How to fix iPad stuck in headphone mode
- Created at:
- Updated at:
iPads have become an integral part of our daily lives, serving as versatile devices for communication, entertainment, and productivity. One essential feature of the iPad is the headphone mode, which allows users to enjoy audio content without disturbing others. However, sometimes users encounter issues where their iPad gets stuck in headphone mode. In this article, we will explore how to enable and disable headphone mode on an iPad, the common reasons why an iPad may be stuck in this mode, and effective troubleshooting methods to fix the problem.
How to turn on headphone mode on iPad
Enabling headphone mode on your iPad is a simple process. Here's a step-by-step guide:
Step 1: Connect the Headphones: Ensure your headphones are compatible with your iPad's audio jack or use wireless Bluetooth headphones.
Step 2: Connect the Headphone Jack: Connect the headphone jack to the iPad's audio port to use wired headphones.
Step 3: Confirm Connection: Once connected, your iPad should automatically detect the headphones and switch to headphone mode. You will see a headphone icon on the status bar, indicating the successful connection.
Why is my iPad stuck in headphone mode?
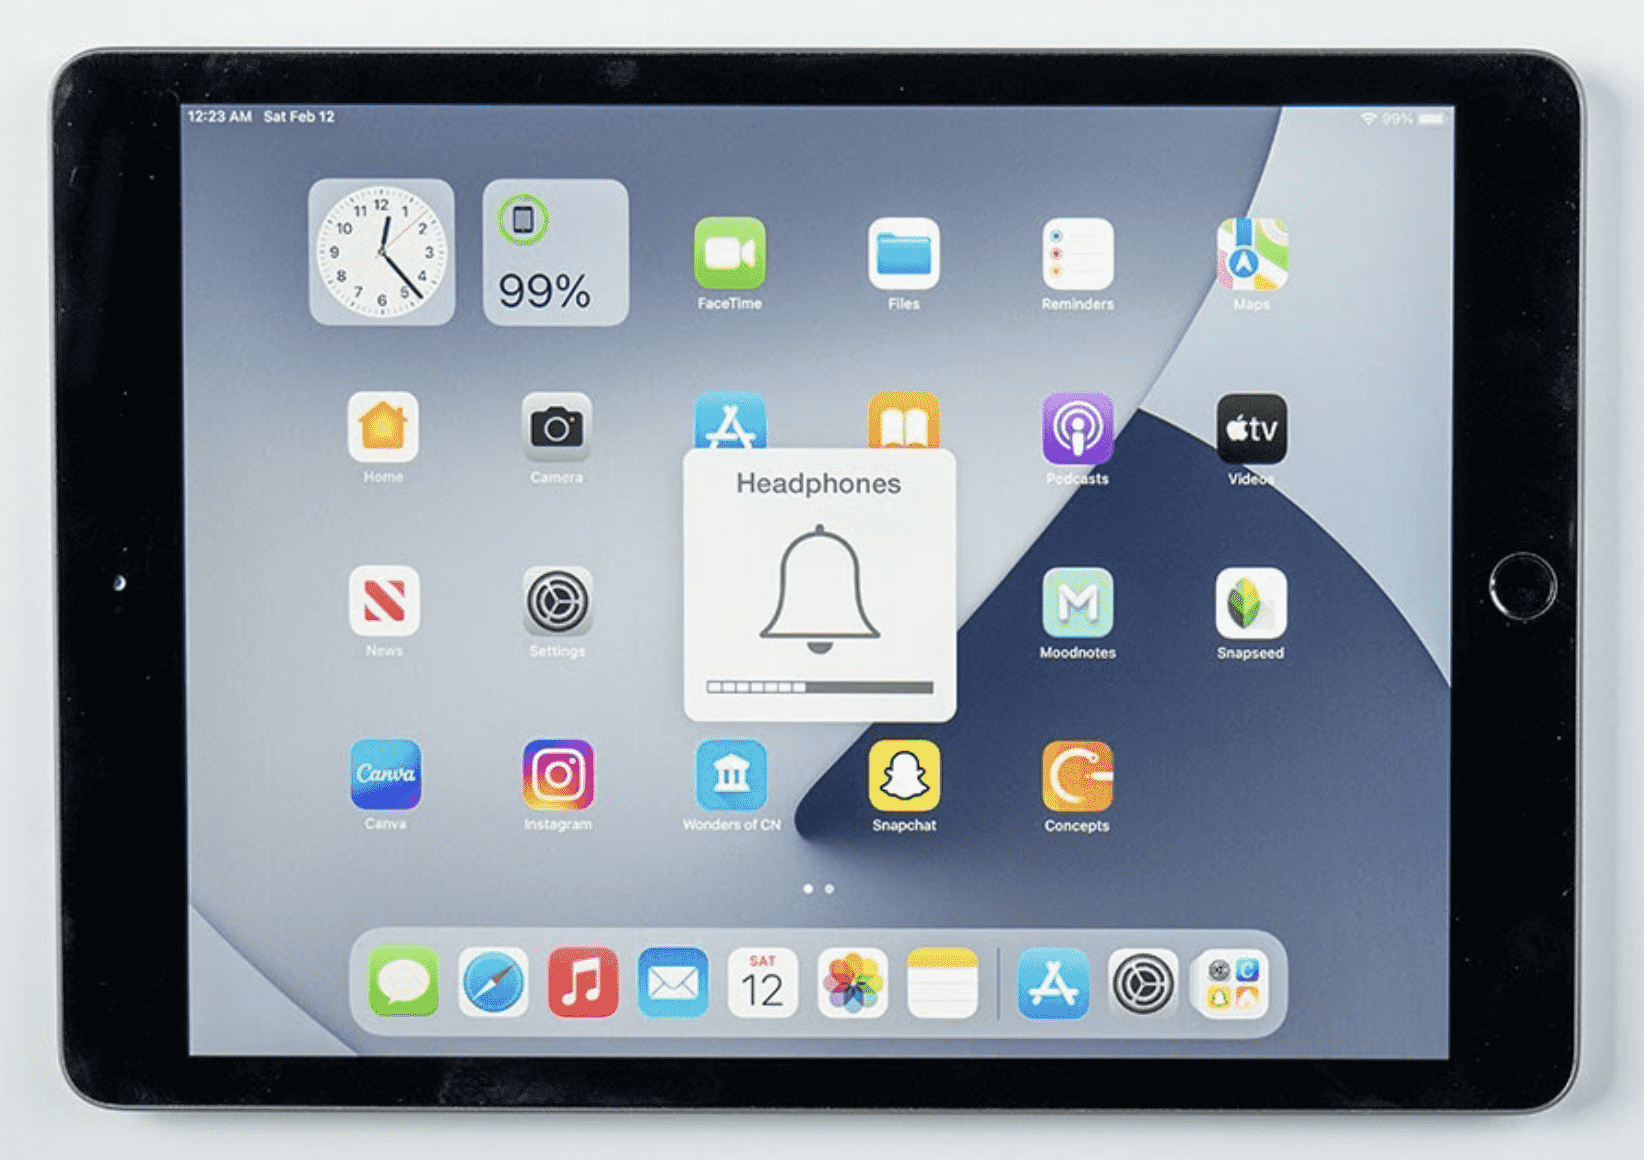
Despite its smooth functioning, iPad users may encounter situations where their device remains stuck in headphone mode. Here are some common reasons that may cause this stuck issue:
- Software Glitches: Minor software glitches can occur, confusing the iPad's audio detection mechanism and causing it to stay stuck in headphone mode.
- Physical Damage: Damage to the headphone jack or the internal components responsible for audio processing can prevent the iPad from recognizing the disconnection of headphones.
- Third-Party Apps: Certain third-party apps may interfere with the iPad's audio settings, leading to headphone mode-related problems.
- Moisture or Liquid Damage: Exposure to moisture or liquid can trigger the moisture sensor within the headphone jack, causing the iPad to believe that headphones are still connected.
How to fix it
If your iPad is persistently stuck in headphone mode, try the following troubleshooting steps to resolve the issue:
- Plug and Unplug
Repeatedly insert and remove the headphone jack into the audio port. This action can help dislodge any debris or dust that might be causing the problem.
- Check for iOS Updates
Make sure the iOS version on your iPad is the most recent. Apple regularly releases updates to fix known issues and bugs, which might include problems related to headphone mode.
- Use AssistiveTouch
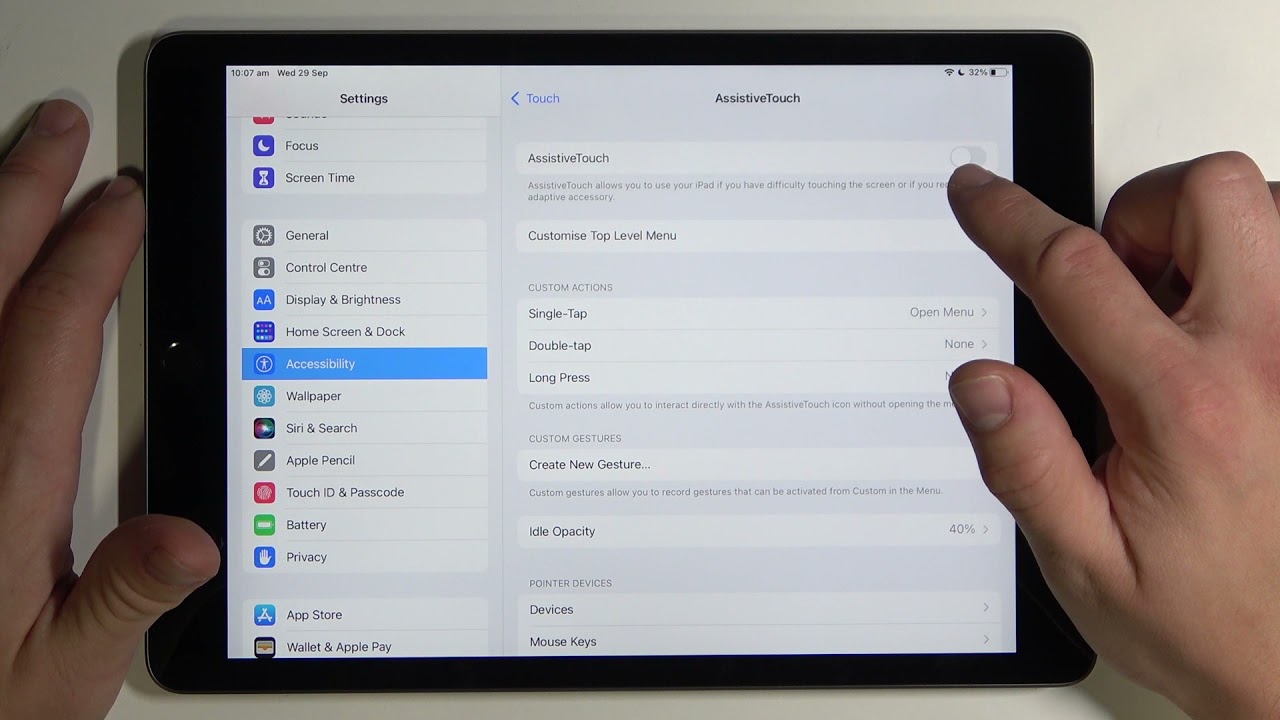
You can enable "AssistiveTouch" by going to "Settings" > "Accessibility" > "Touch" and selecting the option. A virtual on-screen button will appear, allowing you to control audio functions. Try adjusting the audio settings through this method to see if the iPad recognizes the change.
- Reset Audio Settings
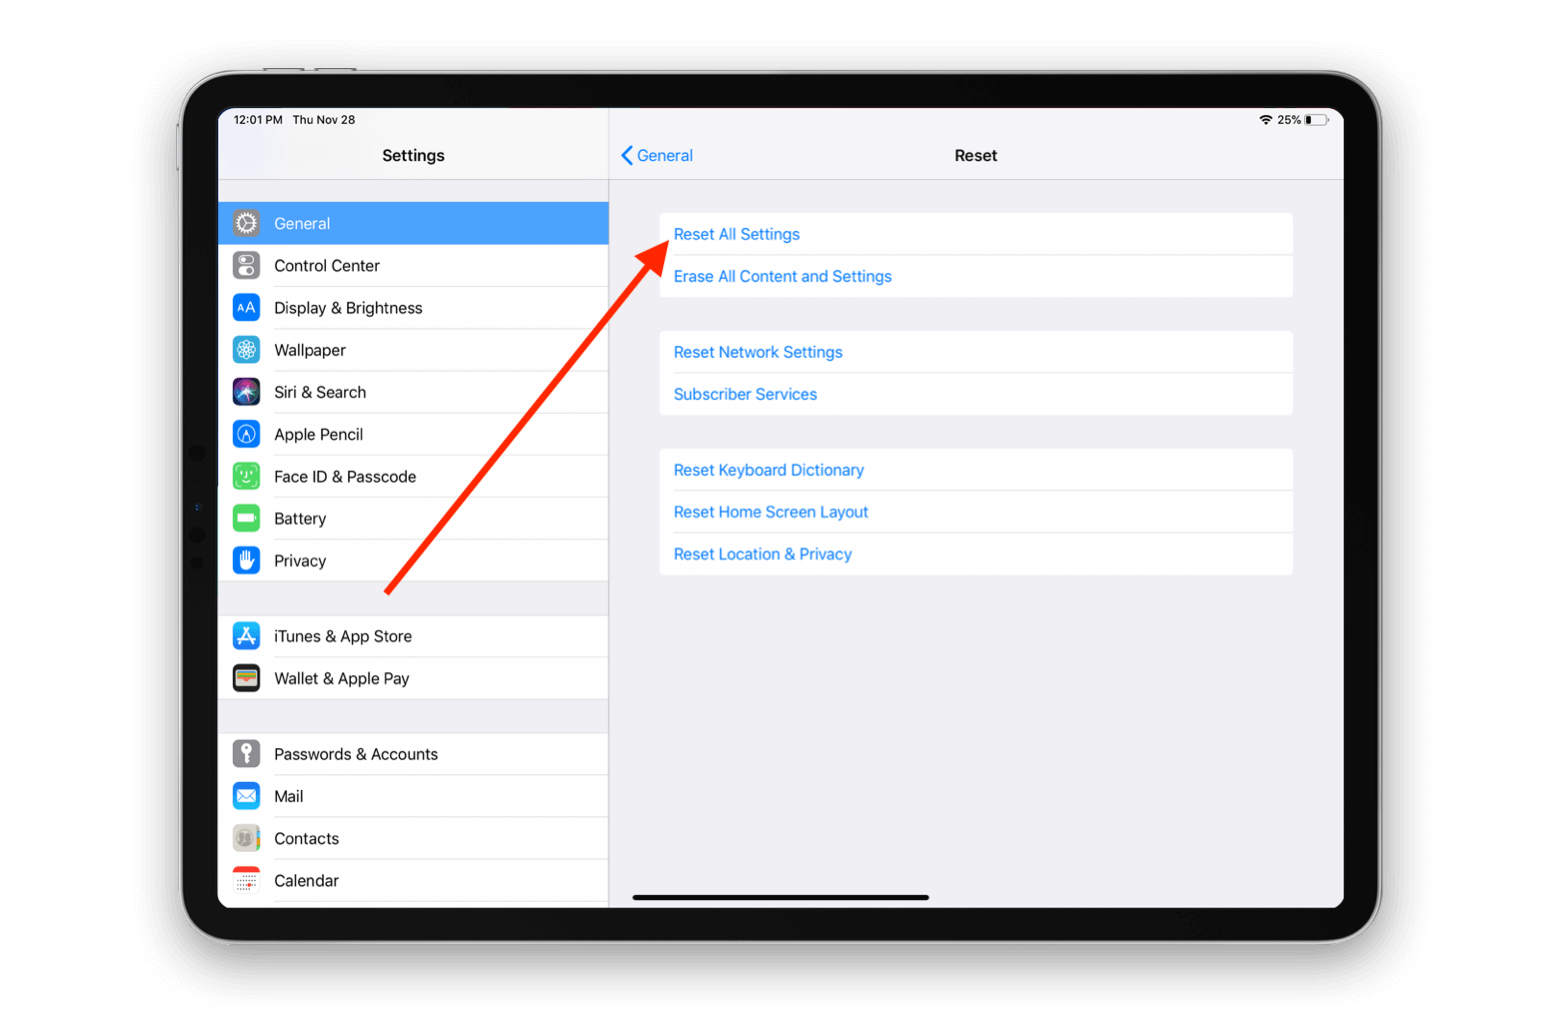
To reset all of your iPad's settings, go to "Settings" and then to "General" > "Reset" > "Reset All Settings". This action will not delete your data but will reset all audio-related settings to their default values, which may resolve the headphone mode problem.
- Check for App Interference
Uninstall recently installed third-party apps one by one to identify if any of them are causing the issue. If the problem started after installing a particular app, that app might be the culprit.
Advanced method
Getting stuck in headphone mode on your iPad can be inconvenient, but if you still can’t repair this issue with the methods above, then AimerLab FixMate is ready to help quickly resolve your issue without losing any data. This powerful software is designed to tackle 150+ Apple system problems, like stuck on headphone mode, stuck on recovery mode, stuck on the white Apple logo, boot loop, and any other common and serious system issues. Besides, FixMate also supports entering and exiting recovery mode with just one click, and this feature is totally free for all users.
By following the steps outlined in this article, you can get your iPad back to normal audio functionality in no time.
Step 1: Set up AimerLab FixMate on your computer from its' official site.

Step 2: Launch FixMate and attach your iPad to your personal computer (PC) via a USB cord. Once your device has been detected, click "Start" on the main interface's home screen.
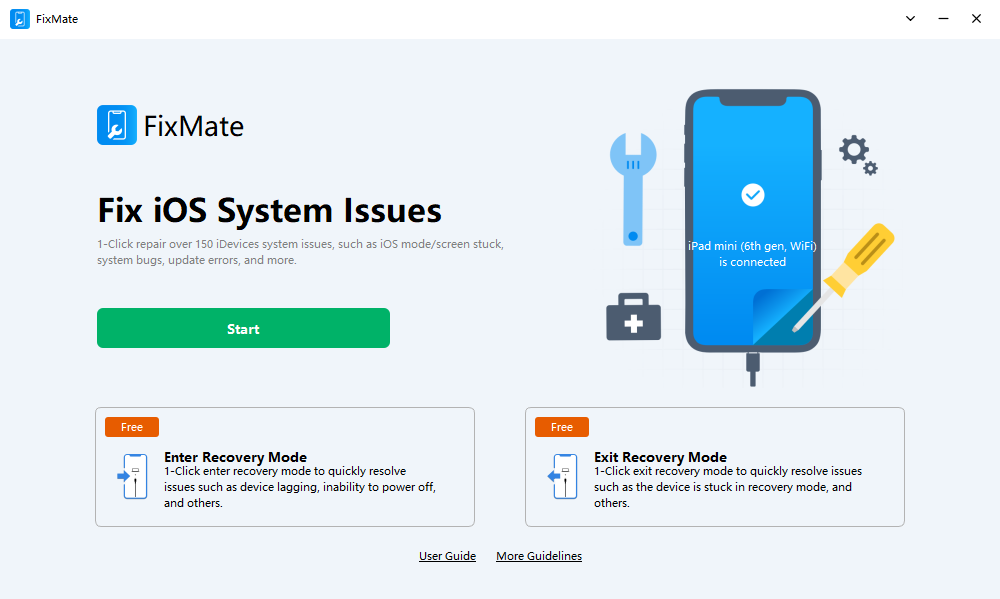
Step 3: To begin the repair, choose "Standard Repair" or "Deep Repair" mode. The standard repair mode repairs minor errors without losing data, but the deep repair option resolves serious issues but deletes data from the device. To fix an iPad that is stuck in headphone mode, it is recommended that you choose the standard repair mode.
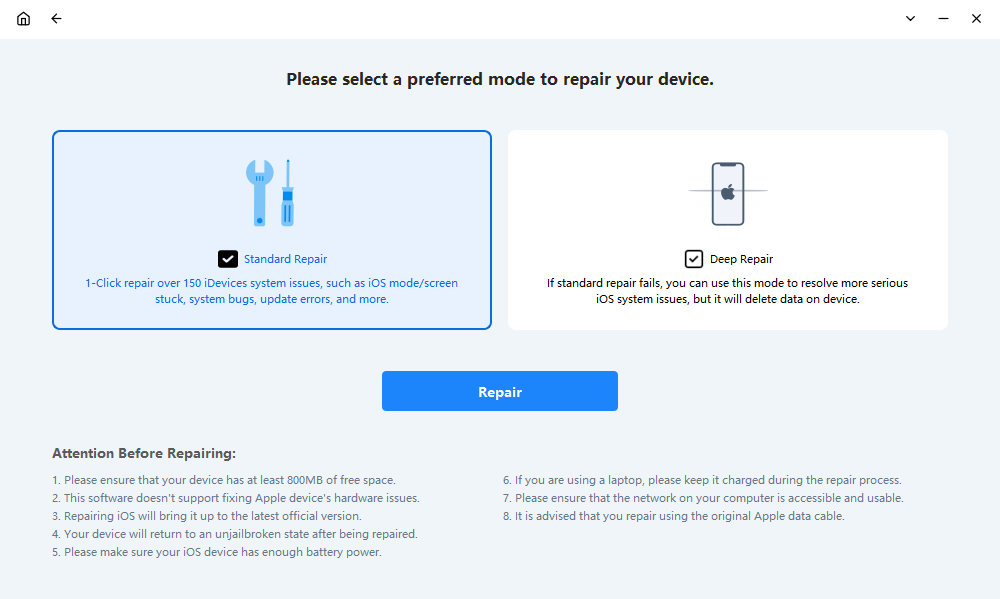
Step 4: Choose the desired firmware version, then click "Repair" to begin downloading it to your computer.
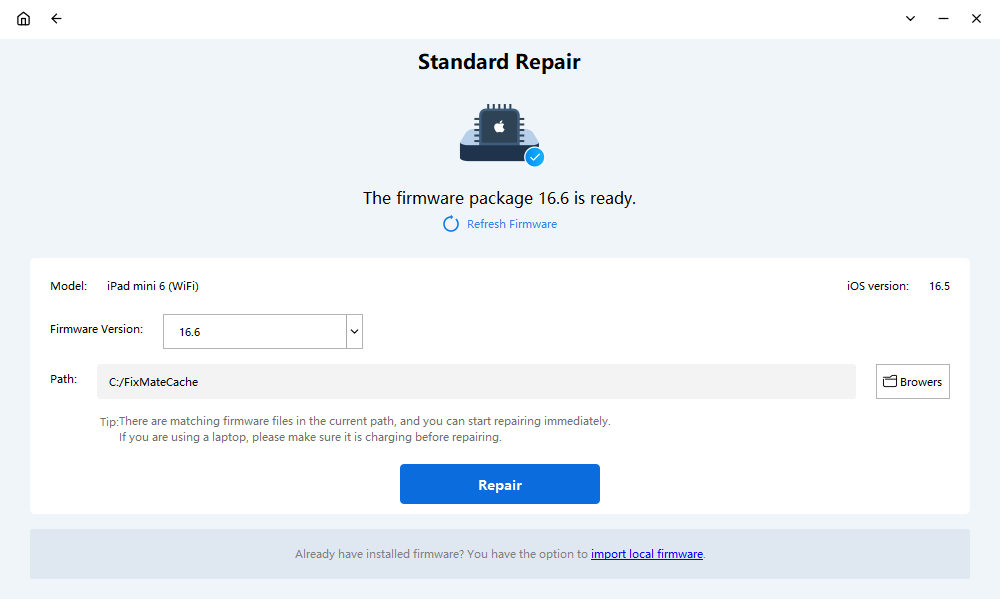
Step 5: FixMate will begin repairing any system issues on your iPad as soon as the firmware download is complete.
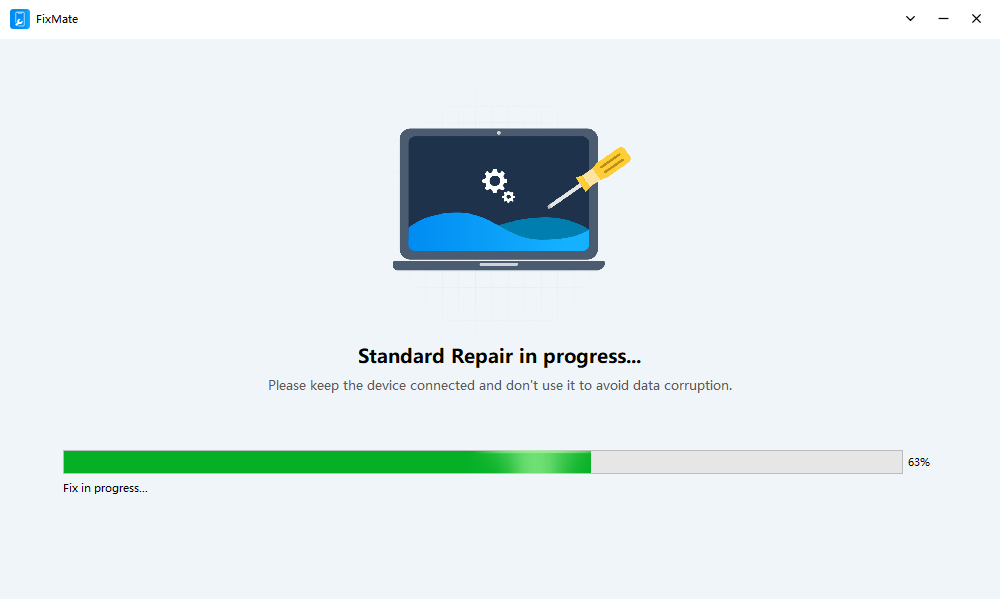
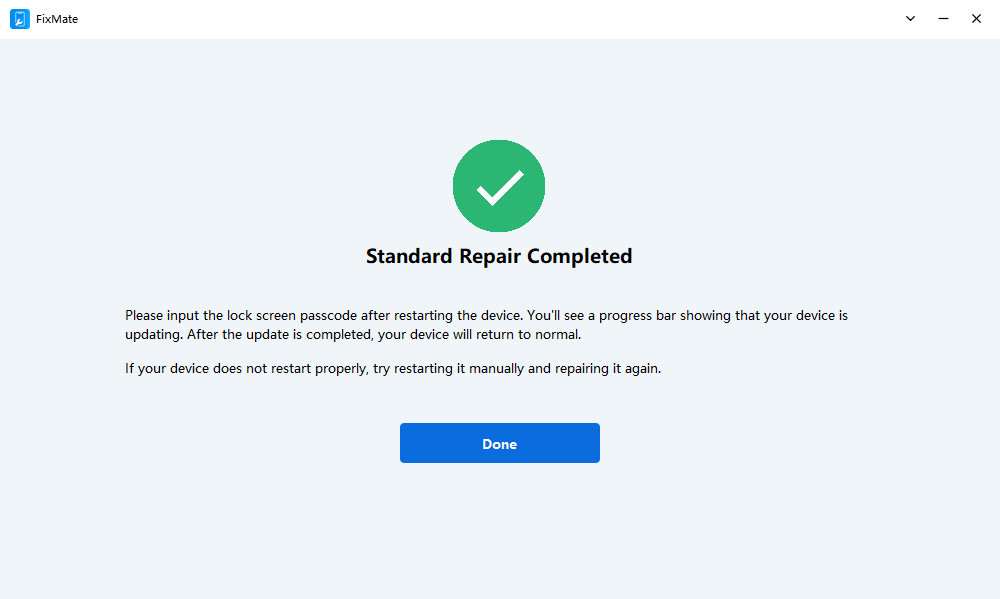
Step 6: When the repair is done, your iPad will automatically restart and go back to the normal state.
CEO
Developer with ten years of software experience.
Popular posts
-
Commonly Used Packages and Plugins in Flutter
- 3
- 0
-
Which e-commerce platform is the most SEO friendly?
- 1
- 2
-
Challenges of adapting blockchain to the Internet of Things
- 0
- 0
-
Most Common Causes for Customer Returns from Online Orders
- 4
- 0
-
How to free up space on iPad in 5 steps
- 3
- 0
-
Collaboration Tools: Best Group Chat App For Small Business
- 6
- 0