
Get money for software reviews
Leave thoughtful review and gain regular revenue. Learn more about reviews
There is a huge selection of video editing software, free and available by subscription, with Hollywood special effects and free libraries of presets. Last trend is “super apps” combining properties from several programs into one. For example, a video editor plus video converter, or photo and video editor, etc. If this is what you are looking for, check out our best video editing software list.
Ezvid is a good example of such programs. It’s a free software with basic video editing features which can record screen or desktop (or both at the same time). It also allows you to quickly create slideshows, add background music and convert English texts to speech.
In Ezvid, the main video editing tools are linked to the timeline panel at the bottom of the interface. The timeline is the special scale where fragments are located which will be rendered in the final video version.
There are 2 tracks available: video and audio. It is also possible to use an additional audio stream here, but more about that later. Two features of the timeline are worth mentioning separately.
First, it can be scaled from 30 seconds to 6 minutes with the appropriate buttons above it. Secondly, the maximum supported file length for editing and recording is 45 minutes.
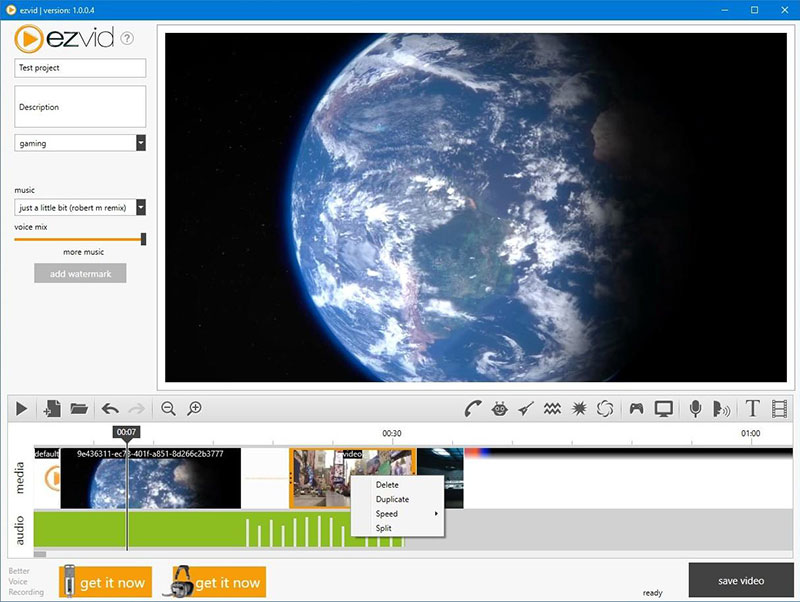
The main advantage is the ability to edit video as fragments. To add new video clips to your project, you just need to drag and drop files onto the video track of the timeline.
Note that the larger the file, the longer Ezvid will decode it. Ezvid visualizes the progress of this and other operations with special animation in the player window.
The following options are available for each video fragment by mouse right clicks:
The strong point of Ezvid is the built-in autosave, to prevent losing work progress due to unexpected program (or system) shutdown. Also, it saves user actions, which allows undoing unwanted changes in the project.
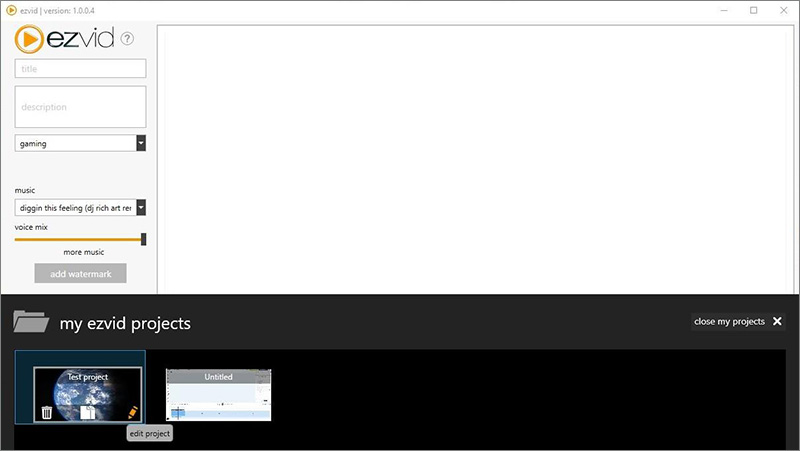
And the last 2 video editing tools in Ezvid are watermark and slideshow. The Add Watermark button is located on the left above the timeline and allows you to make only one picture overlay to video. The selected picture will be placed in the lower right corner of the video, without any possibilities to edit it.
In the same formats as for watermark, you can add pictures as fragments of the video stream. The same timeline options are available for them, in particular, changing playback order and duration.
These options are enough for creating small slideshows and presentations using Ezvid. You can’t change the default settings for video export in Ezvid, so we have collected these characteristics in a table for better understanding of capabilities:
Features | Video | Audio |
Resolution | 1280x720 | - |
Quality level | HD | - |
Bitrate | 5192 | 192 |
FPS | 30 | - |
Channels | - | 2 |
Sample rate | - | 48.000 |
Output format | WMV | - |
Ezvid allows you to add the following formats to projects: video - MOV, WMV, MP4, audio - MP3, pictures - PNG, JPG, JPEG, BMP or GIF.
There are very limited possibilities for audio streams editing. They can’t be modified and only one option is present - delete all audio by right-clicking Clear Recordings.
However, there is a pack of VoiceFx audio effects, which are intended for voice recording primarily, but can be applied to any audio file. There are 6 audio effects available here: Telephone speaker, Robot, Distort, Echo, Power, Phaser. They also are available by as-is scheme and don’t have any modifiers.
Next to VoiceFx is also located the Synthesize speech feature. This function reads selected text with an electronic voice and adds it to the main audio stream on the timeline. This feature works only paired with the Add Text feature.
For added text, there are 20 font options, and 8 colors for background and text at hand. Text insert will be automatically placed on the timeline but can be safely removed if the Synthesize Speech has already been performed.
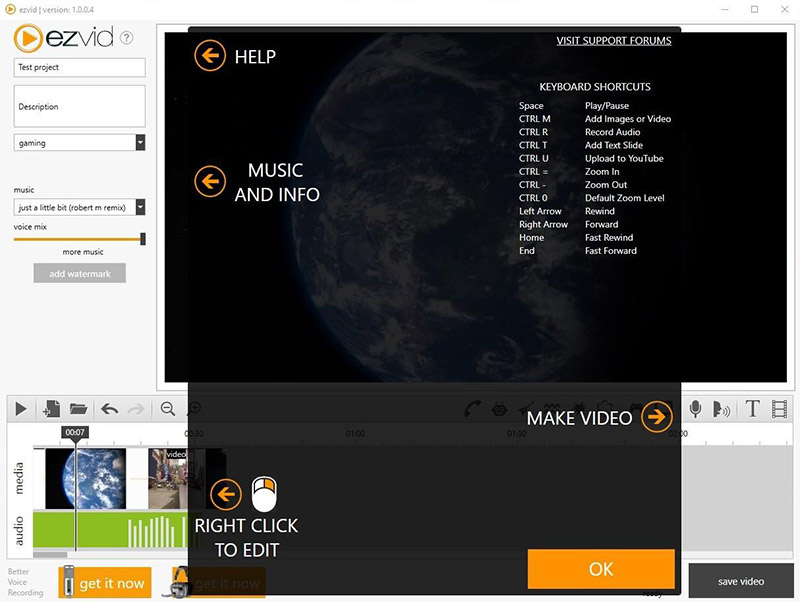
There is also a library of audio samples for 64+ files, which can be freely used in your projects. To add your audio file, select the last item in the drop-down list on the left side of the interface. Please note that Ezvid will treat these files as a separate audio stream for background music, but without any interaction with it on the timeline.
Only one setting for this music is available - adjusting the audio balance between the main audio stream (voice on the timeline) and the secondary audio stream (music).
Ezvid can record both the entire desktop and the application window area. In some games which use full screen mode, capturing may work incorrectly, so we recommend always doing a first recording test.
The common error for these games is a black screen during the entire recording. To fix it, it is necessary to enable Windowed mode in game settings, or to capture full screen as an alternative.
To start screen capturing, click the button with the display icon above the timeline. The advantage of Ezvid in this case is that it automatically calculates the maximum possible recording duration based on the free space available on your hard disk. Clicking on Capture Now starts the recording process with default settings (full screen desktop).
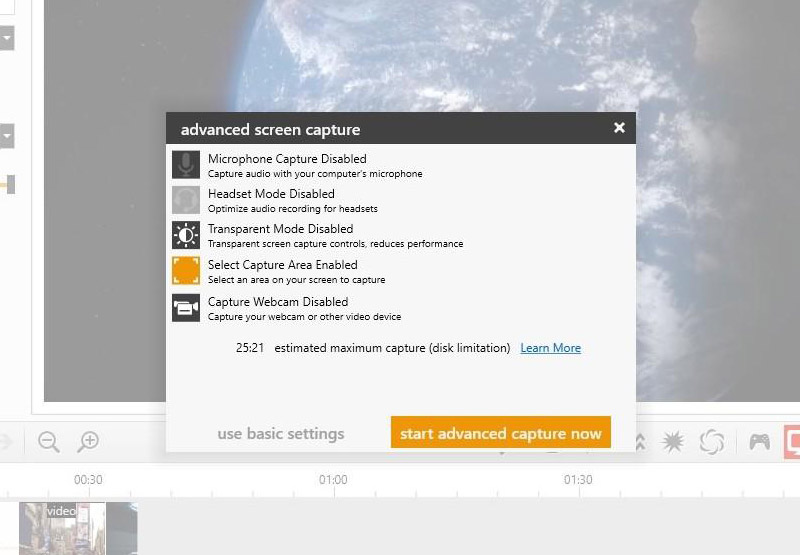
Access to the main features is possible by clicking Use Advanced Settings. There you can select which data sources will be used. In particular, you can turn off the microphone and activate desktop + webcam simultaneous recording mode.
Also in the same window you can control the drawing menu visibility and audio auto-optimization (for headsets). To select a specific part of the screen to capture, click Select Capture Area and use the borders to arrange a specific area.
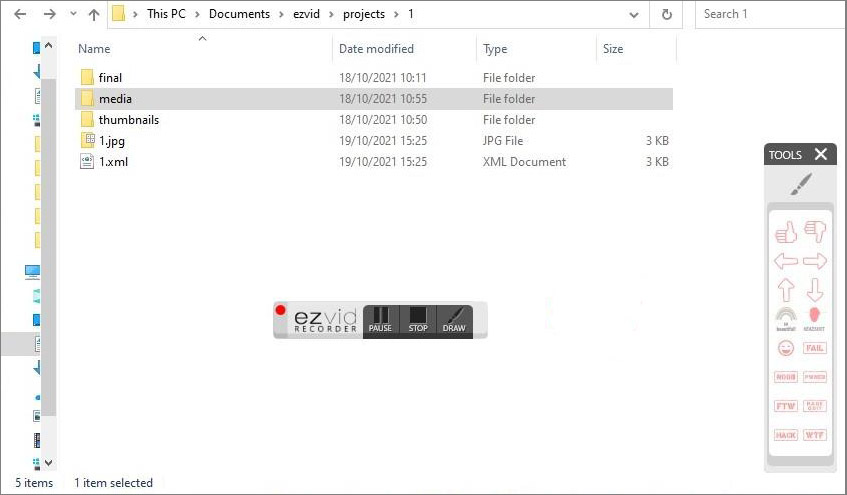
After activating screen capture in any of the modes, a small menu will appear in the corner of the screen, where you can stop or pause capturing. If you hover the mouse over the Ezvid logo, it will show a countdown of the remaining recording time based on the 45-minutes timeline limit. It is also worth clarifying that this timer doesn’t take into account calculations based on the free space on your hard disk, so be careful.
From the Record Control Panel you can go to the Draw menu. In Ezvid, there are: 7 stamps, 4 arrows, like/dislike signs - 16 graphic options in total. There is also a brush which is in red only. Everything drawn on the screen disappears after about 5 seconds, but any click on the Draw panel will reset it.
Ezvid is a free tool for solving simple video editing tasks. It’s not demanding on your PC resources as it contains only a minimal set of tools and features.
For the same reason, it is easy to learn, even for users who previously never worked with video editing software. Also it has a powerful functionality of modules for screen recording, which supports real-time drawing and can capture game screens (when using windowed mode).
The most significant drawback of the program is that the developer has not released updates for it for a long time, and the latest version is dated by 2017. The addition of simple options such as export settings and free timeline editing along with existing work speed could make this software a serious competitor for other free video editors.