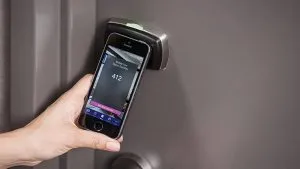
Virtual reality estate tour open doors to endless possibilities. Let’s imagine that you can explore apartments or hotel’s rooms even staying at home. You think it’s boring? Sure, it doesn’t compare with a real view. But virtual reality tours help people with physical disabilities, for instance, feel the world, visit the museums or planet’s distant places everywhere.
Architects can make presentations, teachers can use this VR technology to take students through historical epochs, and much much more. In this article, we are going to talk about VR tours which are fairly useful to businesses to present themselves. It will be very useful for hotels, real estate agencies, museums and so on.
Let us guide you through 5 simple steps to build your own Virtual Reality tour. You will see that it is much easier than you might have ever imagined.
How to create virtual reality estate tour?
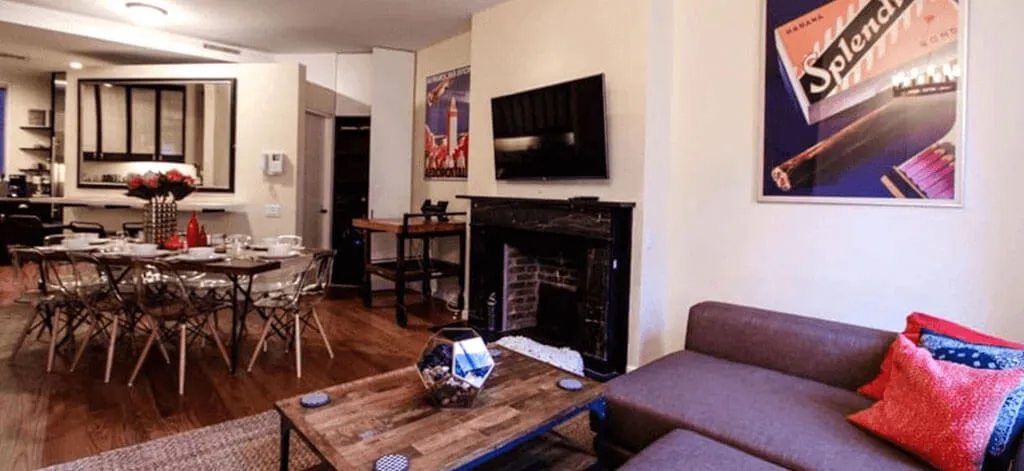
To create the VR tour we’ve chosen an Apartment as the site for illustration.
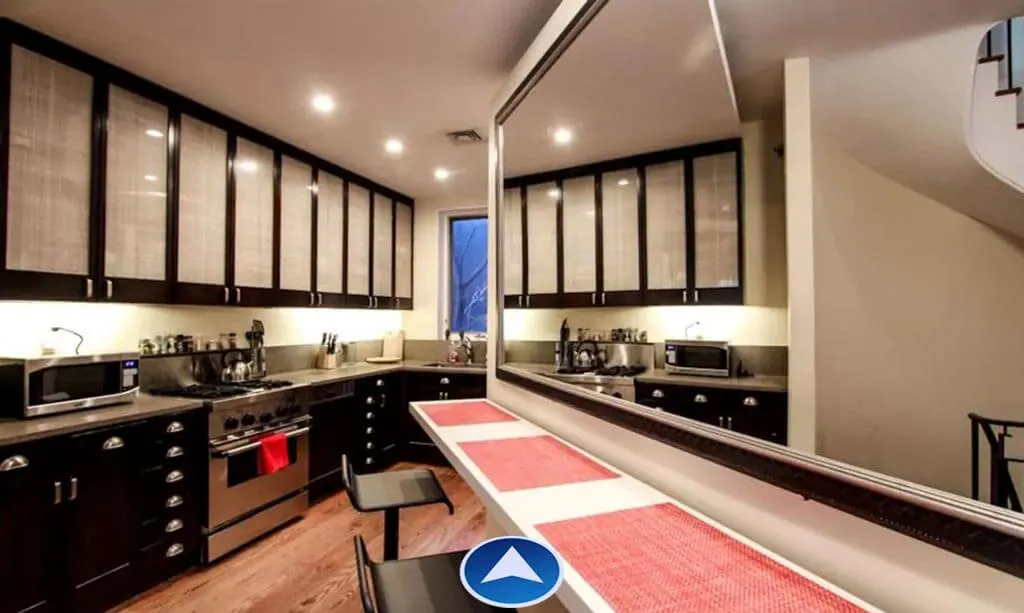
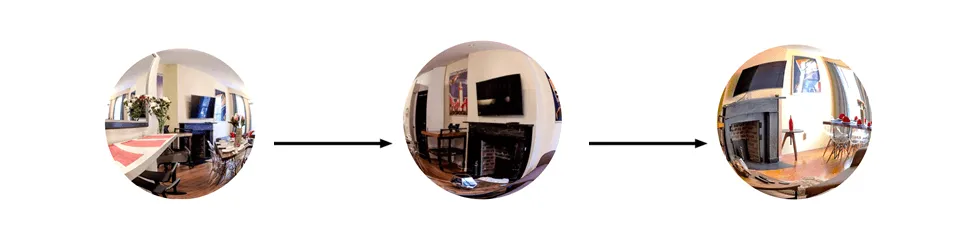
Step 1: Source files – 7 photos
Whether it’s a hotel or large condo you should go with 360-degree pictures. Customers need to see all the details of an apartment and feel themselves inside of it. After all pictures of rooms and environment have been provided, we can move forward.
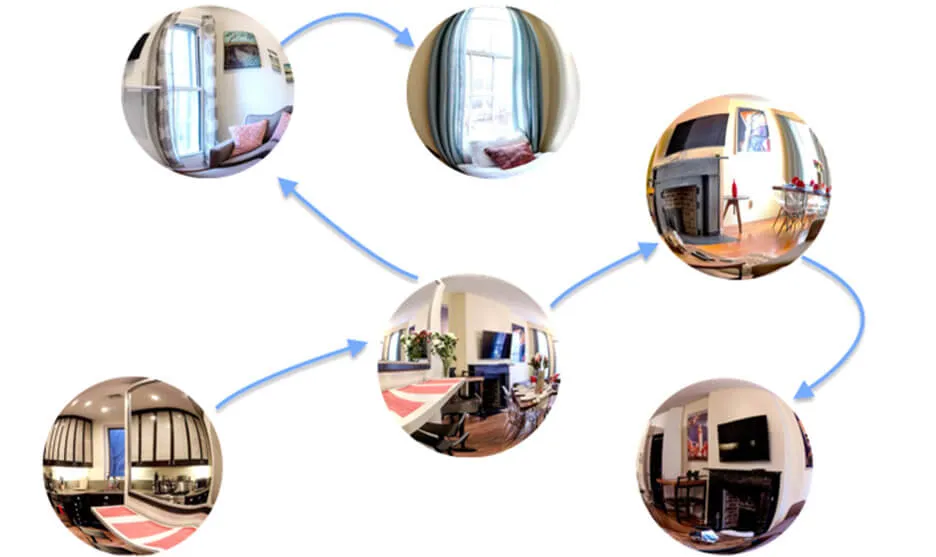
Step 2: VR project planningg
To not lose the effect of presence it is important to understand the connections between environments. When ready it’s time to start the development. After these steps, there’s no need to bother a client anymore.
Mindmap example
Step 3: Virtual reality development
VR developers take each 360-degree photo to wrap it in the sphere. Now, a user is immersed from all sides with texture, that is what provides a virtual reality effect. It takes few hours to create the sphere using math formulas, but after that, you can play with images as you like and with ease.
Sphere connections
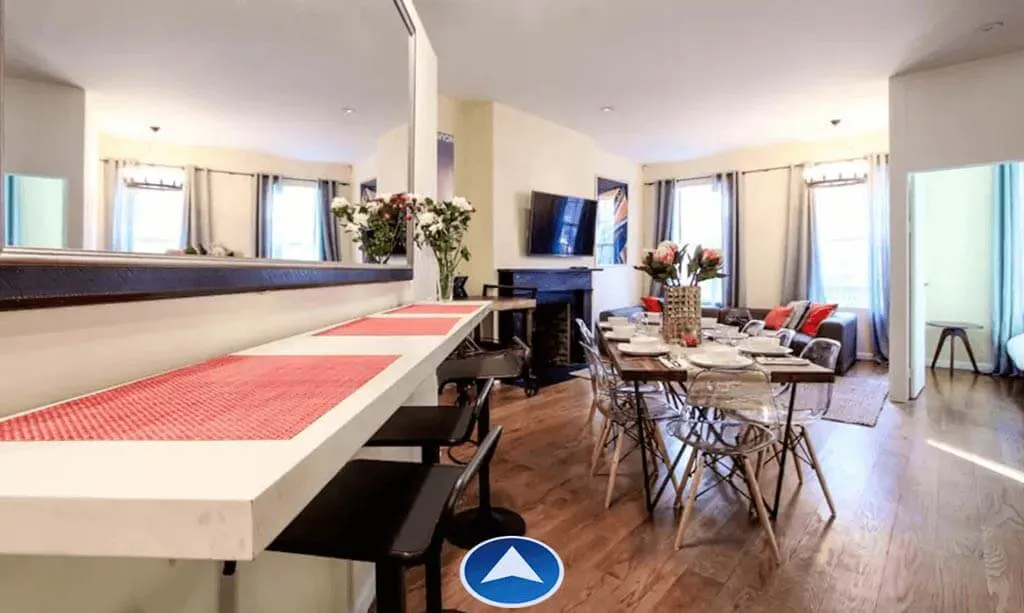
Step 4: Navigation in a VR tour
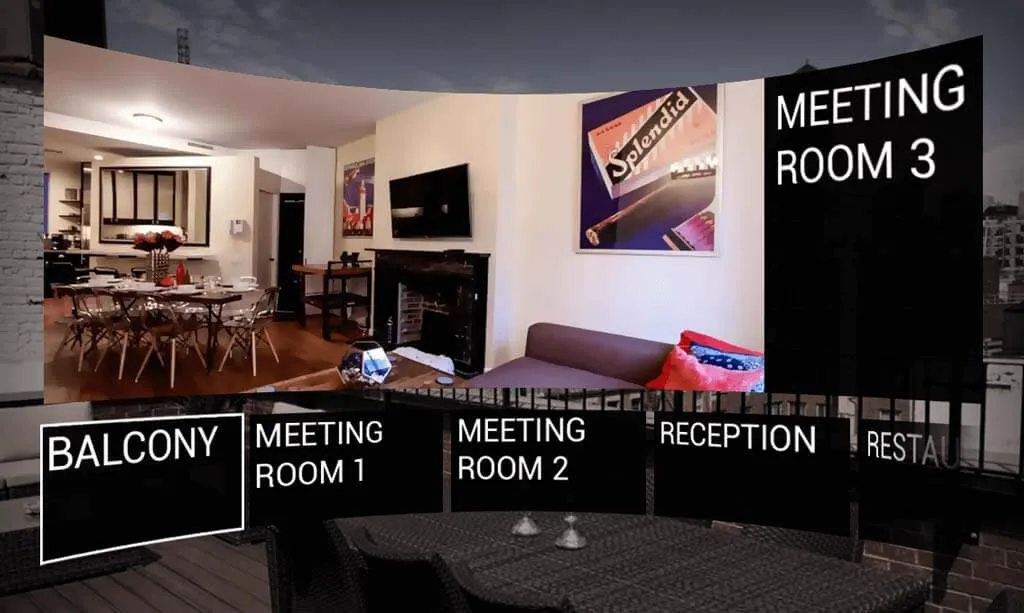
The last stage is making our tour ‘usable’ so that users should be able to feel this VR experience. We have to go back to step 2 to see the connections between locations and to place the markers. In this example, we’ve used arrows placed on the ground to navigate through various rooms, as it is quite intuitive and the ground placement is crucial. While rotating the head, the ground below is only a stable place where you can move around.
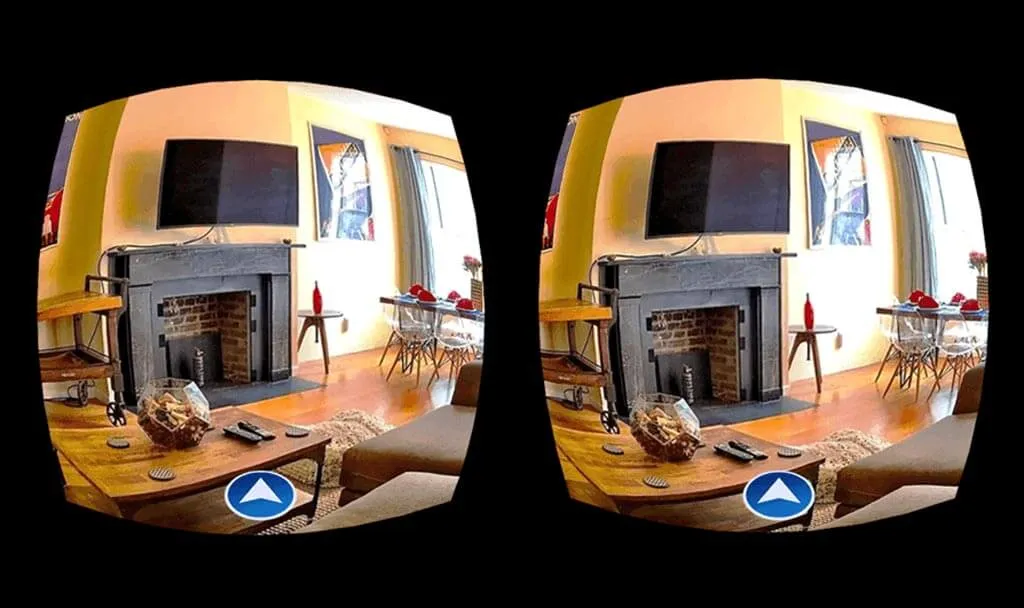
The code with information is embedded into the button to directly identify which image should appear next without going to menu. The tour can be created either flat or spherical full-view, so the users can have VR experience regardless of having the headset or not.
Step 5: Menu
Different environments would contain their own interactions and for these, you would love to have a menu. Imagine walking through arrows from 1st to 5th floor crossing all rooms. The menu is designed separately like all the buttons in the app, so you can create your own design which will suit your taste and/or business needs.
VR tour Cost and timing
The cost of the VR tour usually depends on: the number of environments, the amount of transitions between them. The platform you are planning to use: Samsung Gear VR, Cardboard or another. When everything is settled and decided upon, we can evaluate the development process more deeply. Let’s say, we are developing a Samsung Gear VR version with 360 panoramic photos and video already delivered.
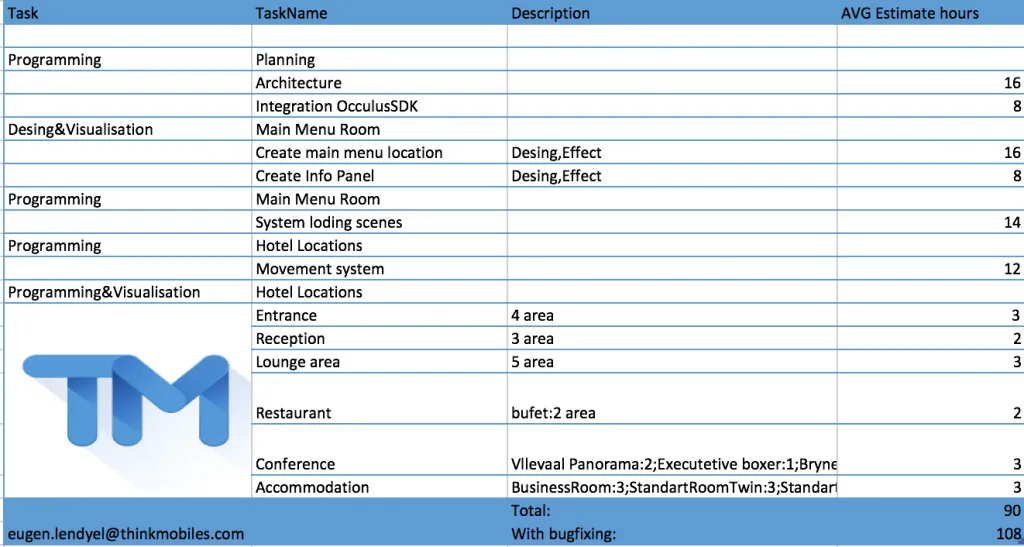
Step 1. First of all, we need to start by building app architecture with Oculus SDK:
- VR App architecture – 16 hours
- Integration of Oculus SDK – 8 hours
Step 2. After, the app skeleton will be processed with UI/UX design elements. Depending on complexity and number of visual effects it may take:
- Main menu location – 16 hours
- Info Panel – 16 hours (depending on complexity)
- standard Unity3D UI – 8 hours
Step 3. Programming the system, loading scenes and providing movement logic through arrow navigation that is located on the ground.
- System loading scenes – 8 hours
- Movement system – 8 hours
Step 4. Development of Unity spheres with 360 photos and their connections depends on the number of rooms and navigation. For example, one room with 4-5 movement options will take approximately 3 hours. You should also consider moving in the environment like walking from one place to another, but in the app it navigates you from photo to photo. You can check also the real estimate, to visualize the development process in depth.
Popular tools for creating VR tours
You do not always need custom development to create a VR tour. Several platforms make it accessible to non-developers:
| Tool | Best for | Pricing |
|---|---|---|
| Matterport | High-fidelity 3D digital twins with LiDAR scanning | Free tier available; Pro from $69/mo |
| Kuula | Simple 360° photo tours, easy embedding | Free tier; Pro from $12/mo |
| 3DVista | Advanced interactive tours with floor plans, hotspots, video | One-time $498 |
| Cupix | Construction progress tracking and site documentation | Custom pricing |
| Custom Unity/Unreal | Fully bespoke VR experiences with interactivity | Development cost varies |
For real estate agents who need quick, professional tours, Matterport and Kuula cover most needs. Custom Unity-based tours (like the one described above) are ideal when you need branded interactivity, gamification, or multi-platform VR headset support.
Business benefits of VR tours in real estate
VR tours are not just a novelty — they deliver measurable business results:
- 49% more qualified leads. Properties with virtual tours receive significantly more inquiries from serious buyers who have already “visited” virtually.
- Reduced time on market. Listings with 3D tours sell up to 31% faster, according to Redfin data, because buyers can shortlist properties remotely.
- Global reach. International investors and relocating families can tour properties without travel, expanding the buyer pool beyond the local market.
- Cost savings on physical showings. Agents spend less time on unqualified visits, focusing in-person tours on buyers who are genuinely interested.
- 24/7 availability. Unlike open houses, a VR tour is accessible any time, from any device — phone, tablet, desktop, or VR headset.
Frequently asked questions
What camera equipment do I need?
For basic 360° tours, a consumer camera like the Insta360 X4 or Ricoh Theta Z1 ($300–$1,000) is sufficient. For Matterport-quality 3D scans, you will need a Matterport Pro3 camera or a LiDAR-equipped iPhone/iPad.
Can VR tours work without a headset?
Yes. Most VR tour platforms render tours in a web browser with mouse/touch navigation. A VR headset enhances the experience but is not required for viewers.
How long does it take to create a VR tour?
A simple 360° photo tour of a 5-room property can be shot and published in a single day using tools like Matterport or Kuula. Custom Unity-based tours with full interactivity take 2–6 weeks depending on scope.
Updated cost estimates for 2025
| Tour type | What’s included | Cost range | Timeline |
|---|---|---|---|
| Basic 360° photo tour | 5–10 rooms, hotspots, hosted embed | $500–$2,000 | 1–3 days |
| Matterport 3D scan | Full digital twin, dollhouse view, measurements | $200–$500/property | Same day |
| Custom interactive tour | Unity/Unreal, VR headset support, branding, animations | $10,000–$50,000 | 4–8 weeks |
| Large-scale (hotel/resort) | 50+ rooms, floor plans, booking integration | $20,000–$100,000 | 2–4 months |
ROI of VR tours for real estate
- 49% more qualified inquiries on listings with virtual tours (Realtor.com data)
- 31% faster sales for properties with 3D tours vs photo-only listings (Redfin)
- 95% of buyers are more likely to call about a property with a virtual tour (National Association of Realtors)
- 40% reduction in unnecessary in-person showings, saving agent time