How To Get Started With Node-RED
- Created at:
- Updated at:
The exponential growth of the Internet of Things or IoT in the past few years has nudged developers and solution architects around the globe to focus their energies in the field of visual programming and visual coding.
Simply put, IoT refers to a system comprising internet-connected and interrelated devices that can collect and transfer data via a wireless network, minus human intervention.
The basic need was to come up with a tool that can ease the process of programming and prototyping by helping devices or APIs to communicate with each other smoothly. The convergence causes numerous cause-and-event actions that need supervision.
The flow-based programming helps developers in Node-RED IoT projects — in visualizing and controlling the workflow of data for optimal management of the series of cause-based events. It is because of this reason that Node-RED has become an invaluable tool for IoT developers.
What exactly is Node-RED?
It is an open-source tool that allows developers to program software visually. They can operate relations and functions without typing a single line of code because the majority of the frequently-used codes are created automatically in Node-RED.
Originally developed by IBM for wiring together hardware devices, web development services and APIs, Node-RED is now used as a flow-based development platform that can be used to create JavaScript functions using its web browser-based flow editor.
Today, it is maintained by JS Foundation. The primary contributors of Node-RED come from IBM and Hitachi. Github project README defines it as a visual tool for writing IoT.
Node-RED enables developers to add or remove nodes through a visual drag-drop interface. The plethora of nodes is majorly divided into the following two categories:
- Inject nodes: These nodes transfer the message to the next code connected in front of them with a wire. They do not require any input.
- Function node: These nodes, on the other side, require input and perform functions in the software accordingly.
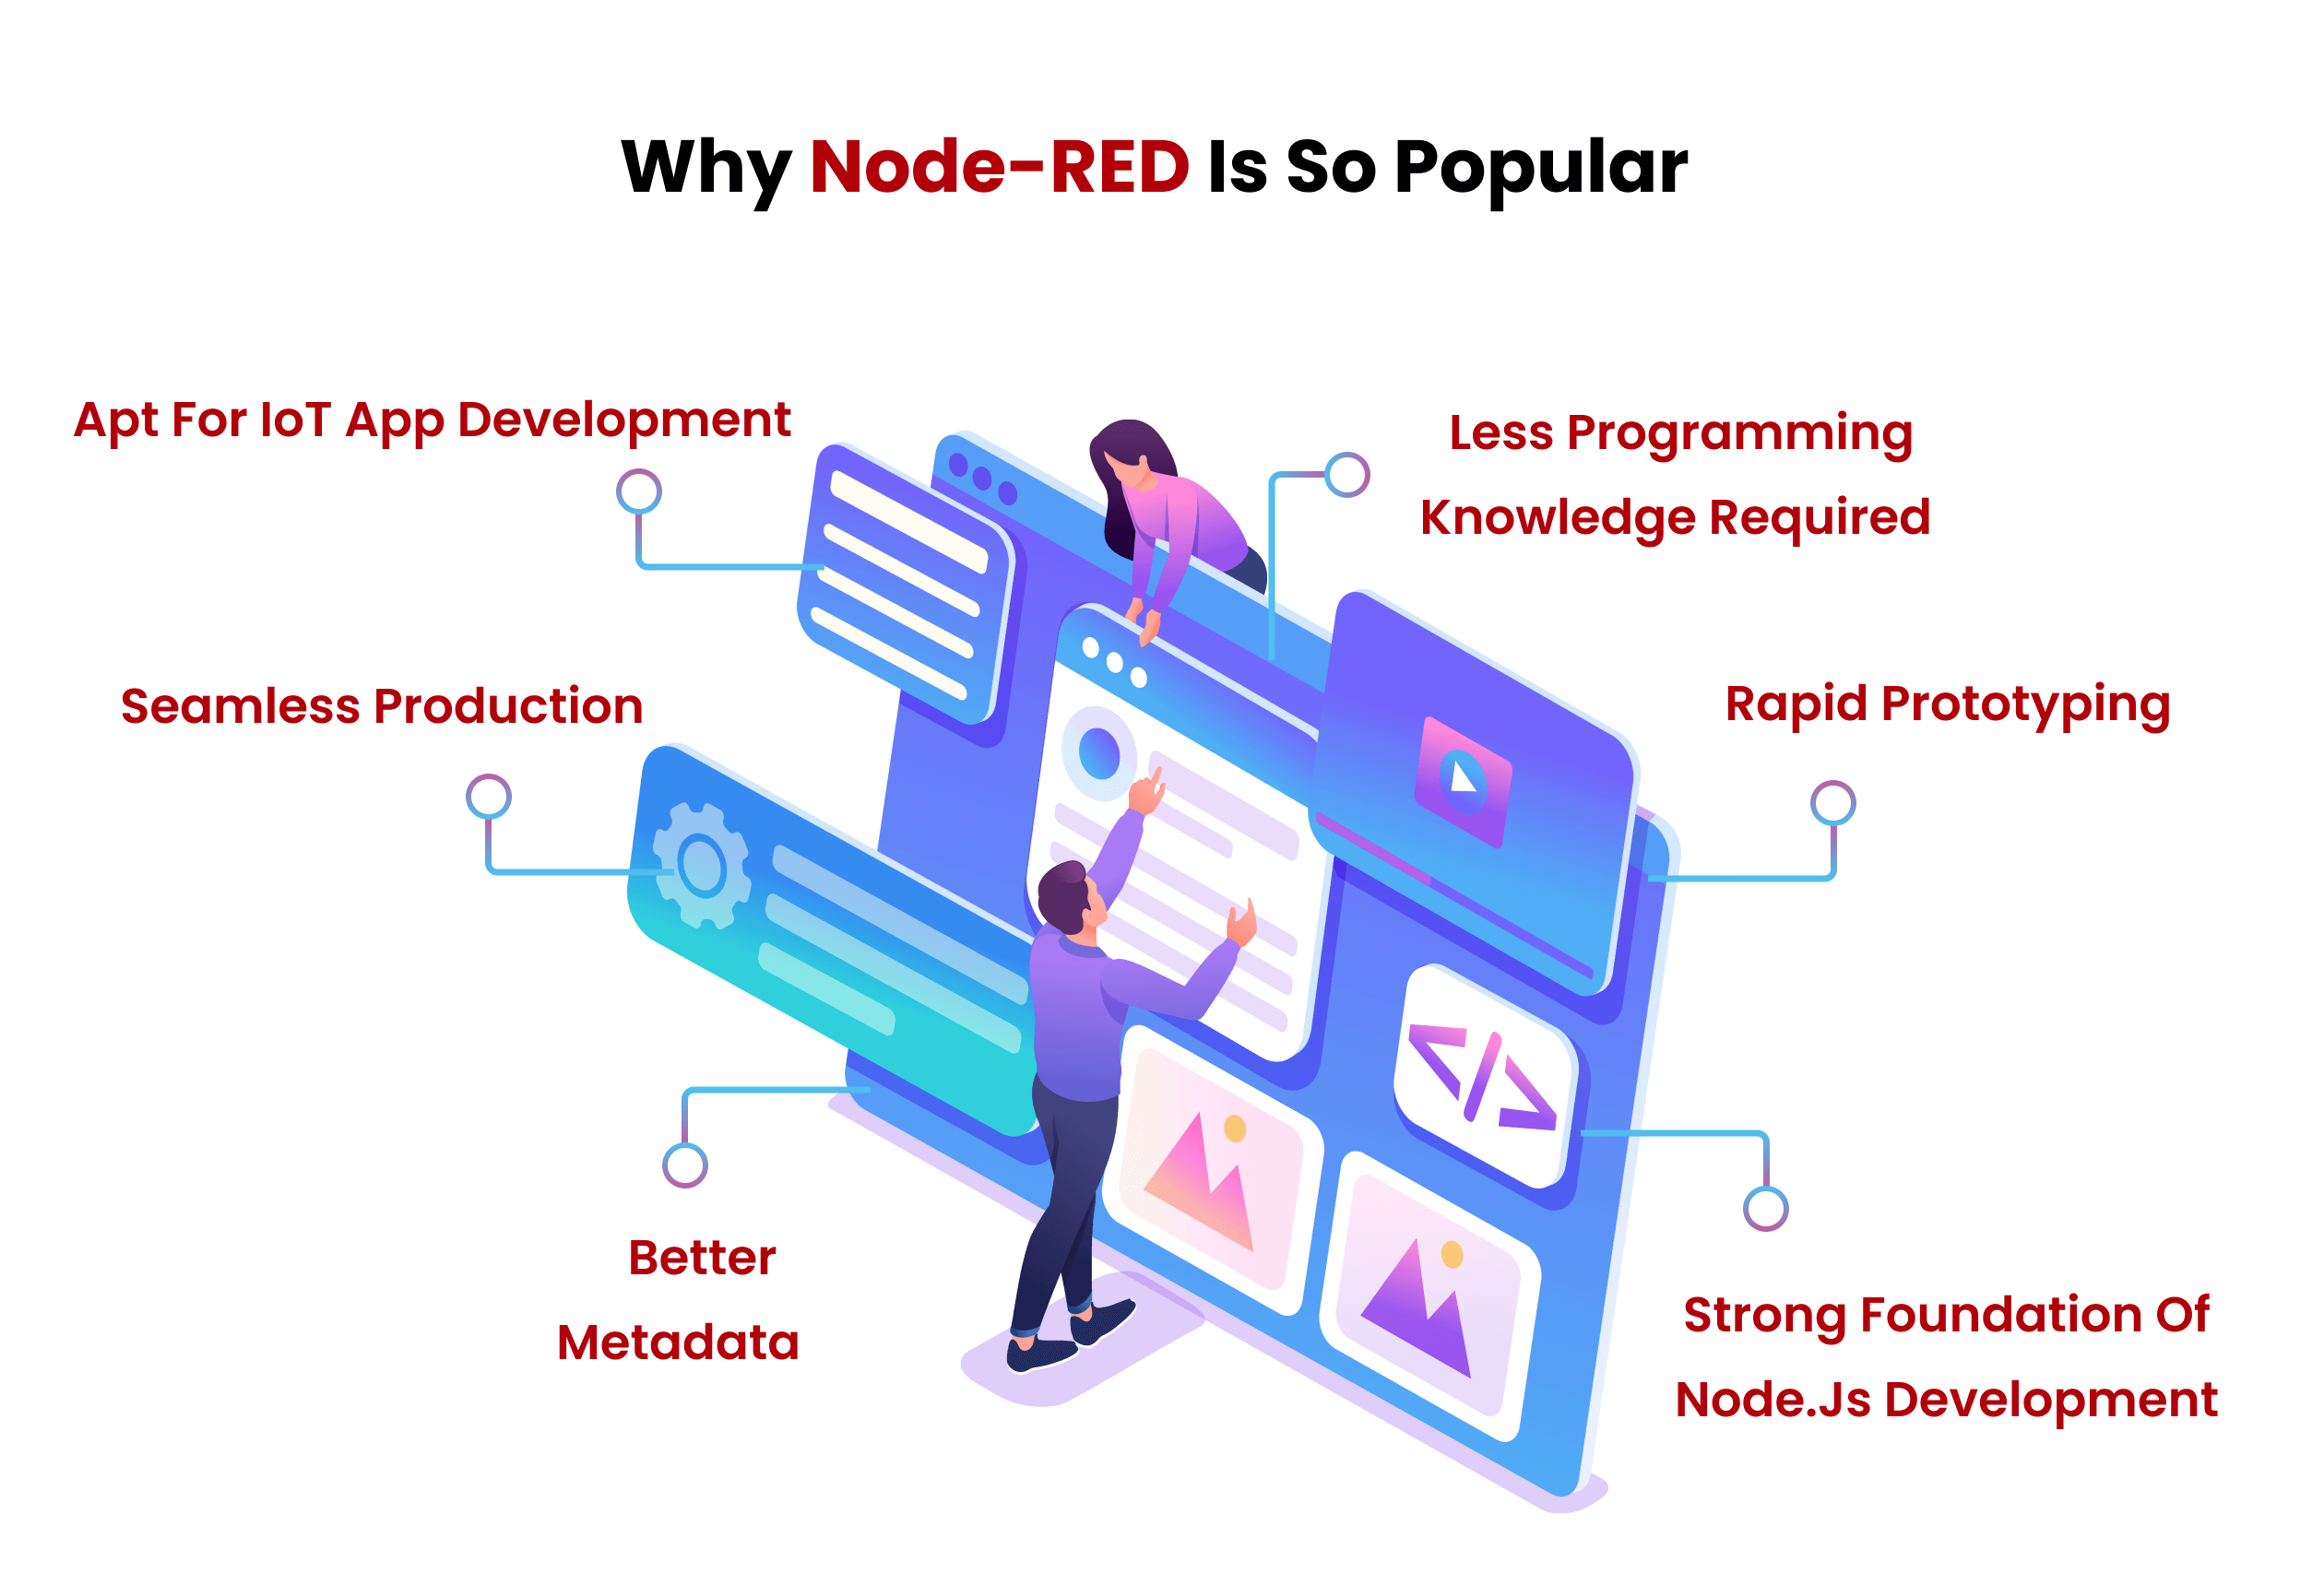
Why Node-RED is so popular
If you read until here, you will agree that this open-source tool is convenient. It is technologically advanced, and enables developers and solution architects to build IoT systems rather easily. But let us go into detail to understand the technical nitty-gritties of Node-RED:

1. Rapid prototyping
By offering quick and simple ways to build flow-based programs, Node-RED helps developers in achieving rapid prototyping that allows them to bring their ideas around mobile applications and IoT devices to life.
Also, because Node-RED is built on Node.js frameworks, it increases the scope of adding more nodes in the virtual programming process. This helps make the prototyping more robust and straightforward.
2. Seamless production
If the prototype in Node-RED impresses the client and the developers need to create the finished product — also in Node-RED — it is possible.
From building a single new function to a group of new functionalities to an entire app from browser to database — Node-RED covers it all, making it an extremely efficient open-source tool to work with.
3. Better metadata
Node-RED applies JSON for describing its metadata. While XML is flexible, expressive and powerful, it can often get twisted into a hard-to-read application metadata. That is not the case with JSON, although there is no guarantee. However, it is easier to read than XML.
4. Less programming knowledge required
Since most of the operations on Node-RED can be performed simply by dragging and dropping the nodes in the workplace, anyone with basic programming knowledge can work on it easily.
The reason behind this convenience is most of the commonly-used codes are automatically created in Node-RED. However, developers might have to type the code at certain places such as “functions node.” But that is not too painstaking.
5. Strong foundation of Node.js services
Since Node.js is the primary base of Node-RED, the latter is light-weight and event-driven which makes it an effective non-blocking tool. These features make Node-RED compatible to work with low-cost hardware solutions such as the Raspberry Pi.
6. Apt for IoT app development
Node-RED offers flow-based programming and solution mapping functionalities that are perfect for building IoT applications. It allows programmers to manage and visualize the workflow of data that is to be maintained and managed in cause-based events.
One of the most common Node-RED examples include enabling data-collecting functions and creating in-house solution development environments for Hitachi’s plant equipment.
Installing Node-RED: The process
At this point, we are sure you are convinced that Node-RED is worth a look — whether you end up using it or not. Its basic installation is straightforward. Simply follow the steps below and get going. We have tried to be as thorough as possible!
For starters, Run the following npm command to install the global module of Node-RED along with all of its dependencies.
sudo npm install -g --unsafe-perm node-red
Prerequisite: Please make sure you have a version of Node.js and npm already installed on your system. Otherwise, you can also opt to run the following command:
sudo npm install -g node-red
However, do not run the aforementioned Sudo code if you are on a Windows system. If you are, just remove “Sudo” from the front and then run the command.
Moreover, Node-RED is compatible to run with devices such as Raspberry Pi. All you have to do is install a script by running the following code:
curl https://raw.githubusercontent.com/creationix/nvm/v0.11.1/install.sh | bash
Else, you can also choose to run the same on any of the cloud servers including Docker, IBM Cloud, AWS, and Microsoft Azure.
Node-RED dashboard
The Node-RED dashboard is a useful module that offers a set of nodes through which developers can create a dashboard in no time. However, it is an optional module and does not come by default — even though it offers the simplest functionality possible!
If you want to install the same, please run the following command in the user directory of Node-RED:
npm i node-red-dashboard
Prerequisite: The Node-RED-Dashboard requires Node-RED to be installed. Is it not obvious?
How to create a User Interface (UI) in Node-RED
Open a separate tab in your browser to access Node-RED. If you are running the code on something like Raspberry Pi, your URL should look like:
http://Your_RPi_IP_address:1880
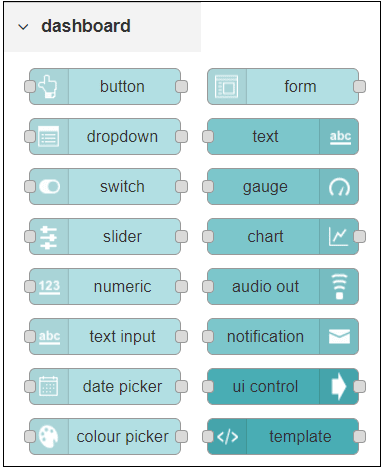
Now, scroll down the nodes section until you have reached a set of nodes called “dashboard.” They provide widgets that show up in your app UI.
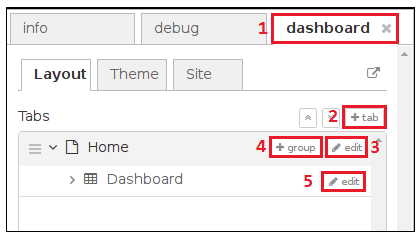
The UI is to be organized in tabs and groups, and every widget comes with an associated group that determines where the widget should appear on the UI.
- To create a new tab, click on the +tab button on the dashboard and edit it. You can name it whatever is convenient for you.

- Once that is done, you can create several groups under it. This is an important step as without it, you would not be able to add your widgets.
Basic operations for Node-RED
1. Add the inject node in the flow editor
Among the list of the nodes present on the left side of your screen, simply drag-and-drop an inject node on the Node-RED flow editor. Right after this, drag the payload node and connect both to give output. It is pretty simple!
2. Insert a debug node
Now drag the debug node to the flow editor from the list mentioned on the left.
3. Join the nodes
If you want to connect two nodes, you will have to connect them with wire using your mouse:
4. Start the deployment process
Click on the “Deploy” button which is available on the top-right side of your screen. This will implement the nodes and virtual program you have set up:
5. Install nodes
Nodes of Node-RED are similar to npm packages. Therefore, you have to use the npm folder in order to download the new nodes. There are two ways to do so:
- Download them locally
cd $HOME/.node-red npm install npm install node-red-contrib-netbeast
- Download them globally
sudo npm install -g npm install node-red-contrib-netbeast
Steps to create an IoT application with Node-RED
1. Starting with a two-node app
- Find the Inject node under the Input section — in the palette on the left.
- Drag the input node into the flow editor, on a blank sheet, that will send the real-time timestamps to the connected node.
- Now drag the debug node in the same way and connect it with the Inject node.
2. Add a ping node
- Select “Manage Palette” from the upper right-hand side, and install the tab.
- Now search for “node-red-node-ping” and click on the Install button.
- Select “Done” to add it to the bottom of your palette.
- Now add it to the flow editor and connect it with debug output.
Please do not forget to edit the configurations of “ping.” For this, double click on it and enter the IP address of the computer you want to monitor, and name the node.
3. Modify ping replies
Add a function node next to the ping node and connect them. Edit the function node by double-clicking on it and add the following code in the function block:
msg.tripTime = msg.payload;
msg.payload = msg.payload !== false ?
"Your server is running":
"Your server is down";
return msg;
To get notifications only when the status changes (for e.g. “your server is running” or “your server is down”), add the “Report by Exception” node.
4. Deploy your IoT application
- On the top-right side of the page, click on the “Deploy” button.
You have successfully built an IoT application using Node-RED that also fetches you real-time system updates.
Wrapping up
I hope the aforementioned steps have given you a clear idea regarding how you can get started with Node-RED. The Node-RED architecture is fast because it is driven by the latest version of Node.js. It ensures a single-threaded event queue that supports simplicity. Node-RED is asynchronous and can be used for building the entire architecture using D3, WS, JQuery and Express.
No additional information provided by user.
Popular posts
-
6 Clever Hacks to Skyrocket Your Mobile Organic Search Traffic
- 1
- 0
-
5 Ways to Improve SEO on Your DIVI Website
- 1
- 0
-
Local SEO Tips To Boost Your Business
- 2
- 0
-
Why You Should Choose Ionic Framework for Mobile App Development
- 1
- 1
-
Most Common Causes for Customer Returns from Online Orders
- 4
- 0
-
Apps and tips to free up space on Mac
- 0
- 0
