Get money for software reviews
Leave thoughtful review and gain regular revenue. Learn more about reviews
In the 21st century, video content has already taken over all other possible sources of information. YouTube has 2.3 billion registered users worldwide. Due to such a great content demand, the need for high-quality video editing software is growing. Main requirements are convenient use and fast work.
We've found a suitable option for any users - Filmora by Wondershare. It includes all basic instruments - effects, transitions, color palette changes, chroma-key, cropping, resolution changing, adding text, and many more. On top of that, this video editor allows recording screens, webcams, and voiceover. Let's take a closer look at the program.
Installer size | 1088 Kb |
Languages | 13 |
Main feature | Video editing |
License type | Free 7-days trial / Paid (different plans) |
Developer | Wondershare Technology (China) |
With a fairly wide functionality, Filmora has relatively low system requirements. This factor allows it to work stably on any average system.
CPU | Intel i5 or higher (2 GHz+) |
RAM | 8 GB (16 GB for HD/4k videos) |
Video card | Intel HD Graphics 5000+ / GeForce GTX 700+ / AMD R5+ 2 GB of vRAM (4 GB for HD/4k videos) |
Resolution | 1280x720 or higher |
Internet | Required for product registration, Filmstock library, etc. |
Disk space | 10 GB |
Platform | Windows 7+ (64 bit) / macOS 10.7 or higher |
Filmora is set to Dark Mode on the first launch, which can be changed to Light Mode or System Default. When using the last option, the program will automatically adjust to the color palette of your operating system. By the way, the first launch is accompanied by a small step-by-step tutorial on how to import media files, add elements to the timeline and apply effects (close to skip it).
The whole program’s interface can be conditionally divided into 3 main parts: Content panel, Preview panel and Timeline.
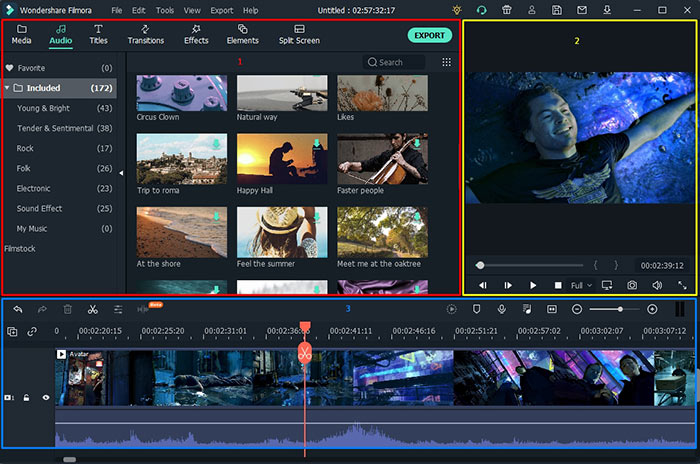
It includes 7 particular tabs: Audio, Titles, Transactions, Effects, Elements, Media, and Split Screen. The first 5 are default libraries with a different number of elements, the last 2 tabs need a closer look.
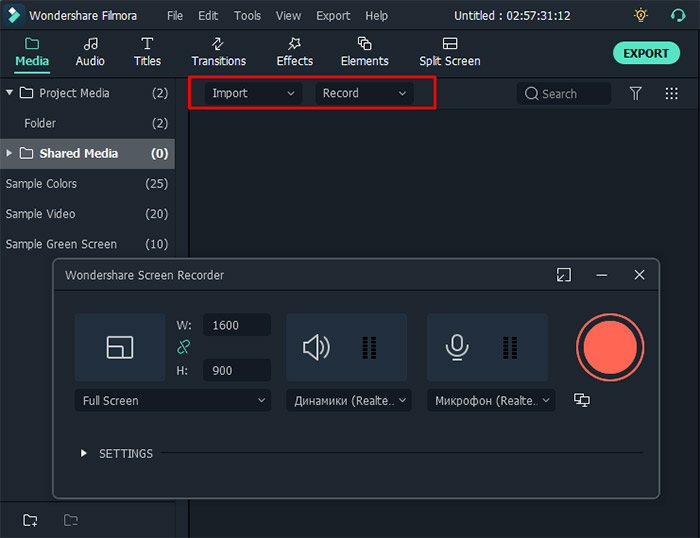
Media - contains all imported content by user, including pictures, audio, and video files. Here you will find additional options for uploading files, folders, items from your phone or camcorder, as well as the ability to add photos from a specific cloud called Flickr. This one also provides functions for recording video from a webcam, desktop, and voiceover.
Split Screen - involves specific presets for playing several videos on one display. The difference between presets is in the number of video elements and options to move them around.
Note: All components (transitions, effects, titles, etc.) are applied by dragging and dropping to a specific element on the timeline.
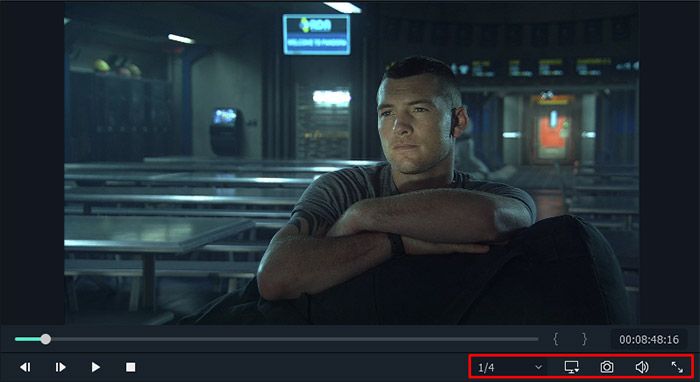
Serves for a preview of edited video files. It allows us to change the quality of preview via 5 modes: Full (highest quality), 1/2, 1/4, 1/8, and 1/16 (the lowest). It also provides the ability to change a project aspect ratio, volume, zoom level (10%, 25%, 50%, 75%, 100%, or automatic). Specific trimming Mark In/Mark Out options are present as well. All instruments are located in the right lower corner.
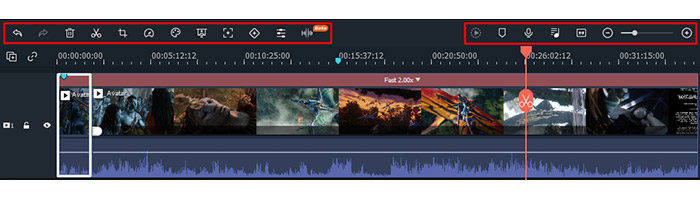
A special panel, mainly designed for adding and editing different components. It contains 3 types of tracks for any kind of content (audio, photo, and video). Keep in mind that you are free to add up to 100 tracks in one project. There are also 11 instruments present here. Each of them has different goals:
Note: In the right-upper corner of Filmora’s timeline, you can also find additional buttons for marking, preview rendering, audio mixing, voice over, etc.
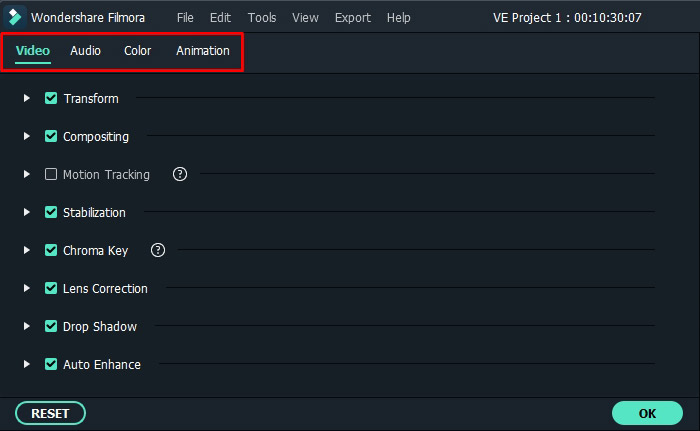
Elements editing. Each uploaded component has individual settings. You can access it via the Edit button, or double-click on a part. This window will contain 4 tabs: Video, Audio, Color, and Animation.
Export options. As a rule, after all editing actions, users export finished files to local disc, special device or upload it directly to such platforms as YouTube or Vimeo for example. Note that Filmora provides 13 video formats including such popular ones as MP4, WMV, AVI and MOV.
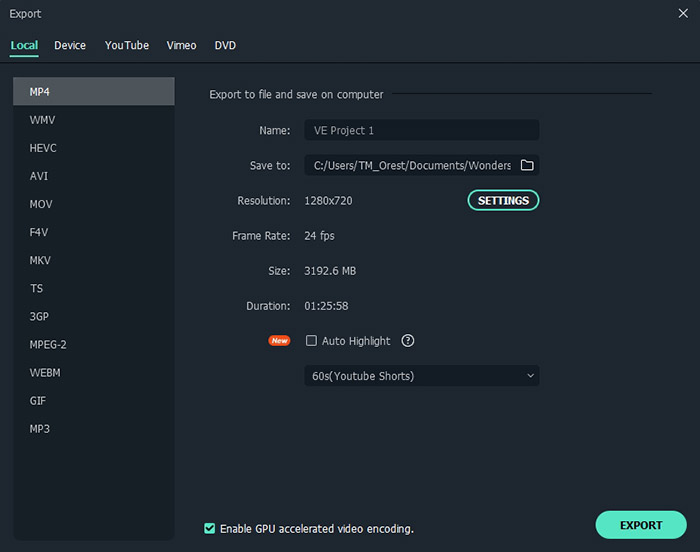
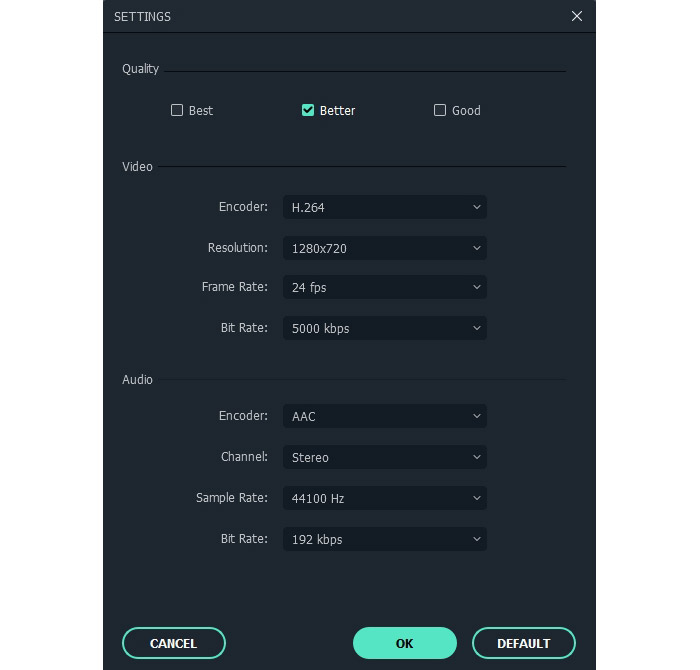
Whatever the chosen format is, you are able to change the final file resolution using presets or set the custom one (change frame rate, bit rate (video quality), sample rate, stereo/mono, encoder, etc.). To simplify export options, developers supply 3 quality presets (good, better, best) that automatically choose optimal video bitrate for any specific format.
Note: When choosing the MP4 format for export, you will be able to turn on the Auto Highlight option, which generates additional video file with highlighted shots.
To test Filmora performance, we’ve used a relatively small video file - 936 MB, with 1280x720 resolution, 24 FPS frame rate and 30 minutes long in MKV format. We’ve exported the edited file in 3 different formats after having applied 7 transactions, 1 title, 2 effects, and 2 elements in each scenario. Final resolution and video quality (bit rate) has been changed as well.
Test machine characteristics: CPU - Intel Core i5-7500 3.40 GHz, RAM - 16 GB 2400 Hz, Graphics - Intel HD Graphics 630, Operating System - Windows 10 (64-bit).
Format | MP4 | MP4 | AVI | AVI | WMV |
Resolution | 3840 x 2160 | 1920 x 1080 | 1920 x 1080 | 1280 x 720 | 1920 x 1080 |
Frame rate | 60 FPS | 30 FPS | 30 FPS | 25 FPS | 30 FPS |
Quality (Mode + bit rate) | “Best” 80000 kbps | “Good” 6000 kbps | “Best” 60000 kbps | “Good” 6000 kbps | “Best” 10000 kbps |
Encoder | H.264 | MPEG-4 | MJPEG | MPEG-4 | WMV3 |
Export time (hh:mm) | 01:47 | 00:25 | 00:21 | 00:20 | 00:23 |
Output file size | 13.4 GB | 1.3 GB | 9.4 GB | 1.3 GB | 2.1 GB |
Wondershare provides a free 7-days trial version with limited functionality and watermarked video export. If you decide to buy this product, check the plans comparison table to fit your needs and optimize financial expenses:
Subscription | Lifetime | Bundle | |
Auto-update | ✓ | ✓ | ✓ |
Unlimited features | ✓ | ✓ | ✓ |
No watermark | ✓ | ✓ | ✓ |
Free tech-support | ✓ | ✓ | ✓ |
Unlimited Filmstock library access | - | Optional | ✓ |
New effects monthly | - | Optional | ✓ |
Money-back guarantee (30 days) | ✓ | ✓ | ✓ |
Price | $51.99 | $79.99 | $99.99 |
License period | 1 year | Lifetime | 1 year |
Filmora is perfectly suitable for those who are just beginning their video editing journey. Effects, titles, audio, and other elements apply in a few clicks. Practical interface and simple instrument use are the reasons to choose this software. Users shouldn't worry about program crashes, accidental closes, and other problematic scenarios as Filmora restores all processes on the next launch, if it happens.
This video editor includes essential instruments for basic editing tasks, provides GPU Accelerator for faster exporting, and even can burn a DVD if needed. Most tools are automated, which makes the editing process quicker. On the other hand, not all of them are working smoothly. Filmora might not be the choice of professional video makers, yet for casual users it is a decent choice.
Year
License