Get money for software reviews
Leave thoughtful review and gain regular revenue. Learn more about reviews
InVideo performs it nicely and quickly if you want to create a video using a template. It's capable of performing delicate and exact editing.
The text may also have a shadow or an outline. The interface has scenarios and is contemporary. The animations in the templates are excellent. For instance, it may use your brand to create a vibrant opener. The stock videos offer a variety of films and sound effects, including chirping birds.
Precise audio editing is a little more challenging than other editing tasks. To make the application quick and simple to use, a shortcut like "S" for splitting audio, video, and text is required. The zoom on the timeline also needs to be improved.

Traditionally, video editing is considered as a complex task that requires pro-tier software and a lot of patience. Modern video editing software requires more and more hard disk space for built-in effects and materials.
At the same time, as a rule, users often use only a few of those. To solve this problem, some vendors have added access to online stores of effects and materials. However, physical copies of selected materials are still needed when required to be used.
InVideo is a completely online video editor. All its features, templates, materials and projects are stored in the cloud and don’t need installation on PC. It is available on any platform, because it’s accessible through a web browser and its performance doesn’t depend on hardware parameters.
This video editor offers many ready-made video templates, thousands of stock media files, while all key features are available in the Free plan. The overall design of InVideo looks holistic and logical. Despite the large number of complex elements (including autoplay), pages are efficient and adaptable during video editing.
The starting point for any project in InVideo is the Workflow. There are three toolbars available to users. The top panel is a kind of main menu, where you can go to the list of your projects, account settings, tutorials and other sections. The middle panel is optional and provides information about unfinished projects.
The most functional is the bottom panel, which covers 70-90% of the web page area. First of all, here you can select one of the 3 available project types, with special presets for content:
It should be noted that on this and other other pages a preview of templates and stock elements are always available.
Tip. To play a template before adding it to a project, first click on it, and then click on the arrow at the bottom of the picture frame.
Here is the introduction to the basics and how to use InVideo online video editor:
Best Online Video Editor 2022- InVideo Official Step-by-step tutorial | InVideo Templates Tutorial
Watch on
The project work area becomes available immediately after selecting a template. If you have selected a pre-configured template, its contents will be automatically placed on the project editing panels.
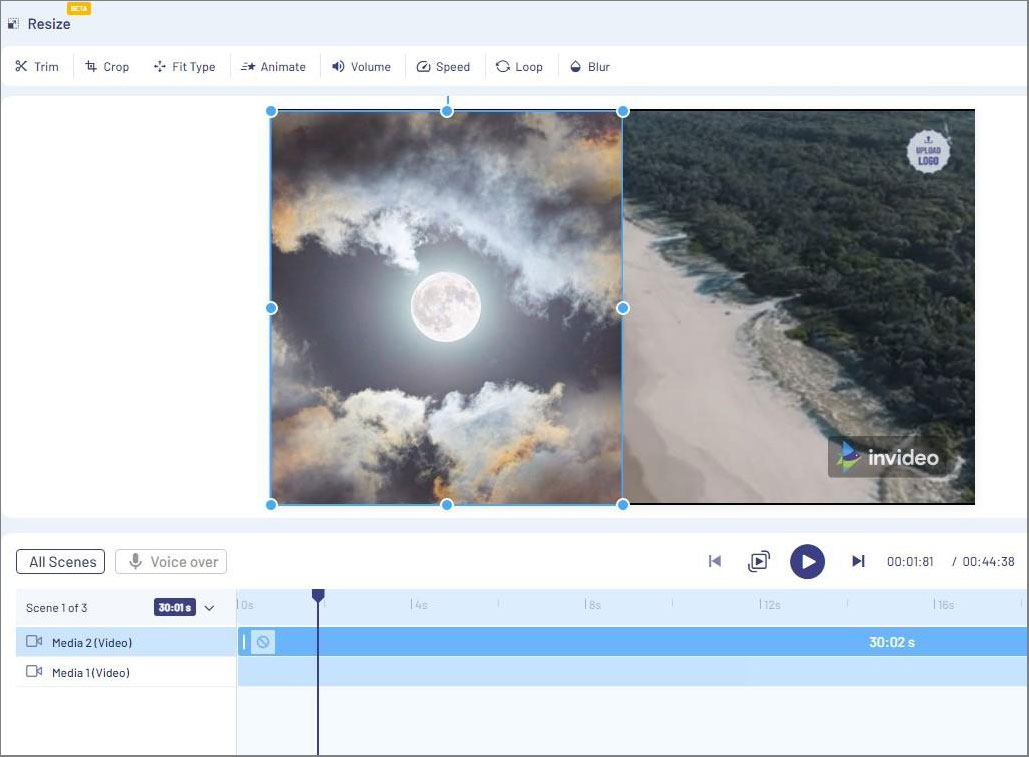
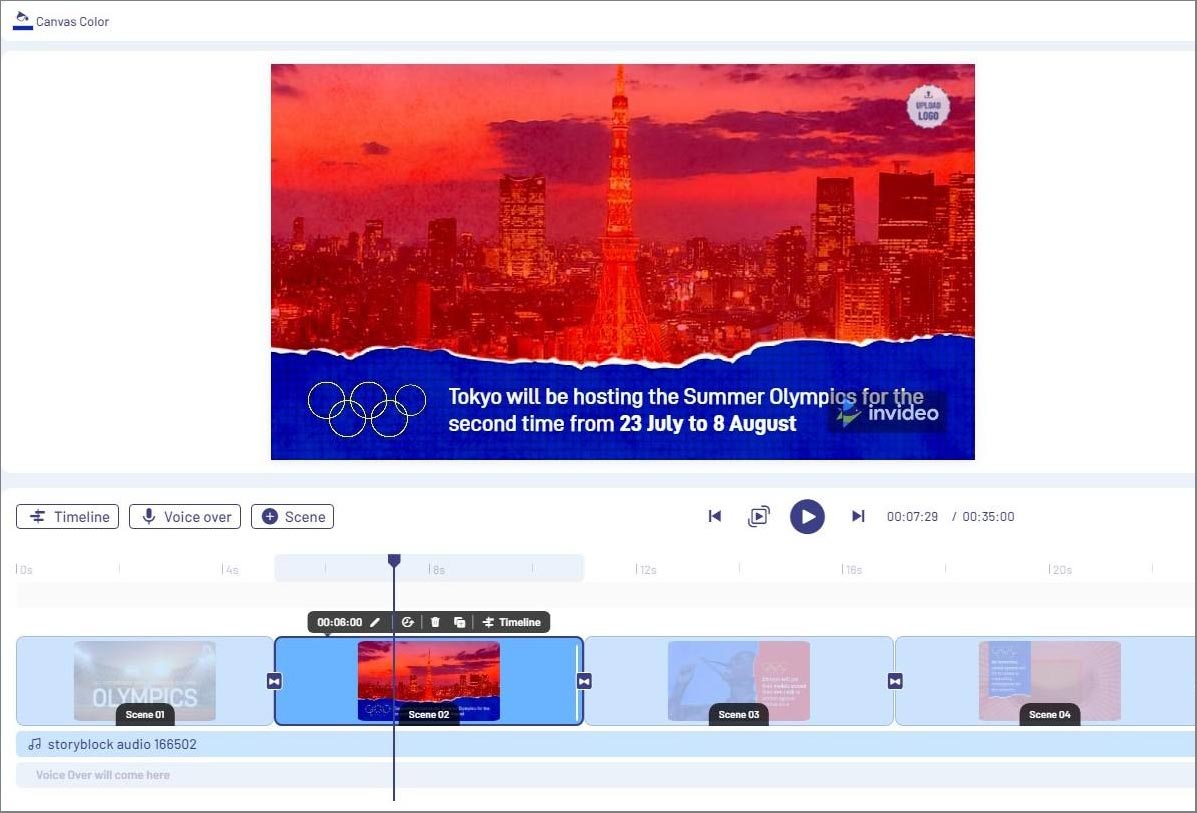
Here the central part of the workspace is occupied by a video player that allows you to check the appearance (all or selected) scenes of your video before you proceed to export (save) it. If video playback is stopped, then by clicking the mouse users can open detailed settings for a selected element.
In InVideo, all visual elements added to a video are called layers. Therefore, the right side of the screen contains a special menu with a list of used elements. The most useful option is the ability to change the name and position of an item in the list. In case of creating scenes with a lot of effects, this layers panel makes it easy to navigate the general list of added effects and quickly enable (or disable) them to test your design ideas.
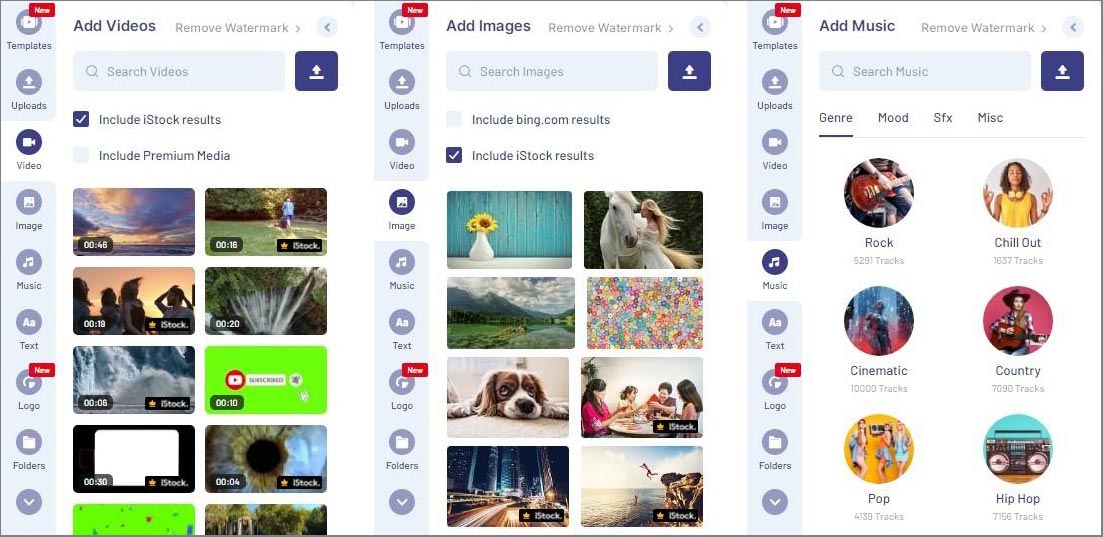
The left part of the video editor in InVideo is reserved for its main menu. Elements and effects that can be added to a project or a specific scene are available here in corresponding groups. Depending on category, a submenu will be displayed with available materials (text, shapes, effects, etc.). For example, in Video and Image users can find stock files, manage uploaded files in the Folders section, etc.
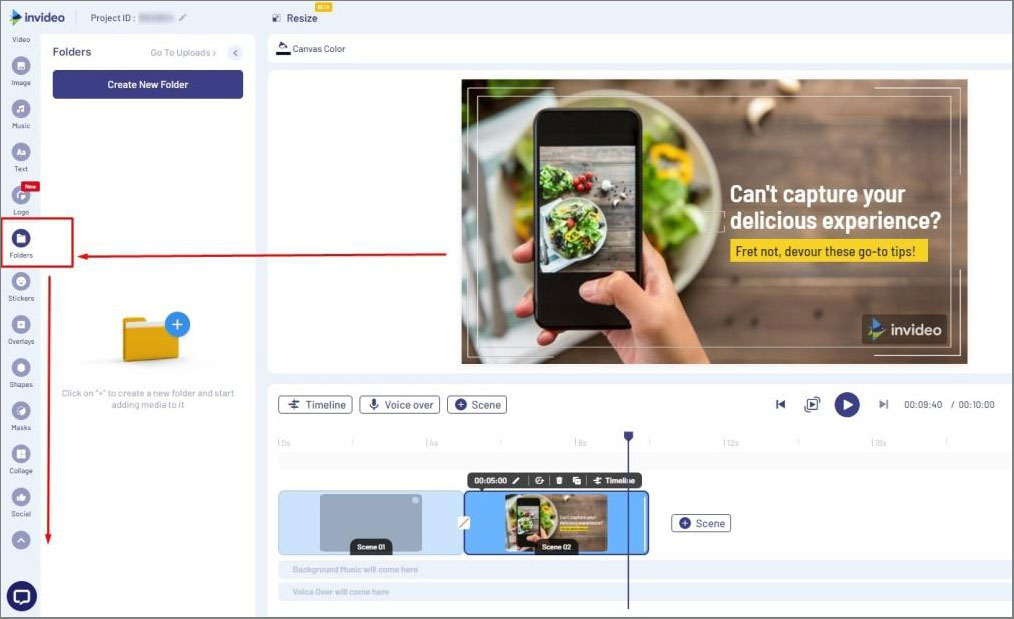
Tip. By default, some of the items in the left panel are hidden, click on the arrow under Folder to display the entire list.
And the last panel there is the Timeline, which is located at the bottom of the screen. In it users can manage duration, sequence the entire project or individual tracks/scenes. Also, this panel allows audio tracks overlay and display time of elements in the debug.
InVideo uses the generally accepted concept of video editing, where the timeline is the basis for building the video sequence. A timeline is the main instrument for managing audio and video tracks. Users can edit video by setting the sequence and duration of scenes.
Fragments placed on the timeline are called Scenes. Timeline comprises 2 audio tracks and 1 video stream. In practice, one audio track can be used for background music, and a second one for voice recording. Video elements added to the stream may be in separate tracks yet inside that same general video stream.
Audio can be added in 3 ways: importing audio file, recording voice, using text-to-speech tool. The latter is more proficient when compared to other video editors. In particular, there are 8 voices for 28 languages, including Arabic, English (with accents), German, Chinese, Spanish, Russian, etc.
Timeline can be used in two modes: project and scene. In the first case, on the time scale, users can edit the duration of scenes in general, while in the second, only for the selected scene.
InVideo has features that are typical for any video editor. But most of them are accessible only if a user has selected a corresponding object. On the other hand, this allows to keep workflow clear and fast.
Key features for editing audio and video by InVideo:
This is a special feature that sets InVideo apart from other video editors. Designers of this service have developed 4,500 different video templates for free use. Selecting a template is the first step, at the same time, the built-in editor templates can be combined and modified in any way.
The templates list is divided into 16 categories, which simplifies their selection. The largest category (Video Ads) contains about 1000 variants, while the smallest (Webinar Promos) brings only 18 templates. Also, templates can be sorted by selecting the aspect ratio of the target device: 16:9, 1:1 or 9:16. And for those who don’t want to look through the hundreds of suggested options there is the built-in keyword search.
Another significant advantage of Invideo over offline editors is the ability to use free media file libraries. The most part (9M+) of these materials is available through built-in integration with popular stock resources such as: iStock, Shutterstock, Pixabay, Pexels and Unsplash. The management of third-party content catalogs is unified with the common InVideo interface style. Categories, tags and keyword searches are also included.
It is important to note that free and unrestricted access is only guaranteed to Pexels, Pixabay and Unsplash libraries. Materials from iStock and some other catalogs are available under special conditions: for the Free plan users – partially and with watermark, for subscribers - on a quota basis (monthly usage limit).
Note that use of a quota for one material is considered within the project, so you can unlimitedly duplicate material on other scenes and it will still be counted only once. If you exhausted your quota for materials ahead of time and immediately need more - contact technical support for help.
InVideo supports many options for scene content customization. The simplest (but most demanded) elements are text inserts. In addition to formats (header, subheader, paragraph), there are also 10 categories of different text styles.
In particular, text inserts with curly backgrounds (dialogue bubble, arrow, etc.), modern author signatures, location boxes and social media credit boxes. At the same time, editing is available for each of the text presets: color, fill, font (including your own), shadow, animation, size and other properties.
To edit the appearance of visual elements, there are several options. Most of them are available as separate categories on the left panel of the project workflow. After placing any of them on the canvas, users can change their size, rotation, opacity and animation effect.
The first group of visual inserts in InVideo are shapes. These are monochromatic graphic primitives for which the fill color editing is also available. More interesting are Stickers. Unlike shapes, they are structured into 47 categories, including emoji, CTA, 3D object, flags, and commercial offers. Another important difference is that all stickers are colored.
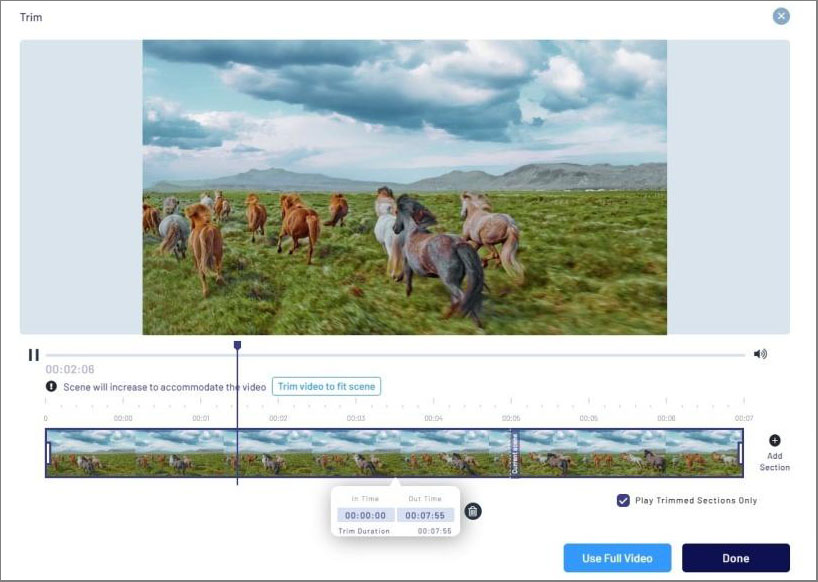
Tip. The duration of text and visual inserts added to the video can be adjusted on the timeline.
Video effects in InVideo are also sorted into several categories, depending on their character. They are all must-have components of any video editor, so we will give a short description of each of them:
InVideo also has the Social tool which can automatically import the contents from a Twitter post. This tool automatically copies the following information from a tweet: text, author, profile link, avatar.
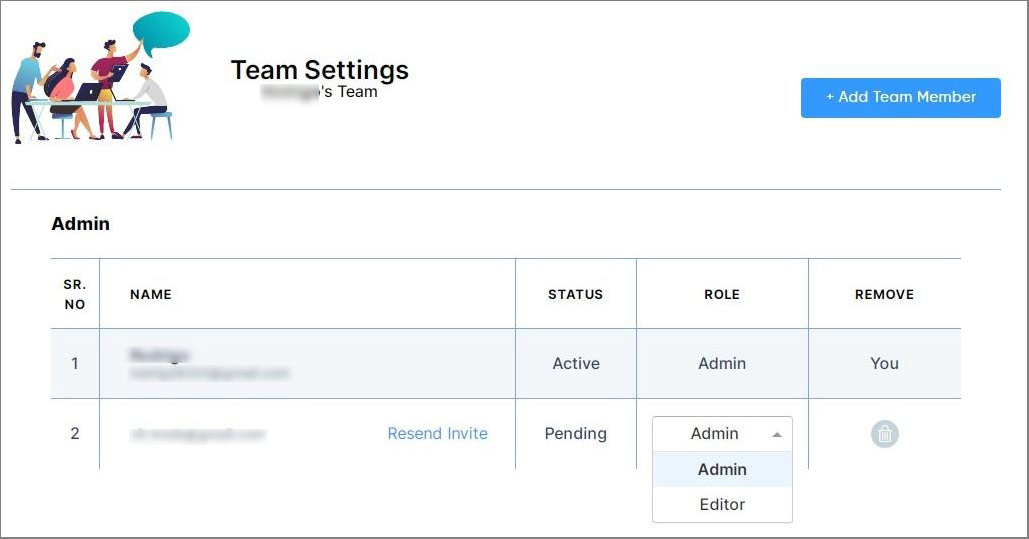
Tools for project sharing are available in all plans from InVideo. You can add a new user to your team when creating a new project or using the Team management tab. To become a team member, users must follow a specially generated link. The owner of the project can send this link directly or use the appropriate form for such emails from InVideo.
The project owner can manage permissions of team members by assigning them the Admin or Editor role. These access levels differentiate as follows:
Teamwork in InVideo means, first and foremost, creating collaborative alliances for users who work on the same video. This feature will be especially useful for marketing teams that consist of a large number of employees with different responsibilities.
It’s also worth noting that so far this feature provides only shared access to projects. Joint (simultaneous) work for team members isn’t available yet, but already in work. An unlimited number of Admins and Editors can be assigned in InVideo Teams.
IVA, or Intelligent Video Assistant, is an exclusive feature available for all InVideo users. This technology is based on Artificial Intelligence and allows you to correct errors in videos, i..e in scenes.
After finishing editing, users can click the fish icon in the upper right corner. This action starts checking the entire scene for compliance with the rules for placing and combining elements. After completing the check, this will show step-by-step recommendations for correcting errors in the visual design.
Users can refuse each recommendation if it doesn’t correspond with their creative idea. But we recommend not ignoring it as those tips are based on recommendations of professional designers.
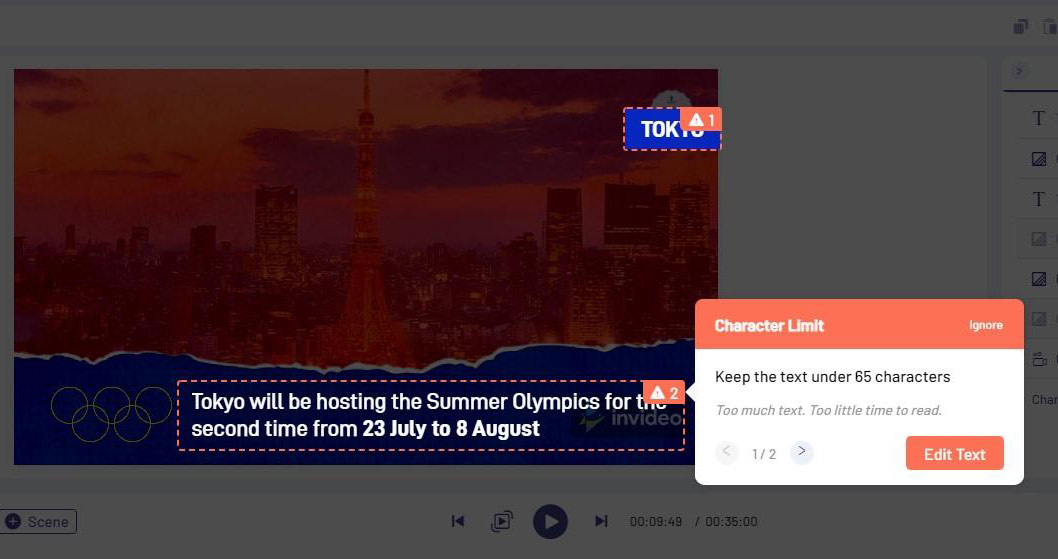
IVA automatically recognizes such common errors as:
Also, this technology provides recommendations for improving scenes content:
To test InVideo we decided to create a short video presentation about InVideo itself. One of the proposed templates was taken as a basis, the contents of this review were used for text inserts, and images were added using built-in integrations with stock services.
Here's step-by-step report how we tried to create a video in InVideo:
1. First, we clicked the Create button to open Workflow. Then, in the Text to Video category, we started looking for a suitable template. Thanks to the preview, we decided that the Cyber Space template would suit us. Leaving the default aspect ratio of the screen as is, we proceeded.
2. On the next page, we had to enter the data to generate the video. There are 3 ways to add content: pasting text, copying web page content and uploading own media files. For us, the first option was the most suitable, so we inserted the text and clicked Next.
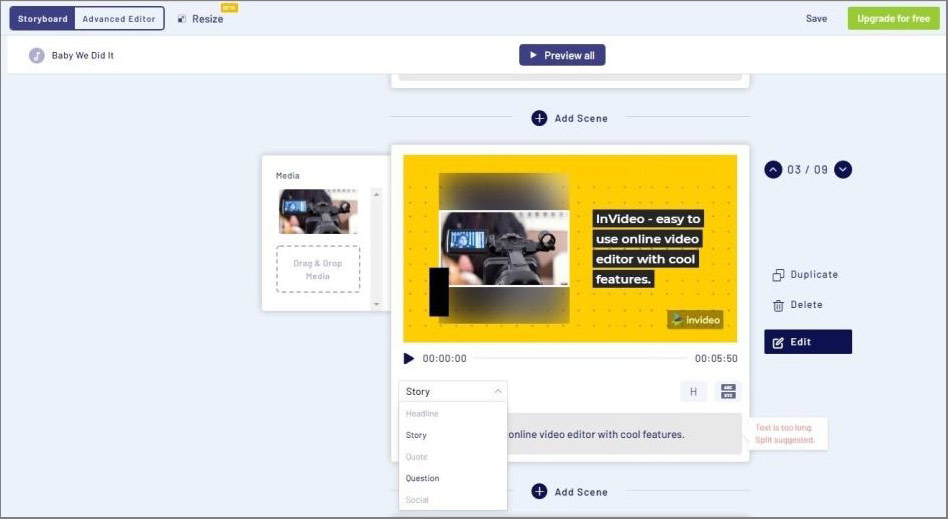
3. The project page opened in the Storyboard mode. The resulting video was about 70% ready, which is a pretty good result. In particular, the AI automatically selected the pictures based on text. Of 8 scenes, only 1 background picture didn’t match the text. There were also minor problems with displaying large text fragments, so we decided to manually edit these items.
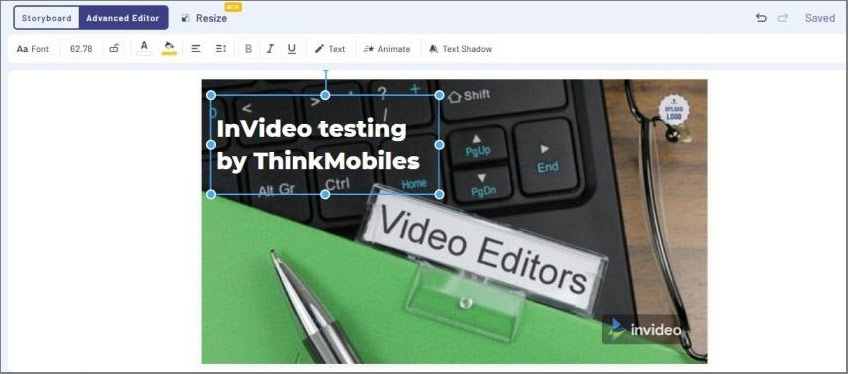
4. We had to check how limited the editing functionality in Storyboard mode was. We managed to edit the title on the first scene in this mode, adding the line "by ThinkMobiles".
5. In the second scene, the text didn’t fit the field. InVideo displayed the warning about it. There were 3 ways to solve this problem. A simple text reduction didn’t suit us, as it worsened the general semantic.
Therefore, we switched the scene type from the default Story to Question. This fixed the text content viewing but increased the duration of the scene in the general stream. So we decided to manually change the contents of the scene by clicking on the Advanced Editor.
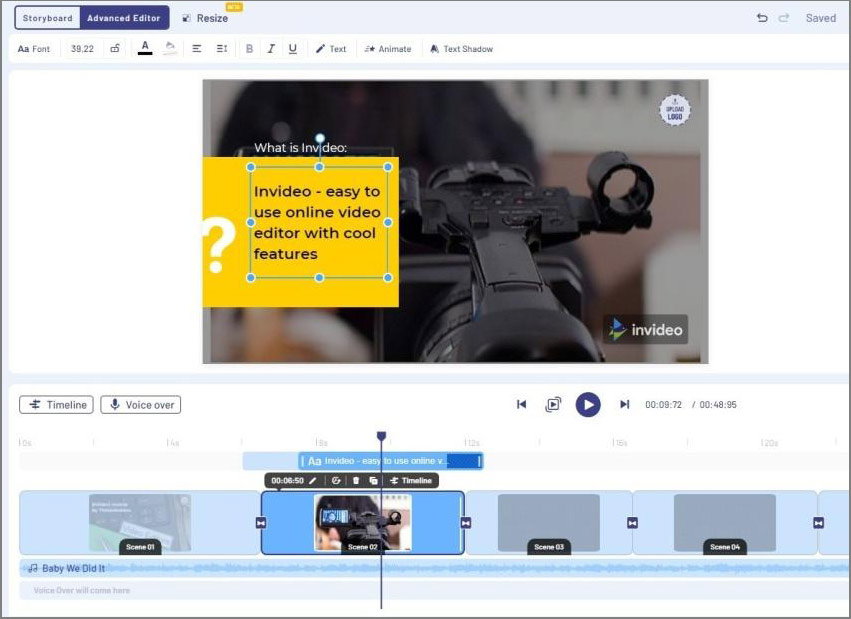
6. In the editor mode, we started making little fixes to the project. For example, on the first slide, we rearranged the text box a little higher to make it easier to read against a dark background.
7. In the second scene, we resized the background and text fields so their contents were displayed correctly.
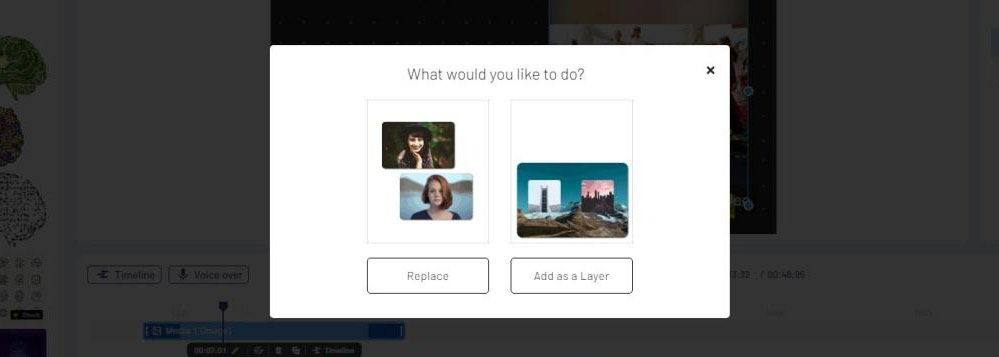
8. In the 7th scene there was a photo that didn’t match the text, so we decided to replace it. Our text mentioned "AI", so we decided to use this phrase in the search for stocks with pictures. Having found a suitable one, we decided to add it to the scene by Drag-&-Drop. At this moment InVideo always asks whether a user wants to replace the image or just place it on the scene.
9. In the 9th scene, we decided to add variety to the content, so we used stickers. One of them we found in the corresponding category, while for the other we did a keyword search.
10. The last step in creating any video using InVideo is assembling the project into a single video. By clicking Download & Share we specified video parameters (720p with watermark) and confirmed rendering. At the end of this process, we downloaded the finished video.
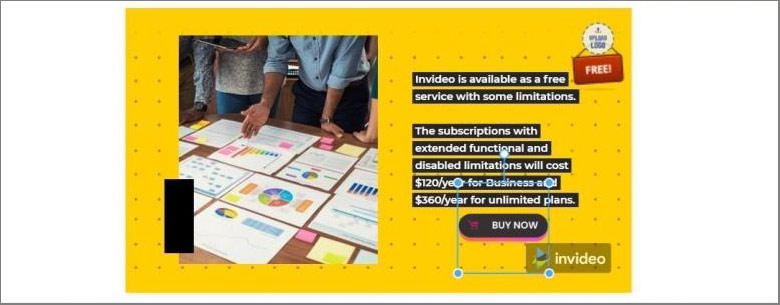
InVideo is available under three tariff tiers, one of which is completely free and suitable for creating small promo videos and presentations. The other two are distributed according to the subscription model and offer the removal of watermark, file number and duration restrictions.
InVideo is a fine example of turning a typical desktop program into a cloud service. Its strong point is in a huge amount of ready-made (and quality) materials of various types which don’t require free disk space on a user PC.
InVideo provides seamless integration with famous stock media files services. AI-based algorithms can automatically select content and detect typical content design errors.
In general, InVideo can’t completely replace Hollywood-level video editing software yet, but it’s already ahead of a significant number of desktop and online video editors. In our opinion, apart from regular users, this will also may be a great solution for marketers and bloggers.
Month
Month