In this review, we’ll explore another artificial intelligence image generation service called Playground, its features, cost, and delve into why it offers two modes: “Board” and “Canvas”. Towards the end of the review, we’ll share a tip on how to avoid a common mistake when starting out with Playground AI. Use the link at the top page to watch the video version of this review.
One of Playground’s key features is its ability not only to generate new images but also to edit them using AI. A brief overview of these capabilities is available on their website. The service allows for the addition of objects and details, as well as the combination of various images using layers. It also can be used to remove unnecessary environmental details.
Pricing
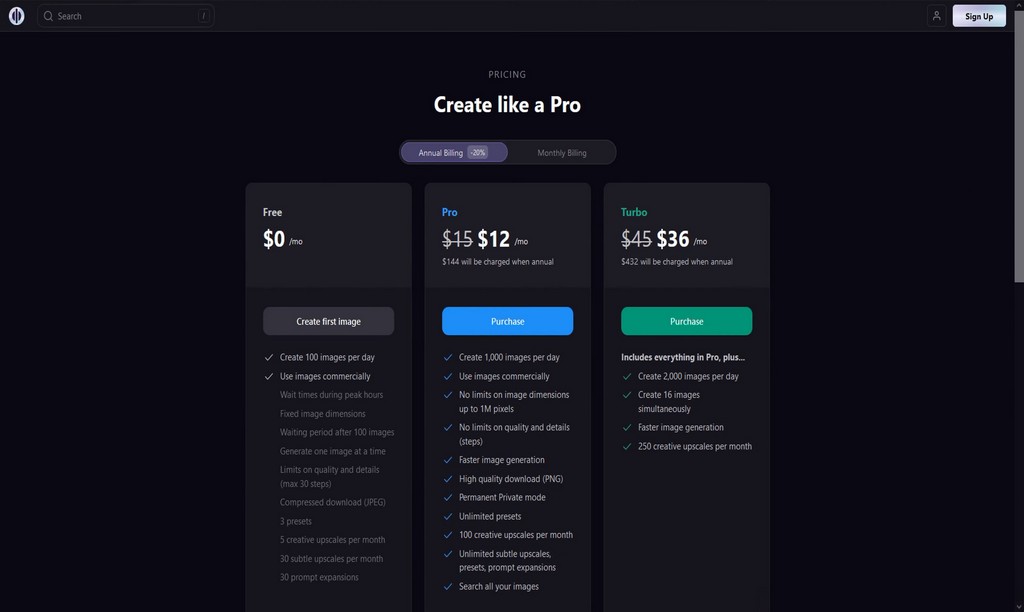
Playground offers a free plan with a limit of 100 generations per day, available without card info. For $15 per month, you’ll get a tenfold increase in the amount and some additional features such as faster generation.
If you require an even larger limit, consider purchasing the Turbo package for $45 with an annual subscription. It’s worth noting that the limit is set for 24 hours, and all plans, including the free one, grant you full rights to your work with the option of commercial use.
Board
Creating an account on Playground via email is unavailable, which is typical for AI projects with free plans. Therefore, you’ll need to register using a Google account. A couple of clicks, and you’re in the main menu. We decided to start with a basic operation and tried generating an image right away using the default settings.
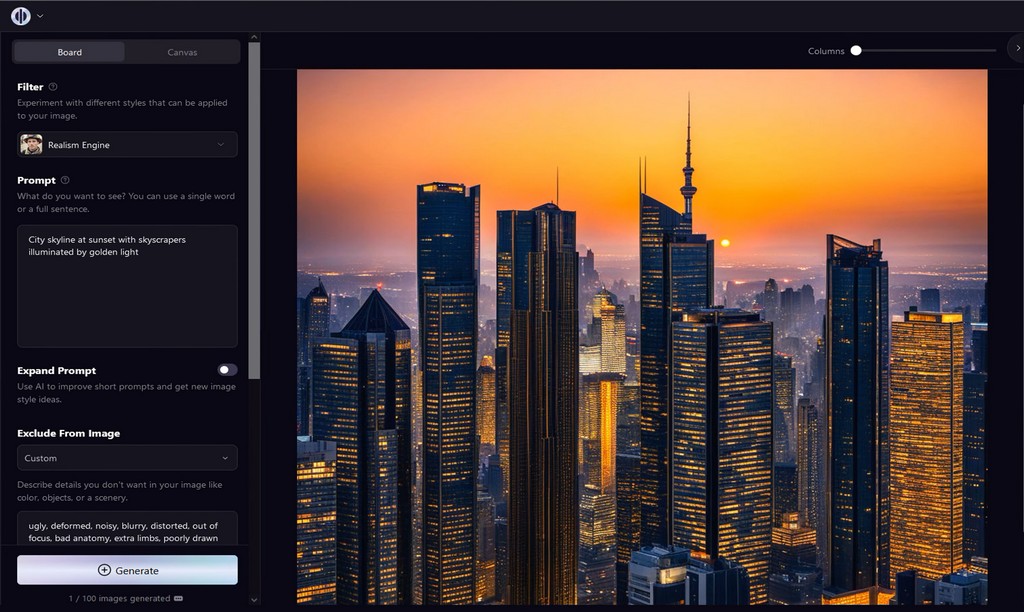
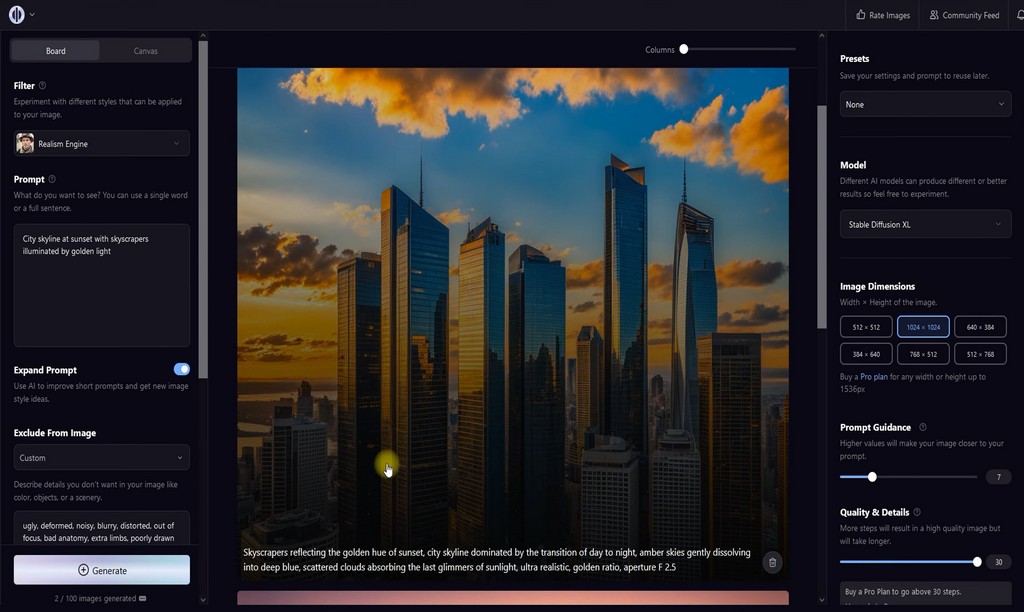
For example, the input query “City skyline at sunset with skyscrapers illuminated by golden light” yielded a quite decent result, although there were issues with proportions and lighting.
So, we tried using the built-in “Expand Prompt” feature. As you could see, beneath the new preview, there was a more detailed query based on my original one. The description became more precise and included more style requirements and details. And this really helped – the image looked more realistic, shadows, reflections, and other details appeared. Now you didn’t necessarily have to study guides on writing queries to get the desired result. In Playground, the text-based AI helped you explain to the AI image generator what exactly you wanted to create.
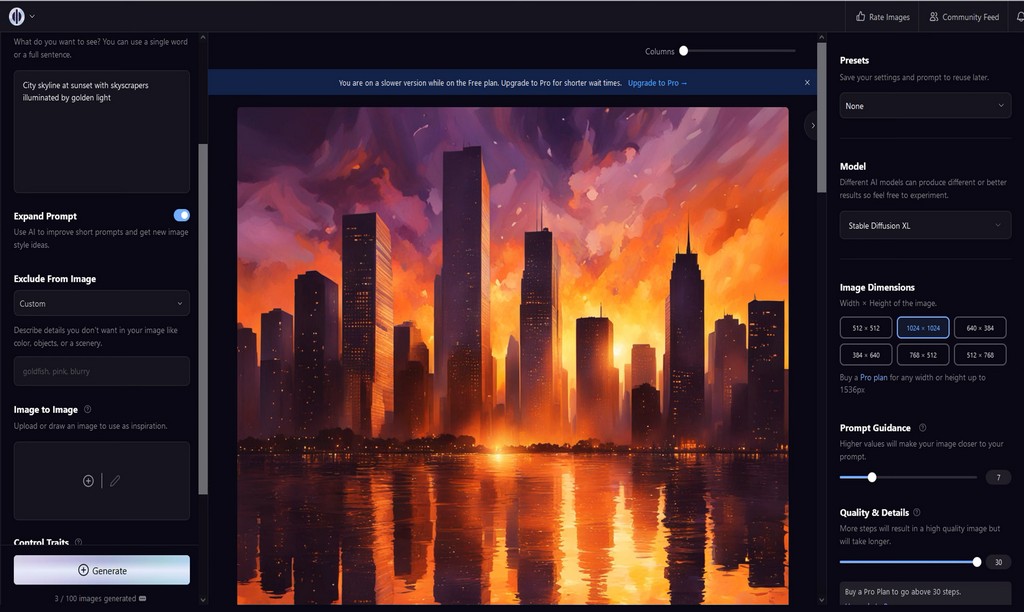
Also, note that in Playground, you could specify items or elements that should be excluded from the image. By default, there was a filter set for typical generation errors, such as blurriness or incorrect fingers on people. We removed this and saw how the result changed. As you could see, the buildings’ geometry lost its clarity, the sky resembled a brushstroke drawing, and there were issues with lighting, and so on. You could use this function both to remove unwanted elements in the created images and for correction purposes.
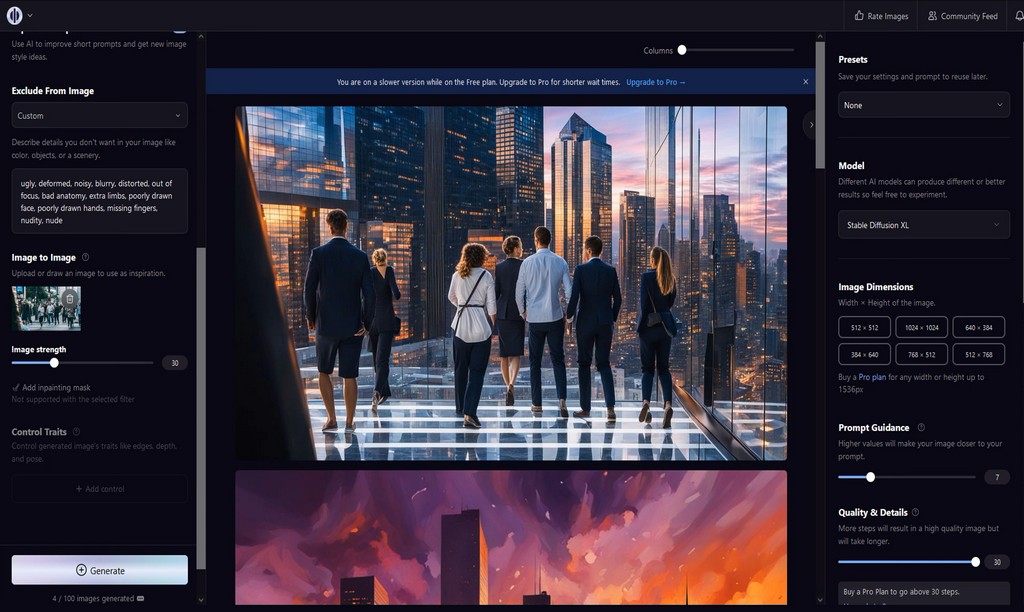
Playground was overall very flexible in terms of customization, allowing users to set references for images. In the “Image to Image” feature, you could upload your image and set its size in the generation process. For my skyscraper sunset query, we uploaded an image with people at a pedestrian crossing and got the result – people were crossing the road somewhere between skyscrapers. It seemed absurd, but it fit the task perfectly.
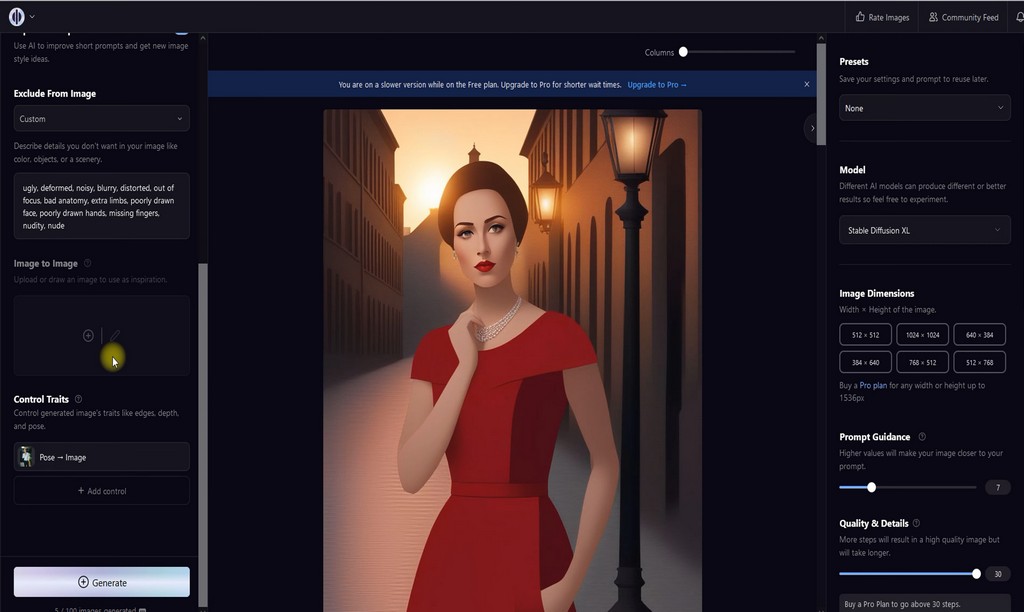
If you plan to create images involving people, for example, for showcasing clothing or commercial purposes, we highly recommend exploring the Control traits capabilities. This allows you to influence how the person in the photo will be depicted. There are three key characteristics: Edge, Depth, Pose, which are automatically recognized from the uploaded sample.
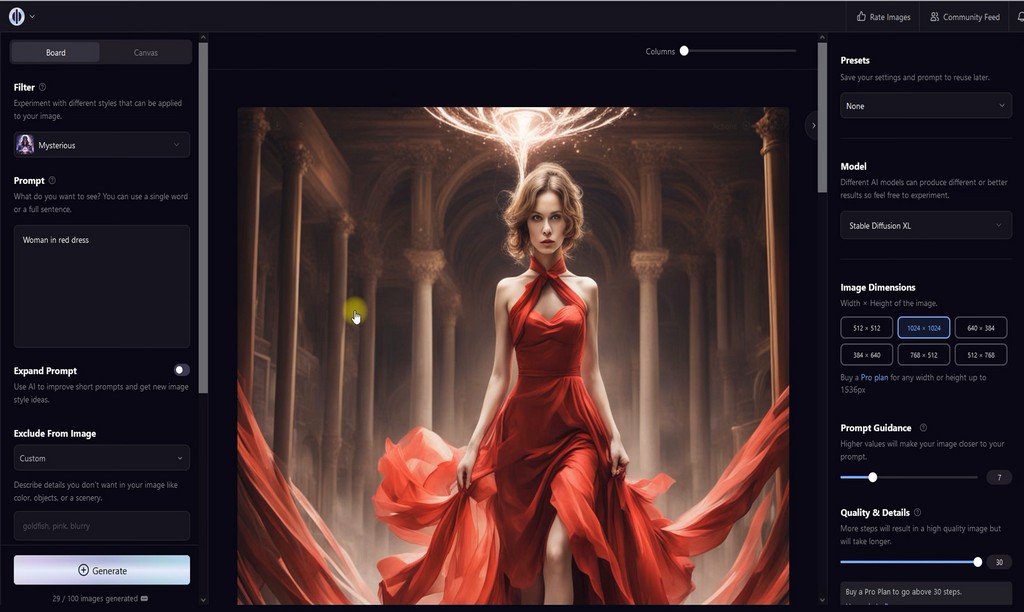
For example, we took a photo of a man holding his jacket and used it to set the pose. Then, we input a simple query like “Woman in red dress”. Ignoring minor environmental details like the floating lamp, the tool correctly replicated the pose. If you revisited the tool after generation, you would see that Playground used recognition similar to that used in 3D modeling, using key anchor points of body parts. Like with all other features, you could watch a tutorial video by hovering over the question mark icon.
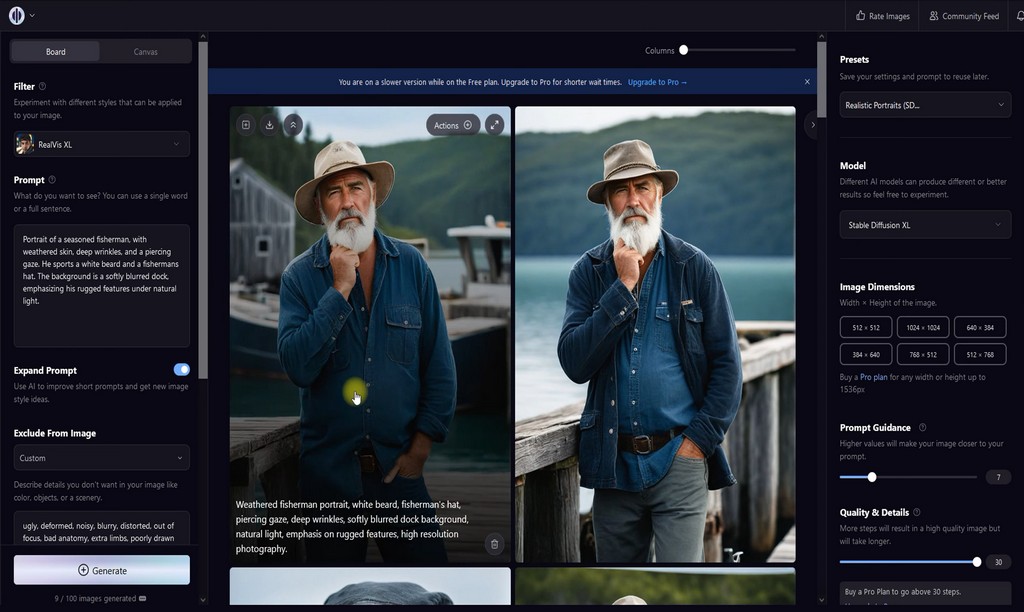
These were the main options for quick image generation. For frequently used settings there are presets that allow you to save current options for future use. In the free plan, only three presets are available, two of which are examples. For instance, we tried the “Realistic portraits” preset. And there we had four variations of a fisherman, fitting the preset prompt.
Here, four artificial intelligence models are available: Playground Chooses, Playground v2.5, Playground, and, of course, Stable Diffusion XL. In tests, the latter model showed the best result for short prompts. Additionally, you can generate images in one of several dozen styles ranging from hyper-realism to fantasy and abstractions. Also keep in mind that as this is the free plan, specifying arbitrary image sizes is unavailable. For example, here’s how the “woman in red dress” image changes if you change the generation style to “Mysterious”.
However, Playground will also be interesting to professionals due to its advanced customization capabilities during the generation stages, such as “Prompt Guidance,” setting the number of iterations, “seed”, “diffusions”, the number of variations and so on. At the bottom of this panel is the “Private Session” option, which, when enabled, prevents automatic publication of your work publicly on the Playground homepage.
We also want to caution that the Playground Content Policy prohibits generating images of a pornographic nature, containing calls to violence, incitement to hatred, and other content prohibited in your jurisdiction. However, partial creation of controversial content is allowed under conditions of non-publication, which is only available in paid plans.
Canvas
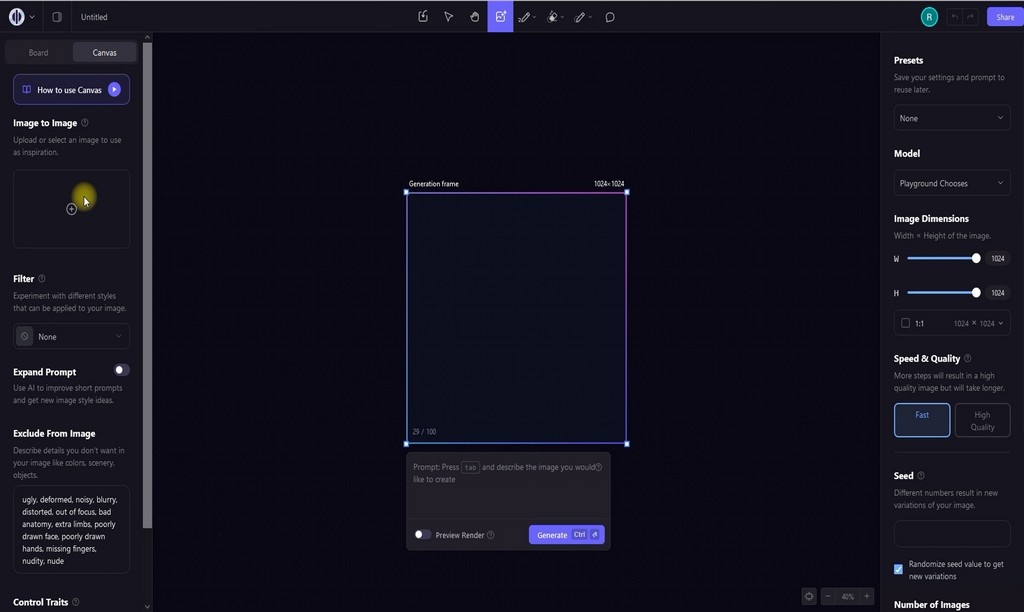
Now, let’s move on to Canvas, which is designed mostly for editing new or existing photos. By default, it’s set to work in single-user mode, but it also supports collaborative work. The results can be saved in a separate file for future reuse. Since it was my first launch, Ineeded to choose the option to create a new file.
Just like in Board, upon the first launch, you encountered a guide. we also recommended watching the tutorial video. Yes, its duration was almost 20 minutes, but from our experience, without it, you would have spent much more time exploring all the capabilities of this tool.
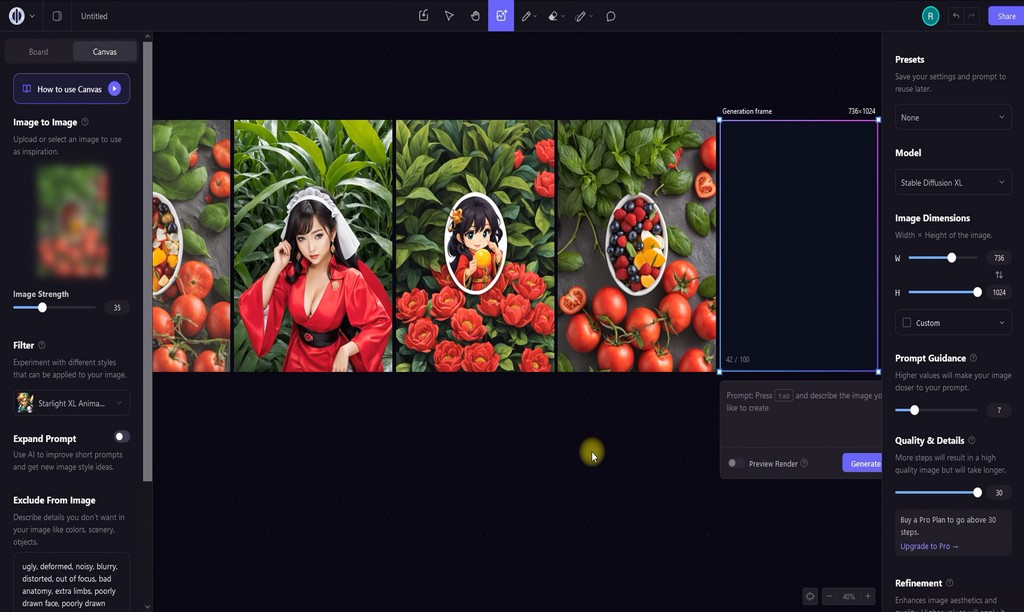
The side panel interface of Canvas contains the same tools for image generation as in Board. However, the input field for queries is now located in the centre of the screen and is tied to the Generation frames. The central part of the screen here is designated for the “canvas” with structural units being frames. Accordingly, the generation settings on these panels apply not to all objects on the “canvas” but only to the currently selected frame.
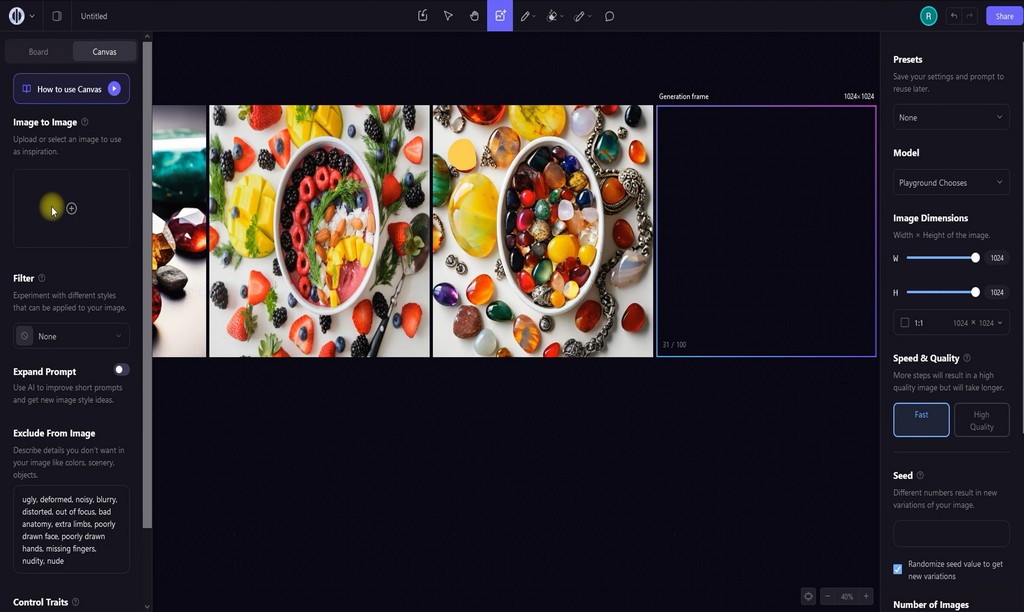
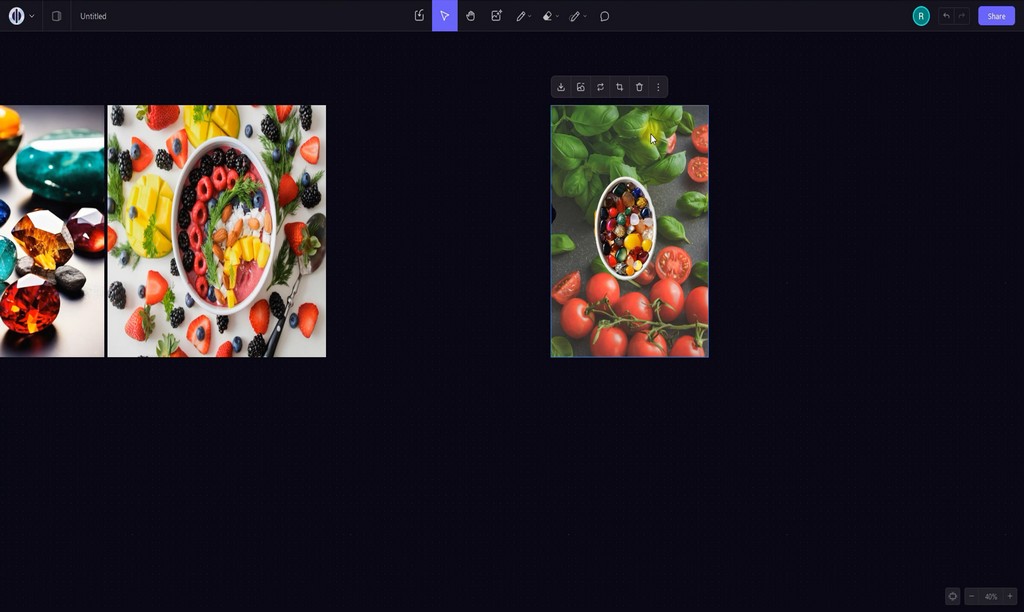
All those wonderful capabilities from the main page should be implemented in this tool. For testing, we took an image with fruits and berries and tried using it as a reference to have the AI replace them with precious stones. The first query was unsuccessful, probably due to an insufficient Image Strength parameter value. Increasing it to 90 resulted in an actual copy of the original. Decreasing it to 50, we got the desired result. The image style remained, but now various precious stones were in the plate and around it.
We decided to try using this image to create something new. We uploaded another image with vegetables, which served as the main background. Then, we applied the “background removal” tool, and most of the background disappeared, although some elements needed to be removed manually. For this, we used the “eraser” tool, as it allowed us to achieve the desired effect faster. Lastly, we moved the frame with the plate onto the frame of the image with the new background. Playground had the ability to work with layer analogs, so we set “Bring to front” to change the display order and it was done.
We also decided to check the image generation in a different style based on what we created… let’s call it a still life. With the “Strength” parameter set to 10, we got a girl in the garden. At 25, we got something resembling an anime poster, and at 35, the artificial intelligence turned the contents of the plate back into fruits and berries.
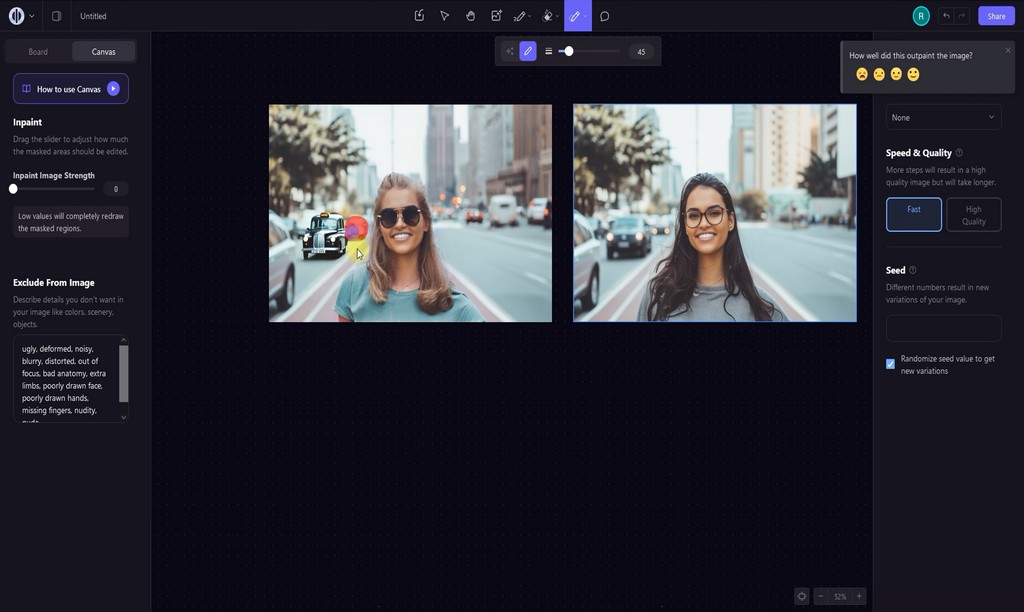
Finally, we checked how convenient Playground was for editing images of people, which was crucial in marketing. For this, we took a typical tourist photo of a girl. The canvas had several editing tools, for which real-time examples were also available to make it easier for me to choose the right option. With their help, we replaced regular glasses with sunglasses, changed the grey sweater to a green T-shirt, and altered the hairstyle and hair color. We also edited the background by adding other cars and buildings.
Comparison with Midjourney
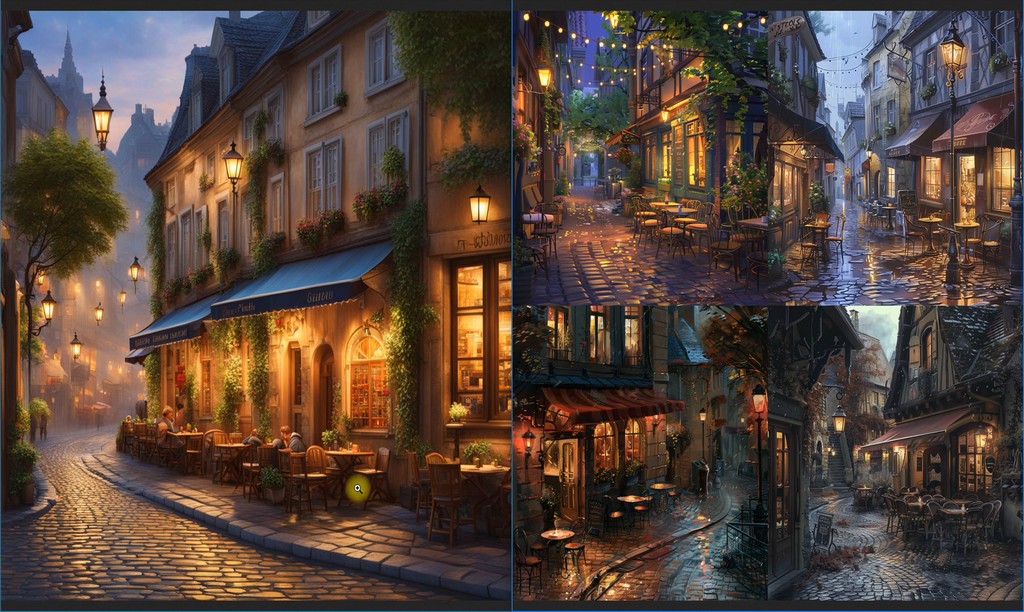
To compare Playground with Midjourney, we used identical prompts without additional parameters. In the first test, a meaningful sentence was used. As you can see, on the left side, Playground’s main problem lies in blurry faces and lanterns hanging in the air. Midjourney was able to overcome these issues and depict people so that their faces weren’t in the frame.
Next we used comma-separated requirements. Playground has the same errors with lanterns, but the overall appearance is more in line with an urban atmosphere. In the results from Midjourney with the, people disappeared, and a fairytale style predominated.
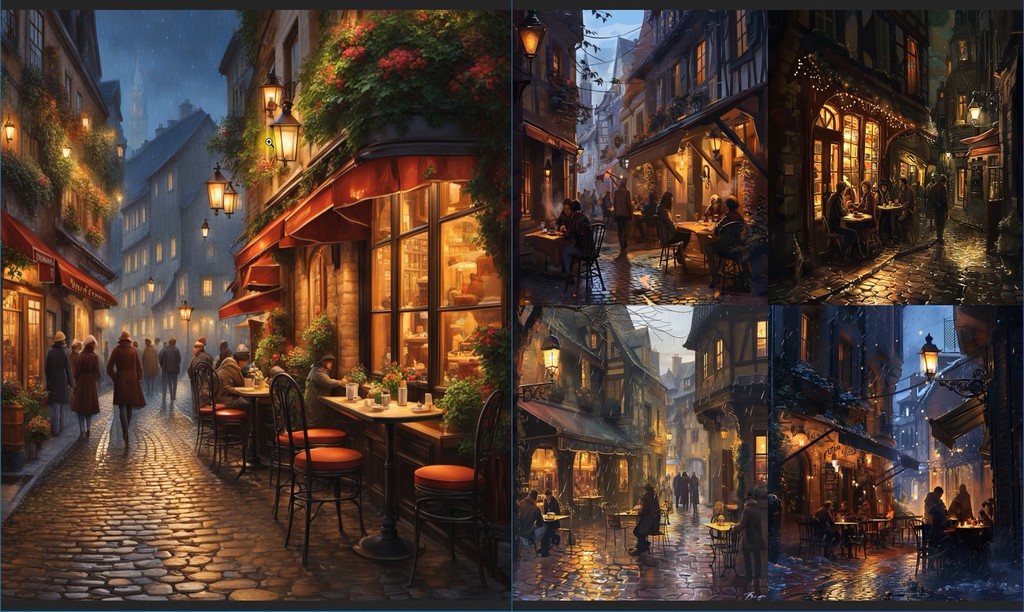
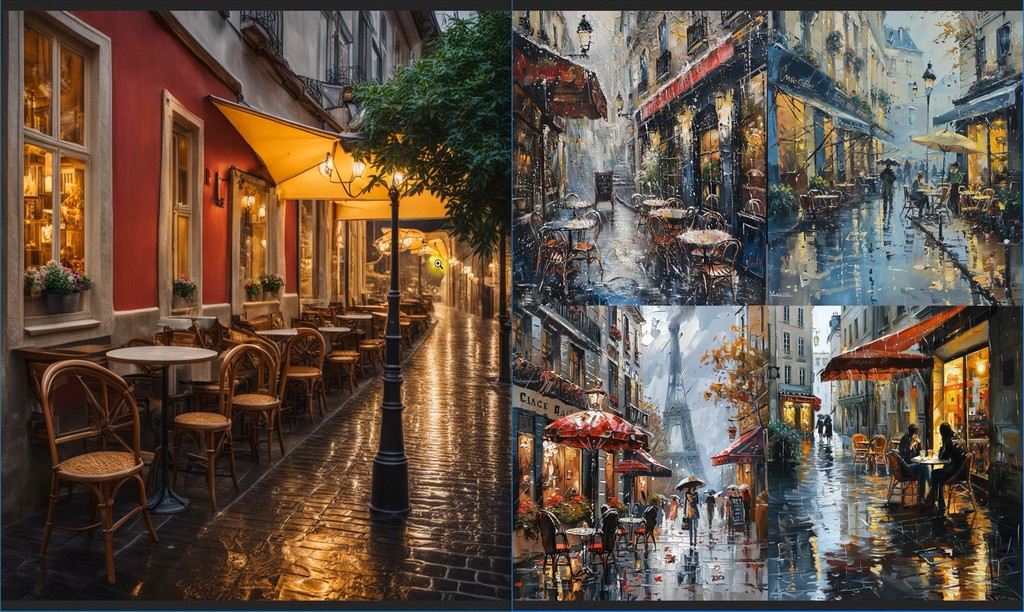
In the third test, a simplified query “European cafe in the rain” was used. In Playground’s work on the left, realism began to prevail, although the chair backs are mostly incorrect. Midjourney’s works, on the other hand, departed from realism and resemble watercolour paintings. It’s worth noting that it better follows the prompt, as it’s raining in all the works. And for those who doubt it’s a cafe in Europe, Midjourney added the Eiffel Tower to the third image.
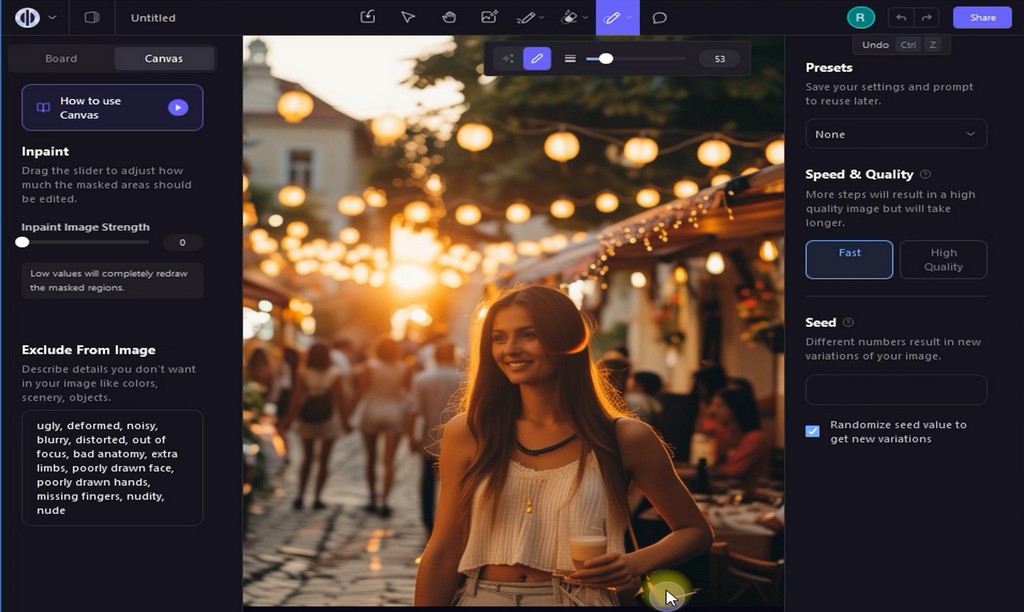
Also Midjourney recently introduced new features, one of which is Vary (region), which allows you to change a specific part of the image. Considering its similarity to the Canvas tool from Playground, we decided to compare their effectiveness as well too. Here’s the original image – a girl in a white top holding a cocktail.
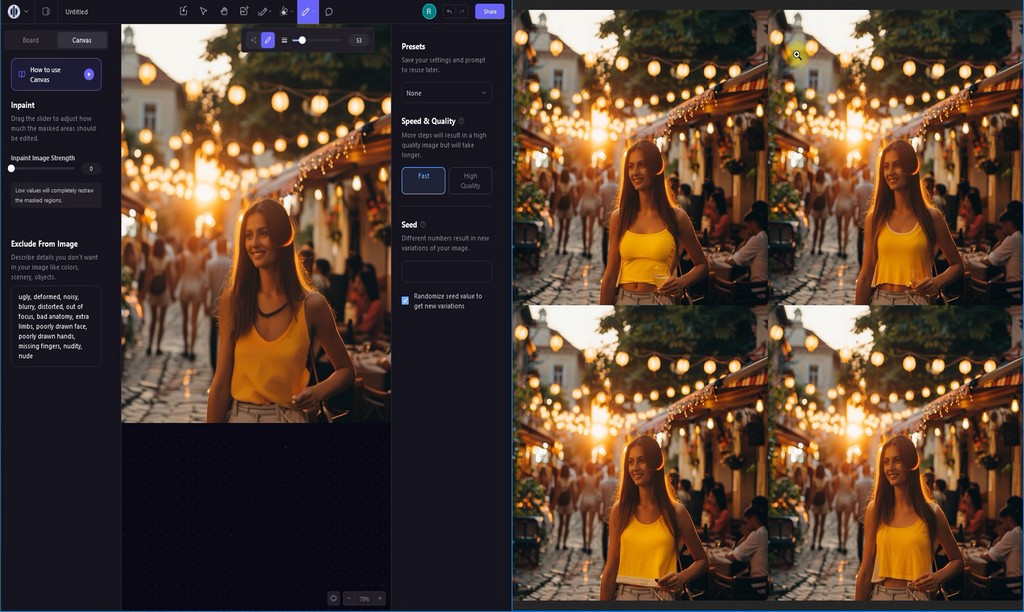
Using the Inpaint tool, we attempted to change her clothes to a yellow T-shirt, and here’s what we got. Now compare this with how Midjourney handled this situation. It’s worth noting that unlike Playground, it attempted to retain the cocktail in her hand. However, in all four variants from Midjourney, it’s a yellow top, not a T-shirt.
Conclusion
Despite the abundance of hints and tutorial videos, you’ll need to spend several days before mastering its capabilities to achieve the desired results in the shortest time possible. Otherwise, instead of speeding up and simplifying your creative process, you’ll spend additional time editing.
For example, during Canvas testing, it was revealed that the AI struggles with defining long hair boundaries. The shown result was achieved approximately on the 10th attempt, and even then, you might have noticed processing artefacts on the right side of the image. In another test, we attempted to change the background of a photo depicting a group of people, but due to the inaccuracy of our query, the result turned out mediocre.
Therefore, Playground, whether free or for a small price, can become an indispensable tool for artists and marketers, but only if you take some time to understand and master all the peculiarities of this AI model.
Finally, don’t mix up two similarly named products when searching for Playground. In this review, we discussed playground.com from the USA, not its competitor, playground.ai. Then consider your prompts carefully to get the most out of Playground and other AI image generation systems.
