What is Chromium? Unlike the name suggests, it’s not the same as Google Chrome, but it is very similar. Chromium is a community project, an open-source software, started by Google yet open to contribution from anybody, and including Google developers, of course. You can think of it as a “base” browser that any company can build on top of. For example, browsers such as Microsoft Edge, Amazon Silk, and Opera were built with Chromium. However, this brief article is about a flip side – being how to uninstall Chromium, or you can use automatized uninstaller.
You can install Chromium as an independent self-sufficient browser. And if you notice, the icon looks very much similar to Google Chrome. It has a similar minimalistic UI design, and it can do basically everything Chrome does. The difference is that Chrome has a lot more features than Chromium.
Why uninstall Chromium?
Unlike Chrome, Chromium lacks certain key features, e.g. codec licenses for AAC, MP3, H.264, Adobe Flash. This makes it possible to play videos on the web. For Chromium, you might need to manually install these codecs.
Also, Chromium appears to be pretty buggy. As an open-source project that is continually being improved, Chromium is considered harmful, as it can let malware/adware/PUPs infiltrate your system without user permission. Another issue are apps that continually track Internet browsing activity, cause browser redirecting, intrusive ads, and decrease the overall performance of your PC.
How to uninstall Chromium
Chromium is considered by many a malware because it often regenerates itself, making it one of the most annoying programs to uninstall. A wish to uninstall Chromium often arises due to infecting Chrome browser with unwanted add-ons, as well as consuming a lot of RAM. This, indeed, can have a negative effect when performing video editing or playing video games.
If you face these issues and are looking for a way to get rid of Chromium from your PC, here is a step-by-step tutorial on how to uninstall Chromium using different methods.
Using Windows 10 uninstallation method
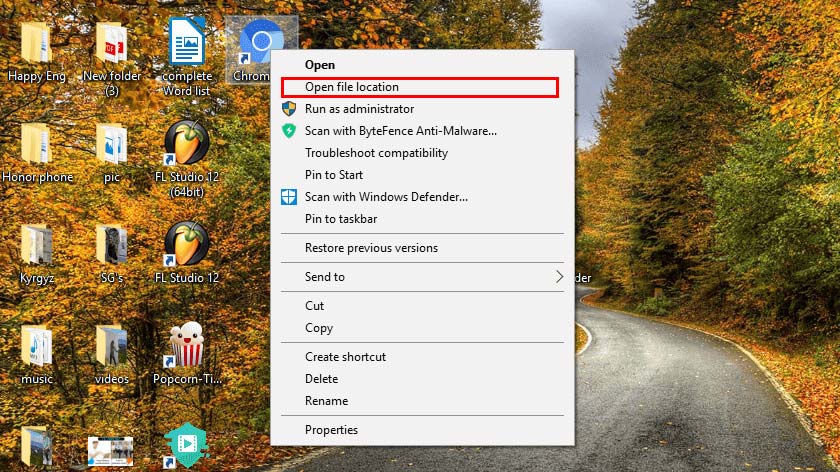
Step 1: Right-click on the Chromium desktop icon and select open file location.
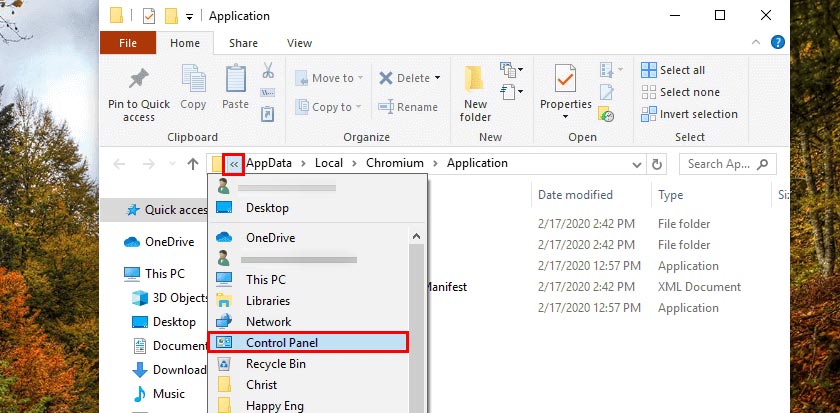
Step 2: In the Chromium folder, you’re going to notice the application has not come with its own uninstaller. When it does come with it, you will find the uninstall option in the folder, which would be the most proper way to delete a program. So, if you cannot find the uninstaller, click the << button on the top left to open a drop-down menu.
Step 3: Click on the control panel option. Note: this is a shortcut to access the control panel from the Chromium folder.
Step 4: At the control panel folder, click on Uninstall a program beneath Programs option.
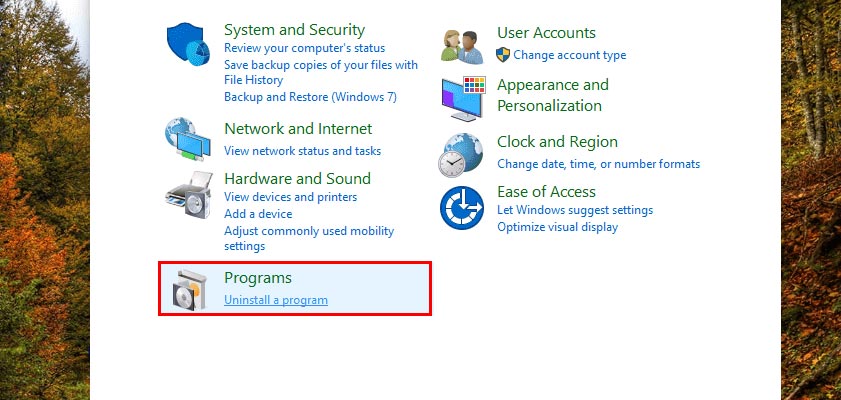
Step 5: After you locate the Chromium app in the list of programs, double-click on it and another menu will open up.
Step 6: Make sure to check the box that says, “Do you want to delete browser history?” if your answer is yes. And proceed to click on uninstall.
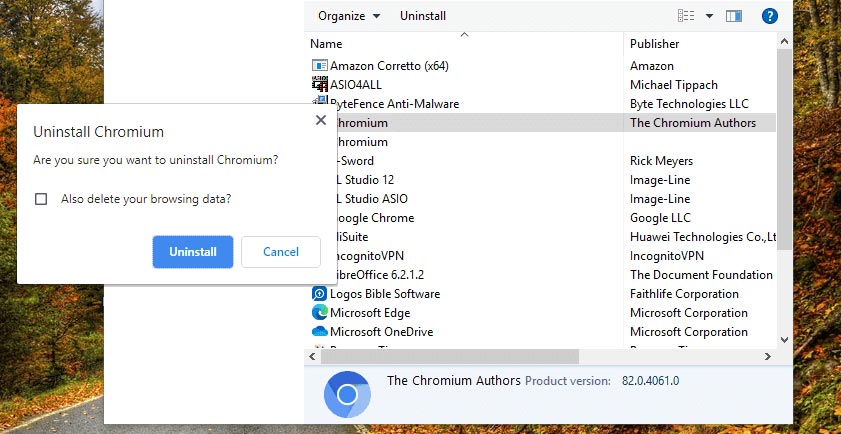
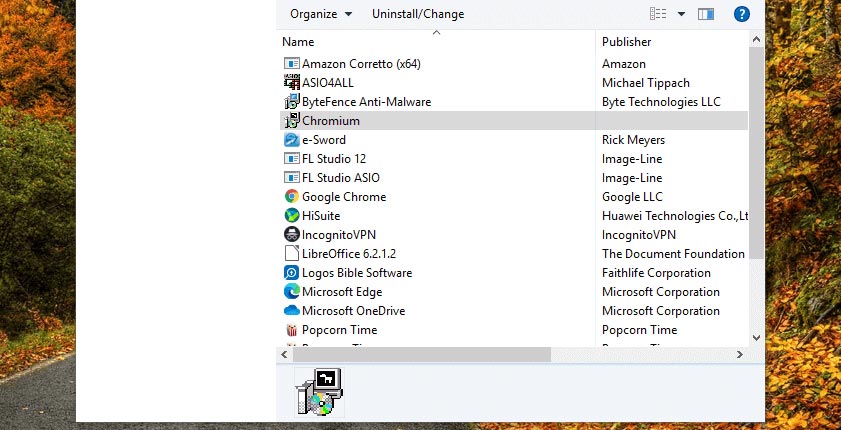
Following these steps will help you to remove the Chromium browser from your PC. However, if you take a look at the screenshot below, you will notice the previously removed Chromium is no longer listed, but there’s still one more. That is because this other Chromium is the base for the Microsoft Edge browser as well.
Using 3rd party uninstallers
Sometimes, traditional Windows 10 uninstall is not enough to get rid of all program traces, especially in case of malware and/or damage to the system files. Sometimes, after uninstalling Chromium from the control panel, it strangely reappears. There is a special “uninstaller” software to tackle such issues.
Sometimes Chromium might not be even listed in the program file list, though it is there. Some apps leave traces and residual files behind and these third-party uninstallers are designed to find and get rid of those files. To demonstrate a few examples, we’ll use Revo Uninstaller Pro (free trial version) and IObit Uninstaller, to do a full uninstallation of Chromium. For more information on third-party software, go to 7 best uninstallers post.
How to uninstall Chromium with Revo Uninstaller
Revo Uninstaller free version provides 23 free uninstallations after which you will need to upgrade to Pro. The free version also features a hunter mode (a target-looking icon in the upper right corner). In it, a user could simply drag the target icon over a program to uninstall. That being said, let’s look at the steps to uninstall Chromium using Revo Uninstaller.
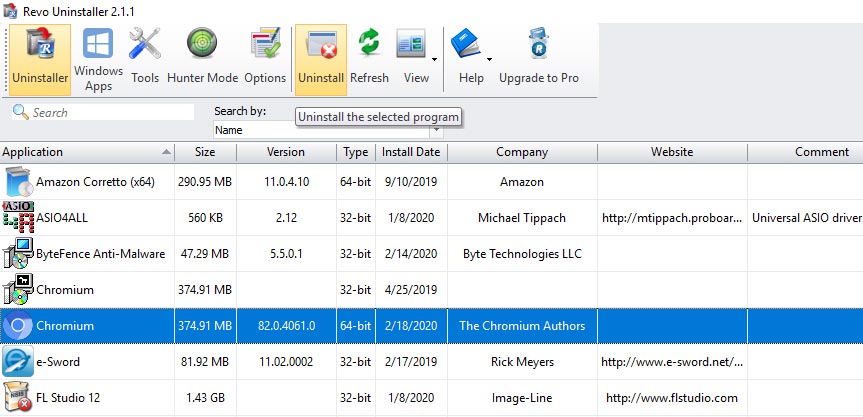
Step 1: Opening Revo Uninstaller free version on your PC will reveal an interface like the picture below. Click uninstaller at the top left menu, which will load a list of all programs on your system. After that, select Chromium from the list and it will become highlighted (see picture below).
Step 2: After selecting Chromium, click on the Uninstall button located on the top middle menu.
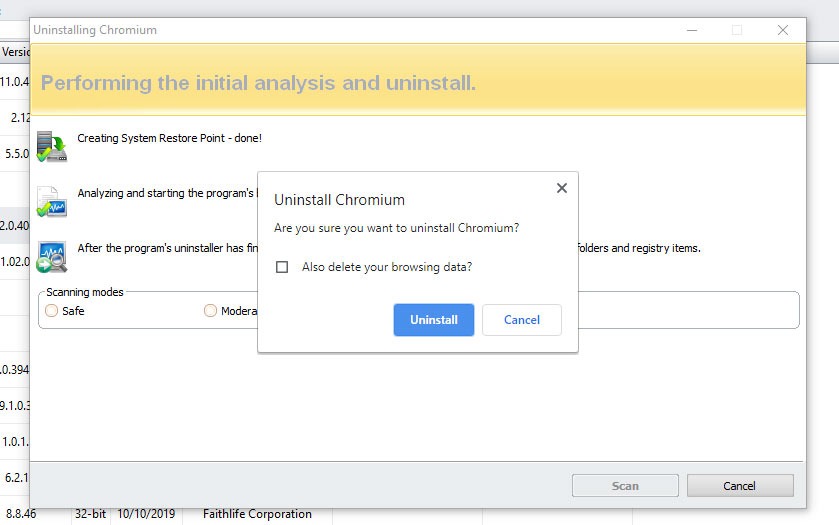
Step 3: An uninstall menu will pop up, allowing you to create a restoration point and extra information. You will also see the scanning mode with three options. After that Revo will use the system’s own uninstaller to delete Chromium. A popup menu will also appear, in which you can choose to also delete browsing data and click Uninstall.
Step 4: After the process is completed, select the Advanced scanning mode option and click Scan. Revo Uninstaller will start a deep scanning process of PC to look for residual traces of Chromium. This usually takes 5 to 10 minutes.
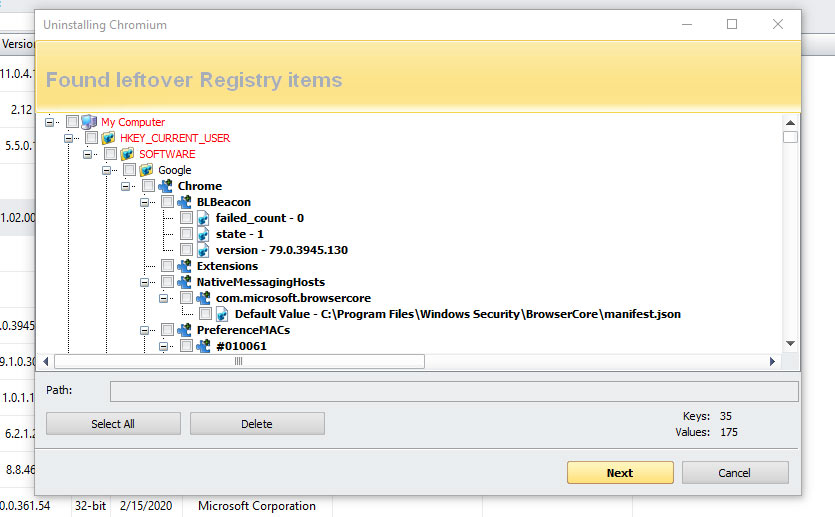
Step 5: After the scan is completed, a menu will appear showing the locations of all Chromium residual files in the registry. You will need to select these boxes and click Next.
Step 6: After you’ve selected the registry locations you want Revo to delete, click Finish. Overall, it is quite a straightforward procedure.
How to remove Chromium with IObit Uninstaller
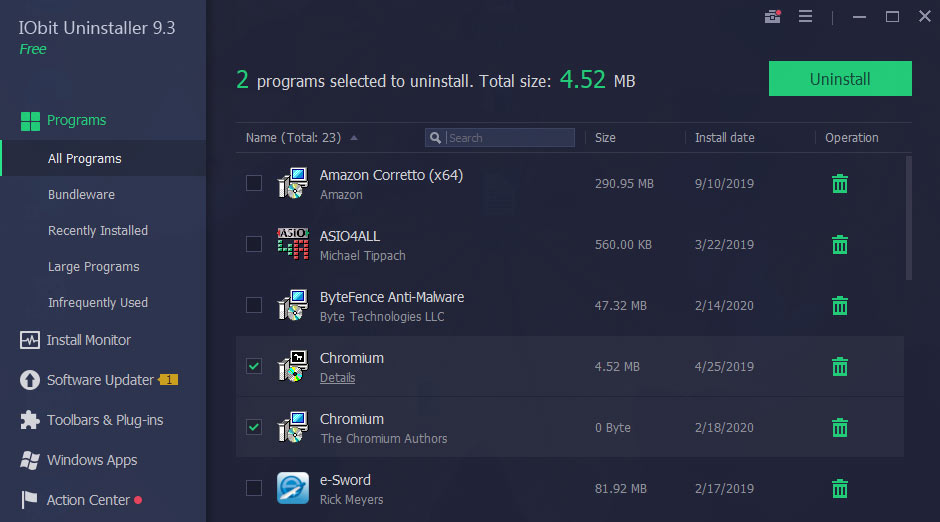
IObit Uninstaller is another free and quite popular tool you can use to also get rid of Chromium. This is what it would look like.
Step 1: Open IObit Uninstaller in Windows 10.
Step 2: Select Chromium from the list click uninstall on the top right corner (green button).
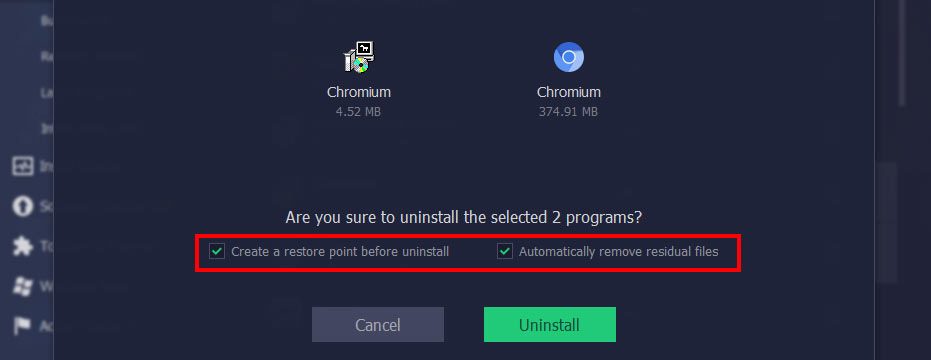
Step 3: After clicking on the button, another window appears showing the application you want to delete. Make sure to check the boxes to Automatically remove residual files and Create a restoration point in case something goes wrong.
Step 4: During the process, you will get a prompt message box to uninstall Chromium, and also a checkbox to delete browser history. This is similar to Revo, which uses your PC’s own tools to remove a program, and do some post-uninstallation cleanup tasks.
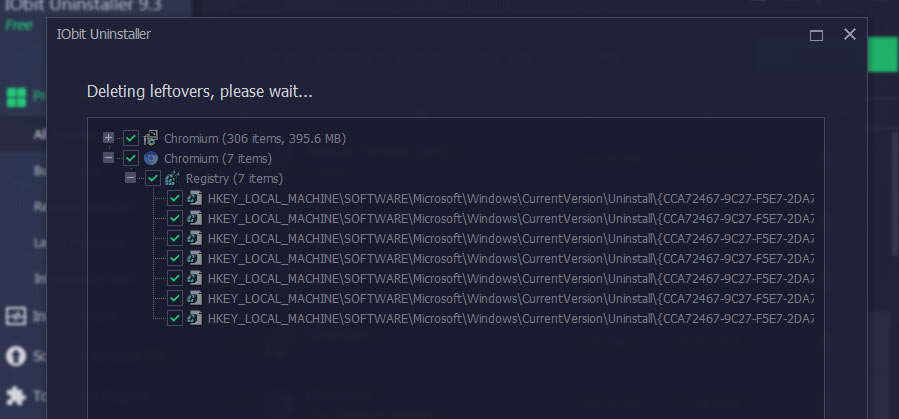
Step 5: After completion, IObit will begin to automatically remove leftover files. After this process is over, all traces of Chromium will no longer be in your Windows 10 PC.
There we go, you’ve successfully uninstalled Chromium from Windows 10 with no trace of leftover files. You can also try other similar apps and choose which is easier for you to use.
Find more about PC optimization and malware cleaning in our best pc optimization article and best antimalware list.

