How to make an Augmented Reality app with Vuforia and Unity? Following up on the topic of VR/AR, we’ve decided to show you how to create augmented reality models in 3D. Using popular developer tools and kits you can do this in few hours and the process could be quite enjoyable! So we’ve sat down with our 3D designer mates, built an AR app (simple, of course) animated model, and now we’re going to present a brief tutorial of it.
What we’ve been building is an augmented reality model for Android devices, using:
- Vuforia SDK (6.2 version)
- Unity platform (5.5.0f3 version)
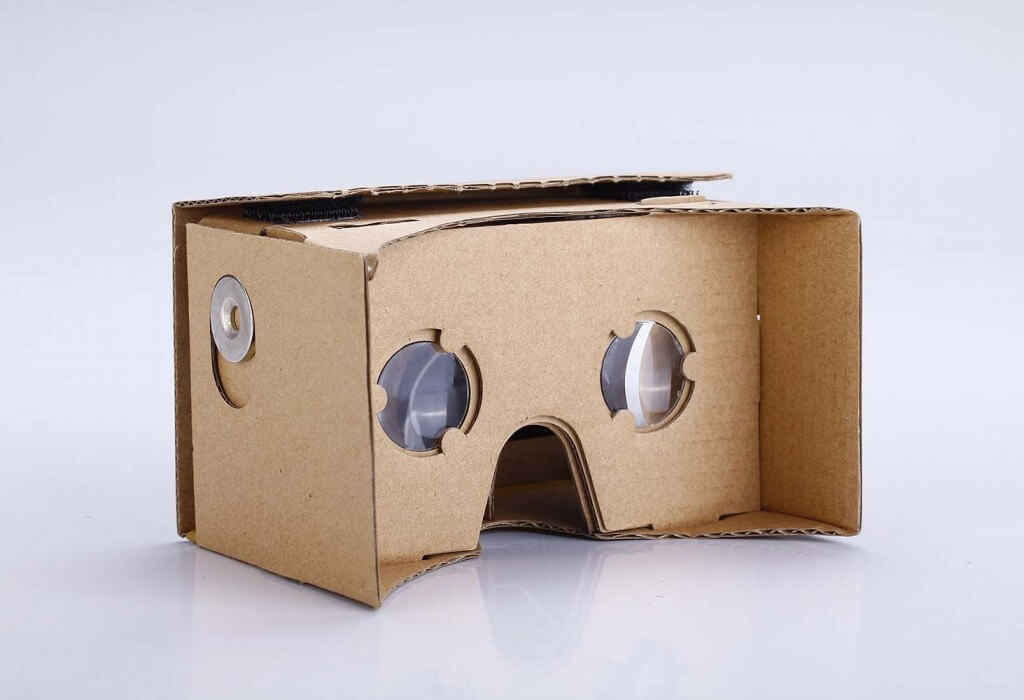
To taste our model you can choose one from the most popular AR devices like:
- Oculus
- Hololens
- HTC Vive
- FOVE
- Magic Leap
- Google Cardboard
Why Vuforia kit?
It’s really easy to work with and has stunning possibilities for game/app developers – as we’ve reviewed in previous post List of best augmented reality frameworks.
Before getting started with the tutorial, we should also mention that for augmented reality models creation we’ve applied a ‘marker based’ approach for AR apps, and target images from our database.
Starting with Vuforia and Unity
To use Vuforia SDK we go to Vuforia Developer Portal and create the account. Then log in and go to Develop page where we have to create a special license key and a database for object recognition.
Let's Build Your AR app
Provide us with your contact details and we will contact you today
Thank you for feedback.
Add a license key
Basically, a license key is a unique ID which the process of app development in Unity requires. To create a license key we go to Develop -> License Manager tab, select Add License Key, select its type (‘Development’ in our case), type the app name, and Confirm to agree to terms and conditions.
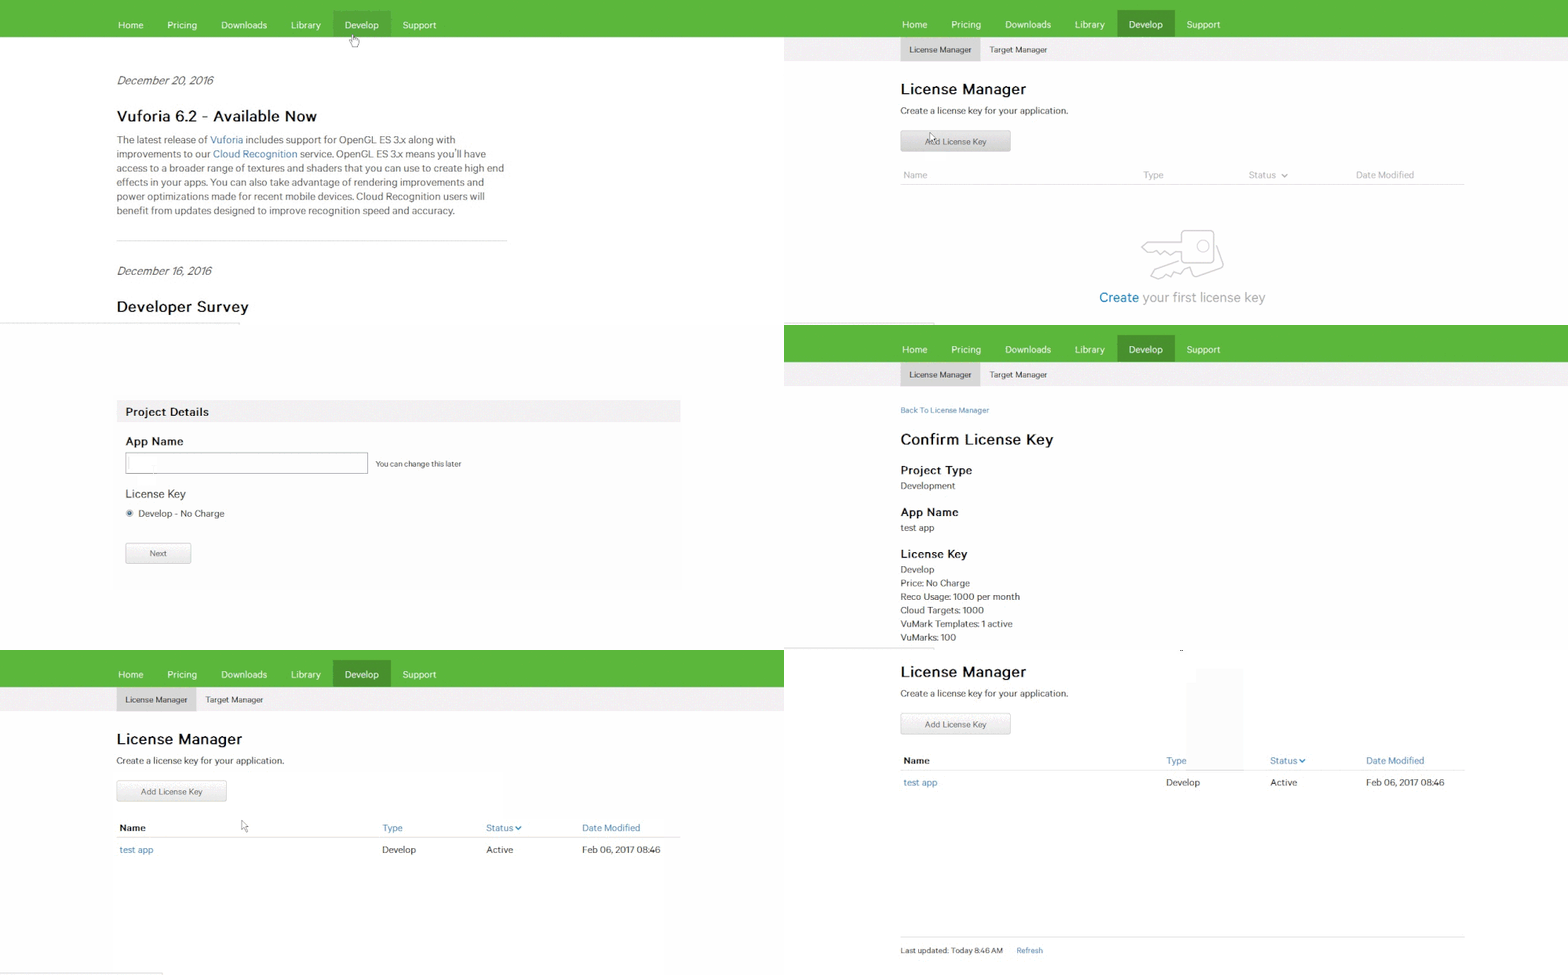
For apps in development, like our test project here, this SDK is free of charge, which is undeniably great news. This implies 1000 uses per month, with 1 template.
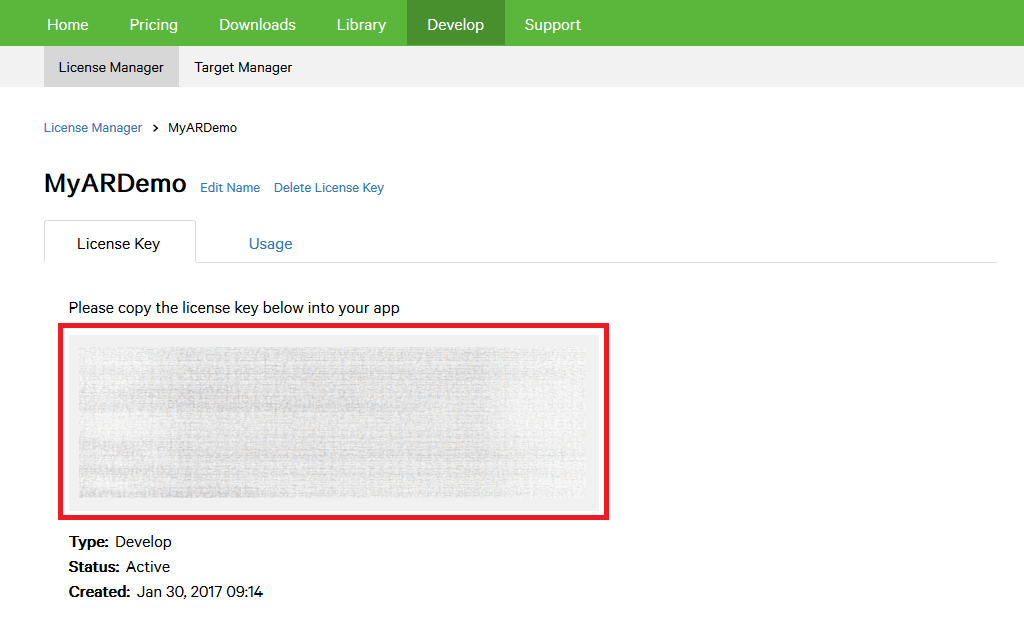
After agreeing to terms we see that our new license key is ready in License Manager tab. Also, we get a notification by email about all the details.
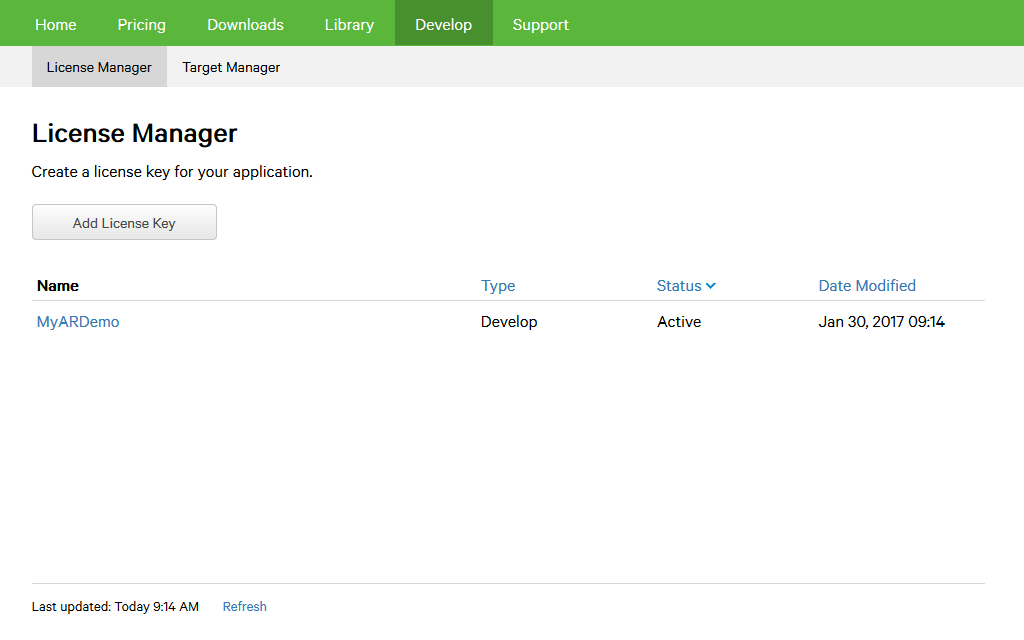
Click on it and copy or save it, as we will need the key further on in Unity application. To find and copy it, go to License Manager -> License Key.
Add a database
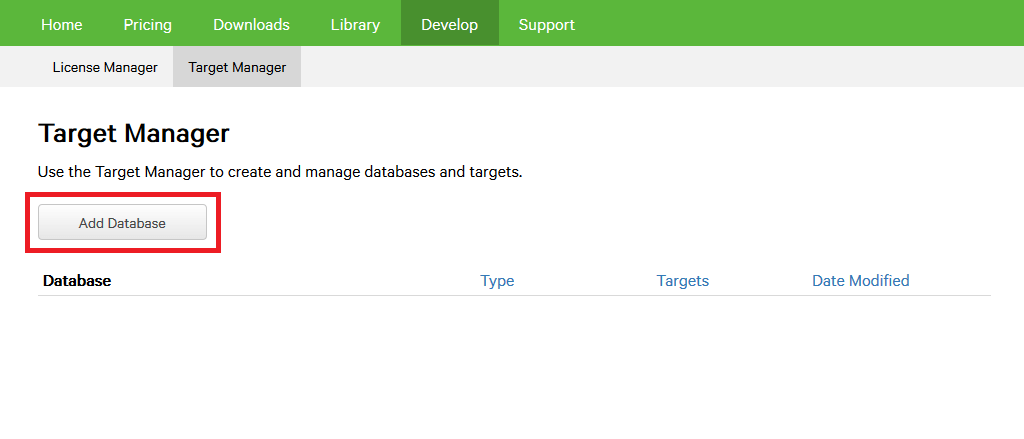
The second thing we have to do in preparing to create augmented reality models using Vuforia is to create a database and image target. We go to Develop -> Target Manager tab to add a database. So, we continue to make an augmented reality app with Vuforia and Unity.
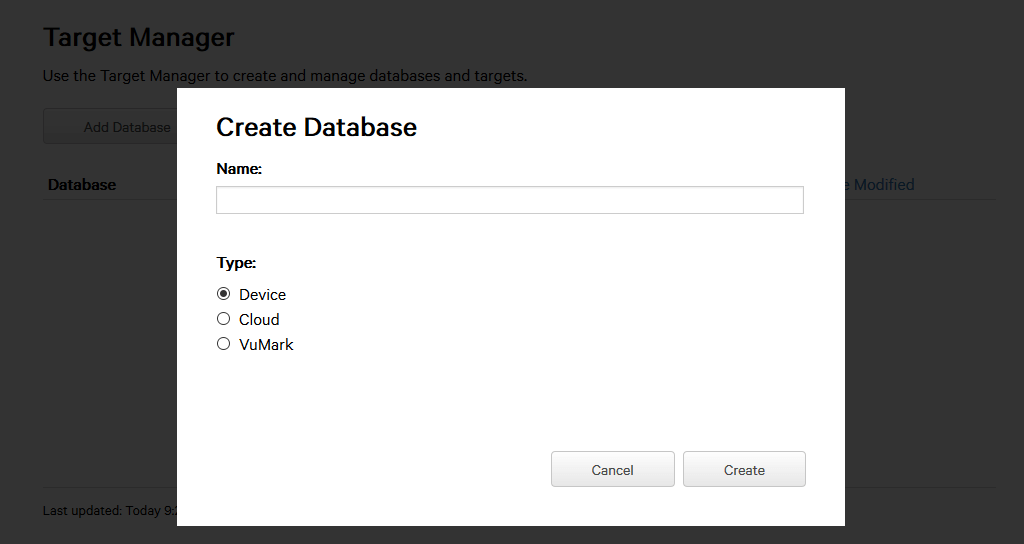
Upon clicking the Add Database button we name it, select the type and click Create.
A new database for our demo AR project is created and we can see it in Target Manager tab.
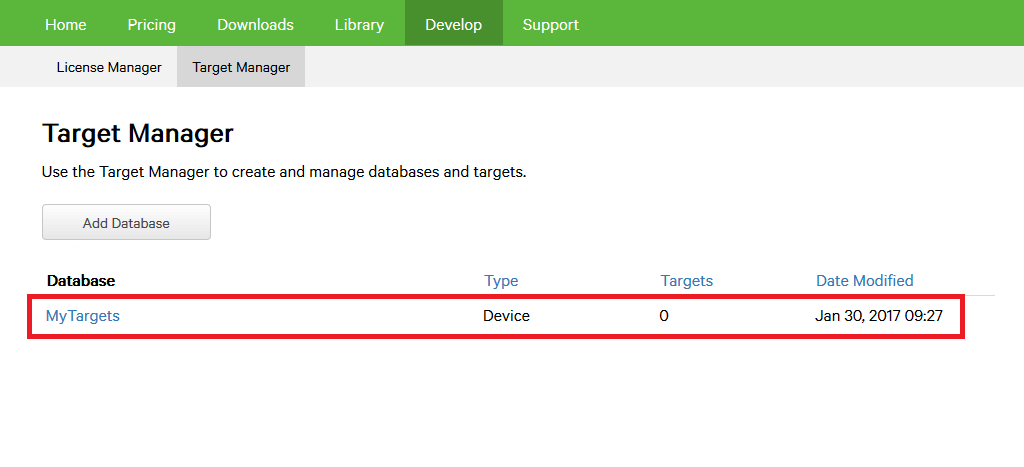
The next step is adding images to our database. These are the images our augmented reality models will be based on. We click on our database called MyTargets and then press the Add Target button.
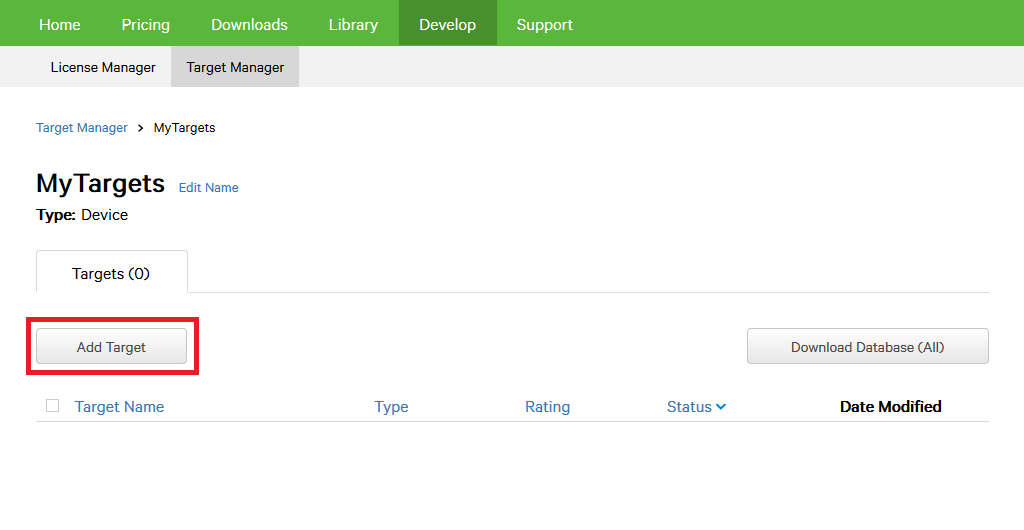
Note, that Vuforia is a great SDK for 3D models as it supports lots of target types (single image, cylindrical, cuboidal, 3D image, etc.). In our AR models tutorial, we’ve used a single image target and a random image of rocks as background.
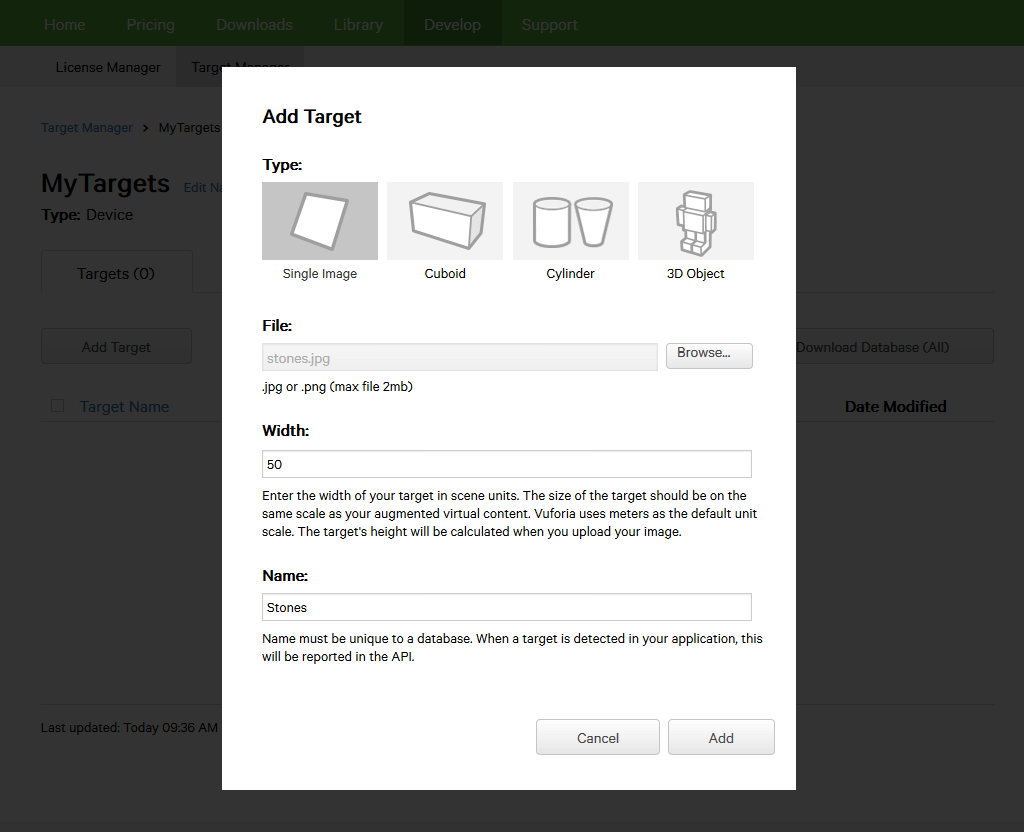
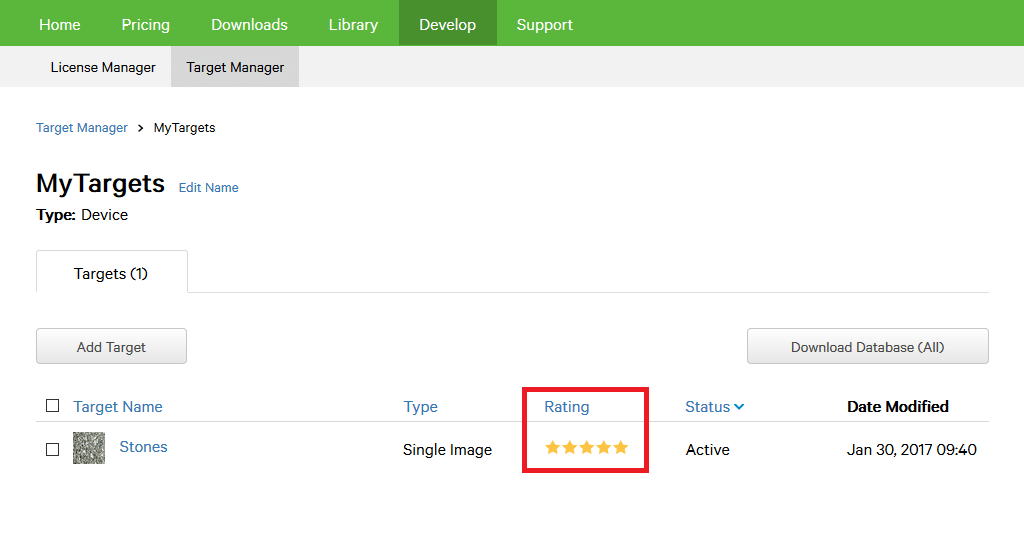
We also have to specify the target width value in scene units. After uploading the image, pay attention to rating section: low rating means your image doesn’t have enough points for further tracking and/or processing. Use Show features tool to highlight those points in image.
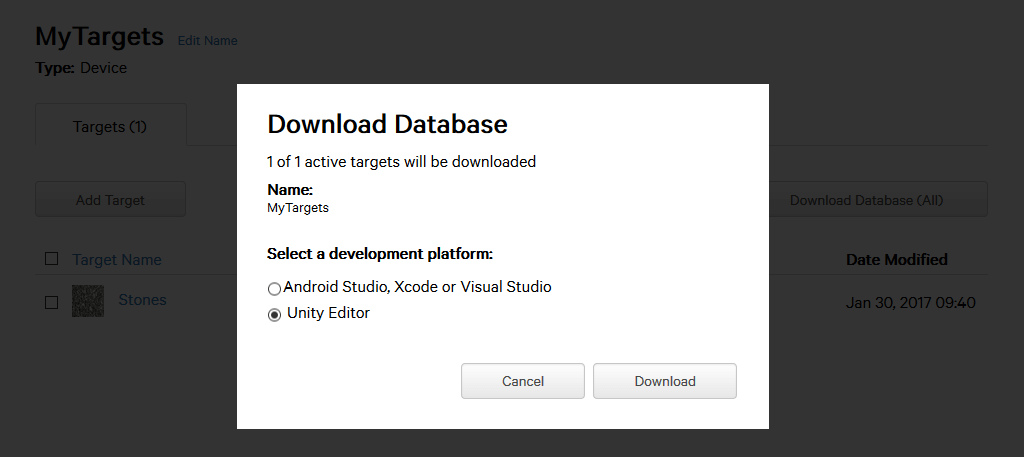
Now, as a database exists and has a target image, we can import it for our project by clicking the Download Database button. Select Unity Editor and download.
Integrating Vuforia with Unity
To start working with Unity we have to download Vuforia SDK – this finalizes the tasks on Vuforia side. We go to Downloads -> SDK and select ‘Download for Unity’ package. Then we open Unity3D platform and create a new project for augmented reality models. Let’s call it “MyARDemo”.
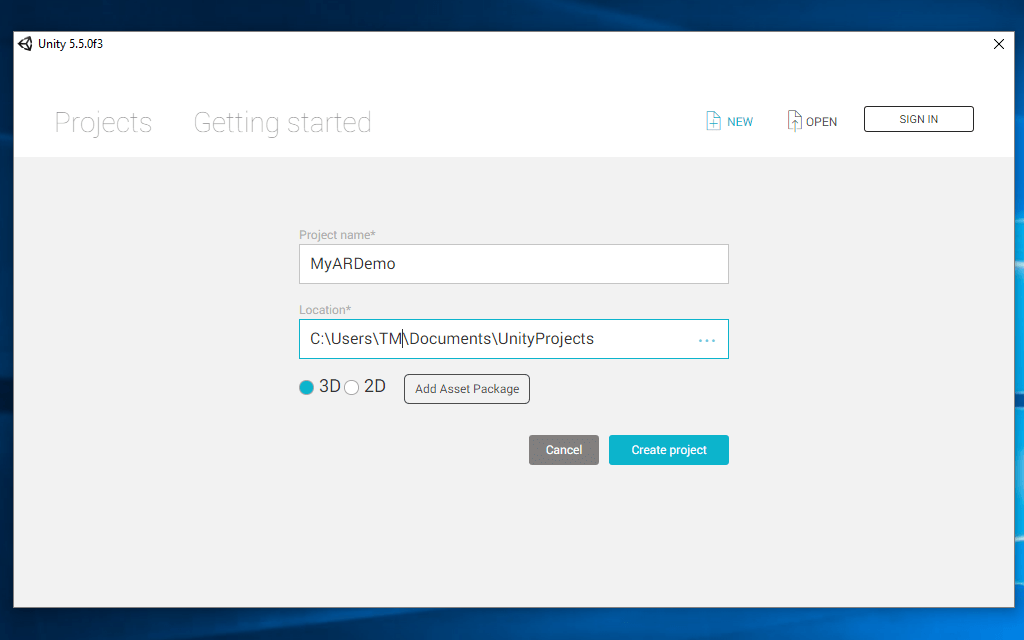
We specify the location on the PC and select 3D type for our animation. Next, we have to import the Vuforia-Unity package and the database with our targets. For that we go to Assets -> Import Package -> Custom Package, and import both of them into our Unity project.
Our corresponding data set and kit, are these:
mytargets.unitypackage
vuforia-unity-6-2-6.unitypackage
Then we go to Vuforia menu and tap ‘Configuration’.
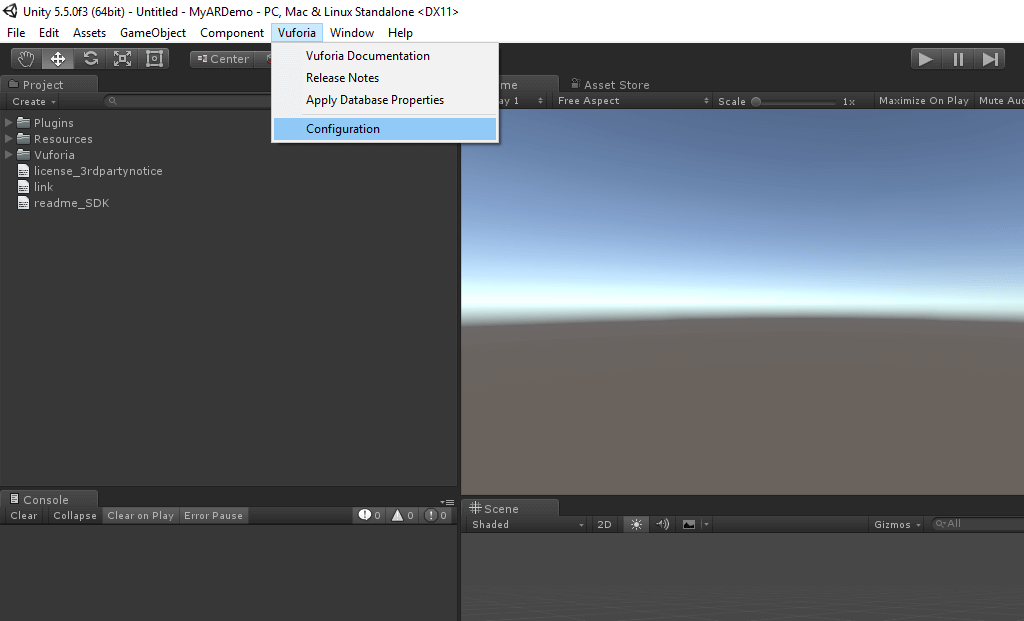
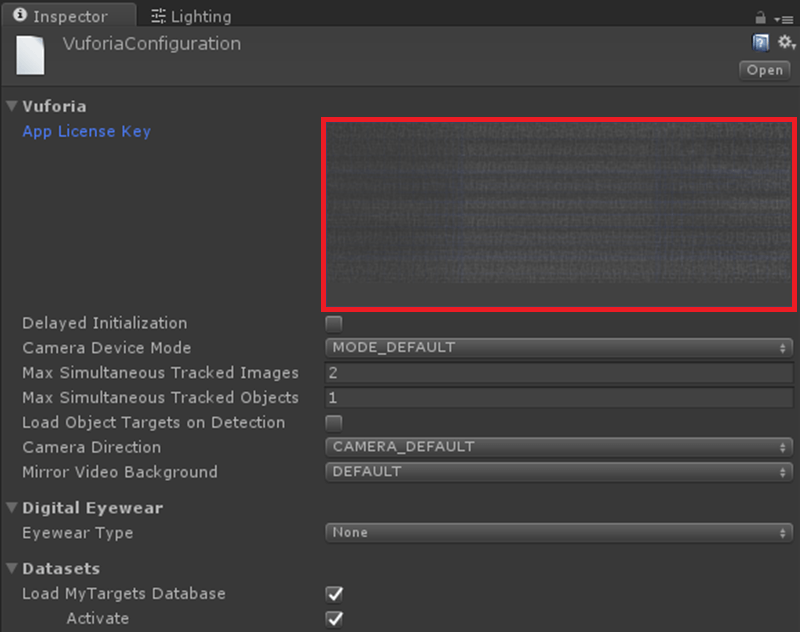
There we paste our application license key that we’ve created previously while checking on ‘Load MyTargets Database’ and ‘Active’ properties in Datasets.
Now we may say “the fun part begins” – let’s upload some image for our augmented reality models and do some animation. For our demo project, we have prepared a rough 3D model of a stunning knight with armour, imagery courtesy of Dmitry Solonin.
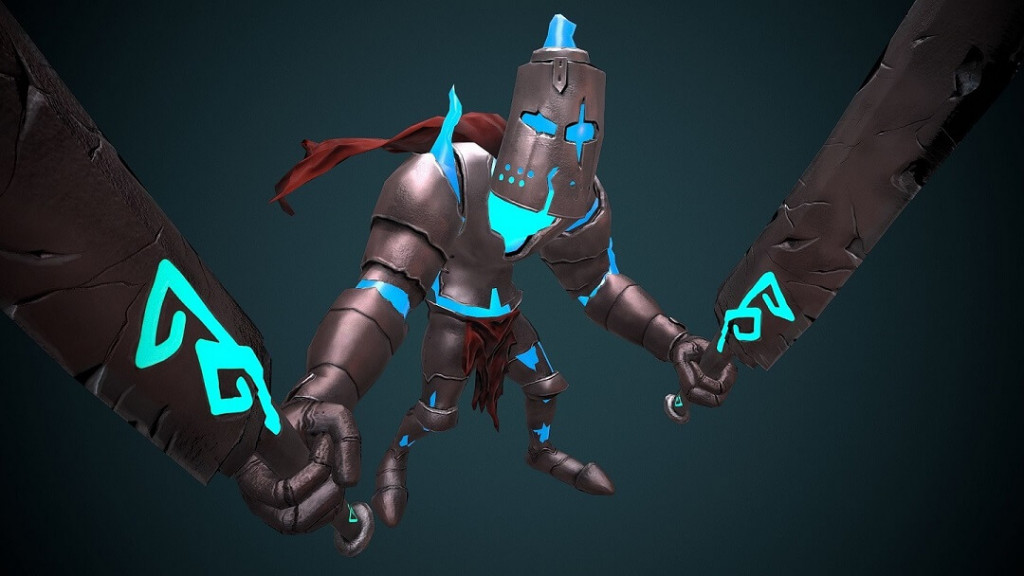
We copy this file into Assets folder in Unity and now it is visible in our project.
ARCamera
Now it is time to add and configure a camera tool for AR animations in our Unity project. This tool is called ‘ARCamera’ and is a special present from Vuforia – similar to a regular camera but with Vuforia script.
For that we go to Assets -> Vuforia -> Prefabs and drag the ARCamera to our scene. Then assign it the next coordinates:
- X=0, Y=150, Z=0 position
- X=90, Y=0, Z=0 rotation
- X=1, Y=1, Z=1 scale.
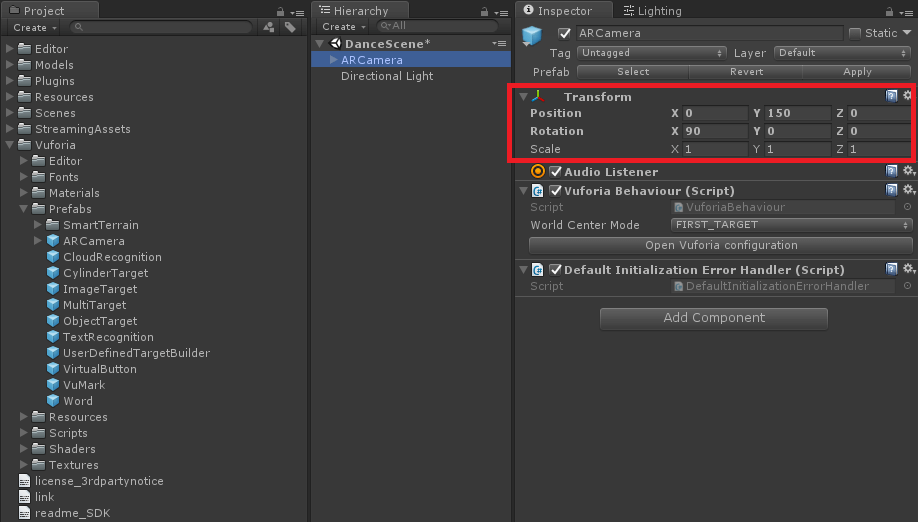
We should also remove the main camera from the scene (Hierarchy panel, right click and delete) and leave the ARCamera only.
The following step is adding our knight model to the scene. We find it in the same path: Assets -> Vuforia -> Prefabs. Let’s add it at X=0, Y=0, Z=0. Now, a certain configuration in Inspector panel for image:
- under ‘Image Target Behaviour (script)’ we change ‘Database’ – to ‘MyTargets’;
- we change ‘Image Target’ – to ‘Stones’.
Afterward, we introduce our 3D model into parent ImageTarget along with the aforementioned setup. We are almost at the finish point of our AR animation project. How should this work? If we place our image of rocks (we just open it on a tablet, it could also be simply printed on paper) in front of webcam, we should see our 3D model in animation – our knight with a sword should be moving.
So we save the scene with all the configurations. And as a final task to build a project for Android, we make following changes in ‘Player Settings’ in the Inspector panel:
- edit company name
- edit Bundle Identifier field (from ‘default’ to something else).
Then go to File -> Build Settings -> Add Current -> select Android platform -> click Build and Run.
The result and conclusion
And “voilà”, here it is, our fighter knight as a 3D animation model in augmented reality.
This is how animated augmented reality models are created with Unity-Vuforia package. For those willing to try it out and examine closer, let’s make some files public – you can download the AR APK of our demo. We can use such 3D models for Android apps, where users point active webcam to a marker and see the animations.
What is fascinating here, as you may see from this tutorial, we may build augmented reality models and create simple AR apps with no script. And we’ve built this demo animation with our team of designers in 1.5 hours! They also assure that this is just ‘a tip of an iceberg’ of Vuforia and Unity possibilities.
Also, you can see a good example of AR app based on our example by Al bee:
If you have ideas on augmented reality projects, want to discuss it with our team or have any questions concerning AR mobile app, don’t hesitate to contact us.
Read more: 20 best AVR development companies
Want to make your own AR app? Hire AR developers right now and get 2 weeks of free development!
Let's Build Your AR app
Provide us with your contact details and we will contact you today
